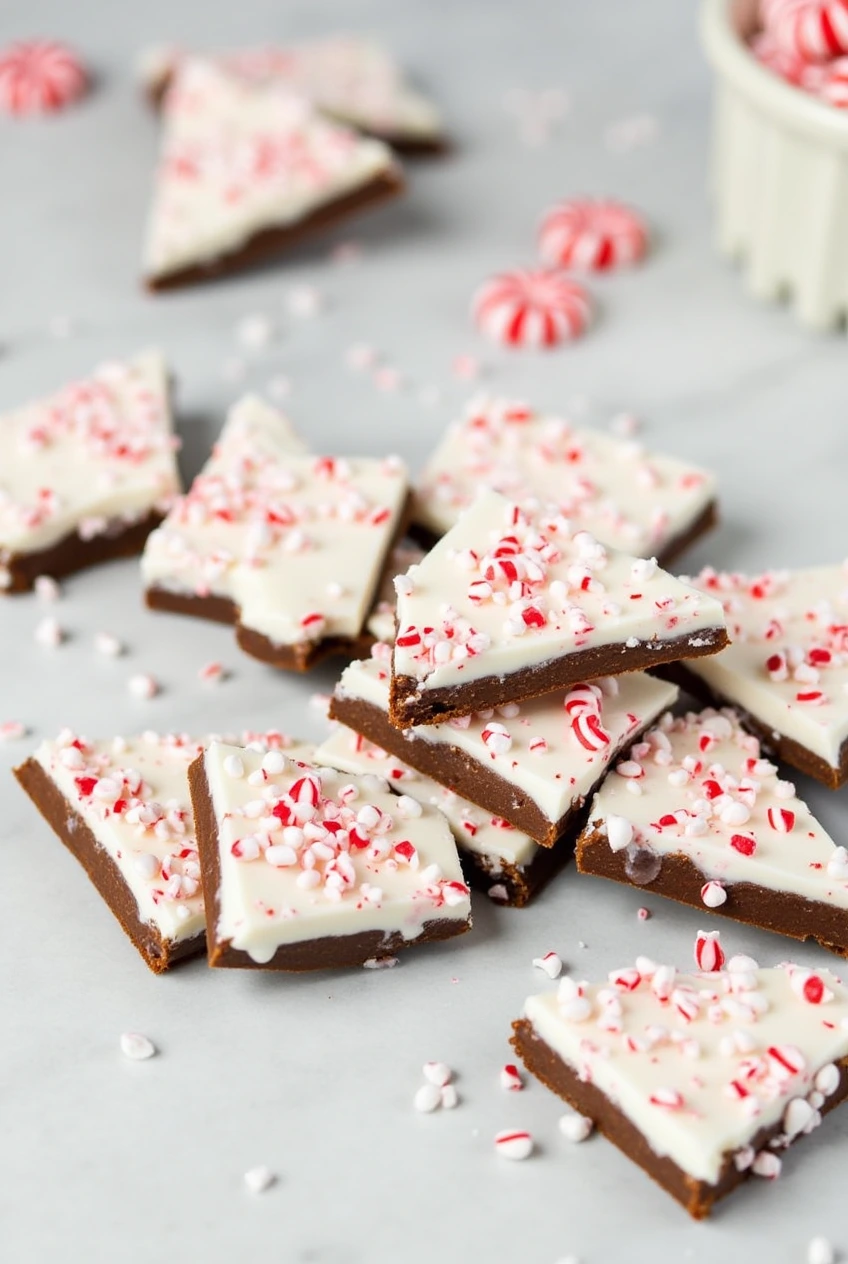
The distinctive crack of breaking chocolate paired with the cool freshness of peppermint creates one of the holiday season’s most beloved treats: peppermint bark. This layered confection, with its striking contrast of dark and white chocolate studded with crushed candy canes, isn’t just visually stunning it’s a testament to how simple ingredients can create something truly magical.
Understanding Peppermint Bark
At its core, peppermint bark is a layered chocolate confection that combines the rich complexity of dark chocolate with the sweet smoothness of white chocolate, all enhanced by the bright pop of peppermint. While store-bought versions are readily available during the holiday season, making your own allows you to control quality, customize flavors, and create a fresher, more vibrant treat.
The popularity of peppermint bark has soared in recent decades, becoming a holiday staple alongside traditional cookies and candies. This rise can be attributed to its visual appeal, satisfying texture, and the perfect balance of flavors that captures the essence of winter festivities.
Why Make It at Home?
Creating peppermint bark in your kitchen offers several advantages. First, it’s surprisingly cost effective, especially when making large batches for gifting. More importantly, homemade versions allow you to select premium ingredients and adjust the sweetness and peppermint intensity to your taste. The process itself is also remarkably simple, requiring no special baking skills or complicated techniques.
Essential Ingredients for Perfect Peppermint Bark
The Chocolate Foundation
The quality of your chocolate will determine the quality of your bark. For the dark chocolate layer, choose a variety with 60-70% cocoa content for optimal flavor and texture. Look for chocolate that lists cocoa butter as an ingredient rather than vegetable oils this ensures proper setting and the characteristic snap of good chocolate.
White chocolate deserves equal attention. Real white chocolate contains cocoa butter, sugar, and milk solids. Avoid “white coating” or “almond bark,” which are made with vegetable fats and won’t provide the same rich mouthfeel or proper setting properties.
Peppermint Flavoring
You have two main options for adding peppermint flavor:
- Peppermint extract: More readily available and easier to measure
- Food-grade peppermint oil: More concentrated, requiring careful measurement but providing a cleaner taste
The Finishing Touch
Crushed candy canes or peppermint candies provide both flavor and visual appeal. Choose candies with natural peppermint oil for the best taste, and consider having extra on hand for particularly festive batches.
Tools and Equipment
Success in making peppermint bark requires few but specific tools:
- A large baking sheet or tray (13×9 inches works well)
- Parchment paper or a silicone baking mat
- Double boiler or microwave-safe bowls
- Offset spatula for spreading chocolate
- Rolling pin or food processor for crushing candy canes
- Thermometer (optional but helpful for tempering chocolate)
Step-by-Step Recipe
Preparation
- Line your baking sheet with parchment paper, ensuring complete coverage.
- Crush candy canes into various sizes some fine powder and some small pieces provide textural interest.
- Measure out your chocolates and have them ready to melt.
Melting and Tempering
For dark chocolate layer:
- Chop chocolate into uniform pieces
- If using a double boiler:
- Heat water to barely simmering
- Place chocolate in top bowl
- Stir gently until almost completely melted
- Remove from heat and stir until smooth
- If using a microwave:
- Heat in 30-second intervals
- Stir between each interval
- Stop when a few small pieces remain and stir until smooth
Creating the Layers
- Pour melted dark chocolate onto prepared baking sheet
- Spread evenly with offset spatula to about ¼-inch thickness
- Let set until just barely firm (about 15 minutes at room temperature)
- Melt white chocolate following the same method as dark chocolate
- Stir in peppermint extract or oil
- Pour over dark chocolate layer
- Spread carefully to avoid mixing layers
- Immediately sprinkle with crushed candy canes
Setting and Breaking
- Allow bark to set completely (1-2 hours at room temperature or 30 minutes in refrigerator)
- Once firm, lift entire sheet of bark using parchment paper
- Break into irregular pieces by hand or cut with a sharp knife
Creative Variations
Flavor Innovations
- Nutty Peppermint Bark:
- Add toasted almonds or pistachios between layers
- Sprinkle nuts along with candy canes on top
- Triple Chocolate:
- Add a middle layer of milk chocolate
- Create marbled effects by swirling layers together
- Caramel Touch:
- Drizzle with melted caramel before adding candy canes
- Sprinkle with sea salt for sweet-salty balance
Dietary Adaptations
For vegan peppermint bark:
- Use high-quality dark chocolate (many are naturally vegan)
- Select vegan white chocolate alternatives
- Verify candy canes are vegan-friendly
For keto-friendly versions:
- Use sugar-free dark chocolate
- Replace white chocolate with coconut butter
- Use sugar-free peppermint candies or pure peppermint oil
Storage and Preservation
Proper storage ensures your peppermint bark stays fresh and maintains its appearance:
- Room Temperature Storage:
- Place in airtight container
- Layer pieces with parchment paper
- Keeps for up to 2 weeks
- Best for maintaining texture and shine
- Refrigerated Storage:
- Extends shelf life to 3-4 weeks
- May develop condensation when removed
- Allow to come to room temperature before serving
- Freezer Storage:
- Wrap well in plastic and foil
- Keeps for up to 3 months
- Thaw in refrigerator overnight
Common Questions and Solutions
Troubleshooting Guide
Q: Why did my chocolate seize?
A: Chocolate typically seizes when it comes into contact with water or steam. Ensure all tools are completely dry and avoid covering warm chocolate, which can create condensation.
Q: The layers aren’t sticking together. Why?
A: The dark chocolate layer may have set too completely before adding the white chocolate. The bottom layer should be just barely set but still slightly tacky.
Q: My white chocolate won’t melt smoothly. What’s wrong?
A: This often indicates either low-quality white chocolate or too much heat. Use gentle heat and real white chocolate containing cocoa butter.
Gifting and Presentation
Peppermint bark makes an excellent holiday gift when properly packaged:
- Holiday Packaging Ideas:
- Clear cellophane bags tied with festive ribbon
- Holiday tins lined with parchment paper
- Custom boxes with dividers to prevent pieces from breaking
- Mason jars decorated with holiday themes
- Serving Suggestions:
- Arrange on tiered platters for parties
- Serve alongside hot beverages
- Use as garnish for desserts
- Create holiday dessert boards
Final Thoughts
Homemade peppermint bark embodies the spirit of holiday treats it’s beautiful, delicious, and meant to be shared. While the basic recipe is straightforward, the opportunity for creativity and personalization makes each batch unique. Whether you’re making it for your family, gifting it to friends, or contributing to a holiday gathering, this festive treat brings joy and sweetness to the season.
Remember that practice makes perfect, and don’t be afraid to experiment with different chocolates and variations to find your signature version. The most important ingredient is the care and attention you put into making it, ensuring each piece carries the warmth of homemade holiday magic.
Print
Homemade Peppermint Bark
Ingredients
Core Ingredients
- Dark Chocolate: 60-70% cocoa content (with cocoa butter, not vegetable oils).
- White Chocolate: Real white chocolate containing cocoa butter, sugar, and milk solids (avoid “white coating” or “almond bark”).
- Peppermint Extract or Food-Grade Peppermint Oil: For flavoring the white chocolate layer.
- Crushed Candy Canes or Peppermint Candies: For texture and decoration.
Optional Ingredients
- Nuts: Toasted almonds or pistachios for nutty variations.
- Milk Chocolate: For an additional layer in triple chocolate variations.
- Caramel: For drizzling.
- Sea Salt: For a sweet-and-salty balance.
- Vegan White Chocolate: For plant-based adaptations.
- Coconut Butter: Keto-friendly white chocolate substitute.
Instructions
Preparation
- Line a large baking sheet (13×9 inches) with parchment paper or a silicone baking mat.
- Crush candy canes into a mix of fine powder and small pieces using a rolling pin or food processor.
- Measure and chop the dark and white chocolate into uniform pieces.
Melting and Tempering
- Dark Chocolate Layer:
- Double Boiler Method: Heat water to a gentle simmer. Place chocolate in the top bowl and stir until almost melted, then remove from heat and stir until smooth.
- Microwave Method: Heat in 30-second intervals, stirring between each, until a few small pieces remain. Stir until fully melted.
- White Chocolate Layer: Repeat the process used for dark chocolate. Stir in peppermint extract or oil once melted.
Creating the Layers
- Pour the melted dark chocolate onto the prepared baking sheet and spread evenly with an offset spatula to about ¼-inch thickness.
- Let the dark chocolate set until just barely firm (around 15 minutes at room temperature).
- Pour the melted white chocolate over the dark chocolate layer and carefully spread it to avoid mixing layers.
- Immediately sprinkle crushed candy canes over the white chocolate layer.
Setting and Breaking
- Allow the bark to set completely:
- Room temperature: 1–2 hours.
- Refrigerator: 30 minutes.
- Once firm, lift the bark off the sheet using the parchment paper.
- Break into irregular pieces by hand or cut into shapes with a sharp knife.
Notes
Creative Variations
- Flavor Innovations:
- Nutty Peppermint Bark: Add toasted nuts between layers or sprinkle on top.
- Triple Chocolate: Include a middle milk chocolate layer or swirl layers together.
- Caramel Touch: Drizzle with caramel and sprinkle sea salt before adding candy canes.
- Dietary Adaptations:
- Vegan-Friendly: Use vegan dark chocolate, vegan white chocolate, and confirm candy canes are vegan.
- Keto-Friendly: Use sugar-free dark chocolate, coconut butter, and sugar-free peppermint candies.
Storage
- Room Temperature:
- Store in an airtight container layered with parchment paper.
- Keeps fresh for up to 2 weeks.
- Refrigerated:
- Extends shelf life to 3–4 weeks but may develop condensation.
- Bring to room temperature before serving.
- Freezer:
- Wrap in plastic and foil, then freeze for up to 3 months.
- Thaw in the refrigerator overnight.
Troubleshooting
- Chocolate Seizing: Avoid contact with water or steam. Ensure all tools are dry.
- Layer Separation: Ensure the dark chocolate is only slightly set before adding the white layer.
- White Chocolate Issues: Use gentle heat and high-quality chocolate with cocoa butter.
Gifting Ideas
- Use cellophane bags tied with ribbon, holiday tins, or mason jars for gifting.
- Layer with parchment to prevent breakage.

