A Sweet Legacy: Understanding Peanut Butter Blossoms
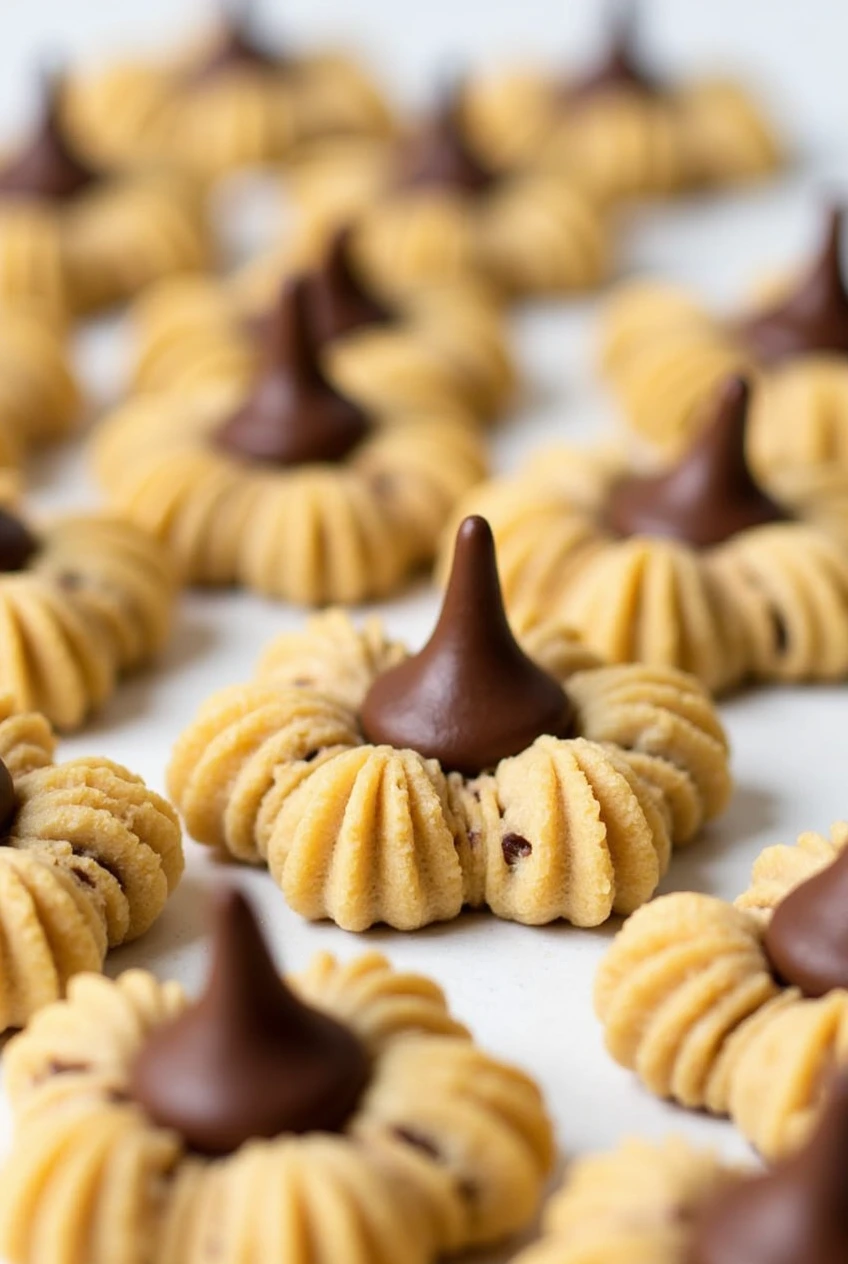
These beloved cookies first captured America’s heart in 1957 when Freda Smith of Gibsonburg, Ohio, entered them in the Pillsbury Bake Off contest. While they didn’t win first place, they earned something perhaps more valuable: a permanent place in America’s cookie jar. Today, these cookies remain one of the most popular holiday treats, combining the comforting flavors of peanut butter with the elegant touch of a chocolate kiss center.
Their enduring popularity stems from their perfect balance of flavors and textures, along with their charming appearance. The slight crunch of sugar coating gives way to a tender, peanut butter rich cookie, culminating in the smooth chocolate peak a combination that delights both children and adults alike.
The Building Blocks of Perfect Blossoms
Essential Ingredients
The magic of peanut butter blossoms lies in quality ingredients:
- 1¾ cups all-purpose flour
- 1 cup creamy peanut butter
- 1 cup granulated sugar (plus extra for rolling)
- ⅓ cup packed brown sugar
- 1 large egg
- 1 teaspoon vanilla extract
- 1 teaspoon baking soda
- ½ teaspoon salt
- ½ cup softened butter
- 24-36 chocolate kisses, unwrapped
Choosing Your Ingredients Wisely
The type of peanut butter you select significantly impacts your cookies’ success. Commercial brands like Jif or Skippy work best, as their stabilized consistency ensures reliable results. Natural peanut butter, while healthier, can cause cookies to spread unpredictably due to its natural oil separation.
For the chocolate component, traditional Hershey’s Kisses remain the classic choice, but alternatives can create exciting variations. Dark chocolate kisses offer a sophisticated twist, while squares of high-quality chocolate or even peanut butter cups can provide delicious alternatives.
Essential Equipment for Success
Before beginning, gather these kitchen essentials:
- Heavy-duty baking sheets that won’t warp
- Parchment paper or silicone baking mats
- Stand mixer or hand mixer
- Cooling racks
- Cookie scoop or measuring spoons
- Small bowl for sugar coating
Creating Perfect Peanut Butter Blossoms
Preparation Steps
- Preheat your oven to 375°F (190°C).
- Line baking sheets with parchment paper.
- Unwrap all chocolate kisses this step is crucial as cookies need the chocolates pressed in while still hot.
- Place about ½ cup granulated sugar in a small bowl for rolling.
Making the Cookie Dough
- In a large bowl, cream together butter, peanut butter, and both sugars until light and fluffy (about 3-4 minutes).
- Beat in the egg and vanilla extract until well combined.
- In a separate bowl, whisk together flour, baking soda, and salt.
- Gradually mix dry ingredients into the wet mixture until just combined.
Shaping and Baking
- Roll dough into 1 inch balls (about 1 tablespoon each).
- Roll each ball in granulated sugar until completely coated.
- Place cookies 2 inches apart on prepared baking sheets.
- Bake for 8-10 minutes, or until edges are lightly golden and tops are just set.
- Remove from oven and immediately press a chocolate kiss into the center of each cookie.
- Let cool on baking sheet for 5 minutes before transferring to wire racks.
Creative Variations
Alternative Chocolates
- Dark chocolate kisses for a less sweet version
- Caramel filled chocolates for extra indulgence
- Mini peanut butter cups for double peanut butter flavor
- Fair trade chocolate squares for ethical sourcing
Dietary Modifications
For gluten-free cookies:
- Replace all-purpose flour with a 1:1 gluten-free baking blend
- Ensure all other ingredients are certified gluten-free
For vegan cookies:
- Use plant-based butter
- Replace egg with a flax egg (1 tablespoon ground flaxseed + 3 tablespoons water)
- Choose dairy-free chocolate
Decorative Touches
- Roll in colored sugar for festive sparkle
- Drizzle with melted chocolate after cooling
- Sprinkle with sea salt for sweet-salty contrast
- Add finely chopped peanuts to the sugar coating
Professional Tips for Perfect Results
- Temperature Matters
- Ensure butter is properly softened but not melted
- Bring egg to room temperature for better incorporation
- Chill dough if it becomes too soft
- Texture Control
- Don’t overbake cookies should be just set
- Press chocolates in immediately while cookies are hot
- Allow cookies to cool completely before storing
- Storage Solutions
- Store in airtight containers at room temperature for up to 5 days
- Freeze baked cookies for up to 3 months
- Freeze shaped dough balls for fresh-baked cookies anytime
Presentation and Gifting
These cookies make wonderful gifts and party offerings. Consider these presentation ideas:
- Layer cookies in holiday tins with parchment paper between layers
- Create cookie boxes with assorted holiday treats
- Arrange on tiered plates for parties
- Package in clear bags tied with festive ribbons
Serve alongside:
- Cold milk or hot chocolate
- Coffee or tea
- Holiday punch
- Vanilla ice cream for cookie sandwiches
Common Questions Answered
Q: Can I freeze the dough?
A: Yes, freeze shaped balls for up to 3 months. Roll in sugar just before baking.
Q: Why are my cookies spreading too much?
A: This usually happens if the butter is too soft or the dough is too warm. Chill dough for 30 minutes before baking.
Q: Can I make these ahead?
A: Yes, either freeze the shaped dough or baked cookies. Fresh-baked cookies stay good for 5 days in an airtight container.
Q: Why are my chocolate kisses melting too much?
A: Let cookies cool for 1-2 minutes before adding chocolates, or chill kisses beforehand.
The Joy of Sharing
Peanut butter blossoms are more than just cookies they’re a tradition that brings people together. Whether you’re making them with children, sharing them at holiday gatherings, or gifting them to friends, these cookies carry the warmth of home and the sweetness of shared moments.
Remember that while the recipe is straightforward, it’s the love and care put into making them that makes these cookies special. Don’t be afraid to experiment with variations while keeping the classic charm that has made them a beloved treat for generations.
Print
Peanut Butter Blossom Cookies
Ingredients
Essential Ingredients
- 1¾ cups all-purpose flour
- 1 cup creamy peanut butter (commercial brands recommended)
- 1 cup granulated sugar (plus extra for rolling)
- ⅓ cup packed brown sugar
- 1 large egg
- 1 teaspoon vanilla extract
- 1 teaspoon baking soda
- ½ teaspoon salt
- ½ cup softened butter
- 24–36 chocolate kisses (unwrapped)
Instructions
Preparation Steps
- Preheat the oven to 375°F (190°C).
- Line baking sheets with parchment paper or silicone baking mats.
- Unwrap all chocolate kisses to have them ready for quick use.
- Pour ½ cup granulated sugar into a small bowl for rolling the dough.
Making the Cookie Dough
- In a large bowl, cream together softened butter, peanut butter, granulated sugar, and brown sugar until light and fluffy (about 3–4 minutes).
- Beat in the egg and vanilla extract until well incorporated.
- In a separate bowl, whisk together the flour, baking soda, and salt.
- Gradually mix the dry ingredients into the wet mixture until just combined.
Shaping and Baking
- Roll the dough into 1-inch balls (about 1 tablespoon each).
- Coat each ball in granulated sugar.
- Place the dough balls 2 inches apart on the prepared baking sheets.
- Bake for 8–10 minutes, until the edges are lightly golden and the tops are just set.
- Remove from the oven and immediately press a chocolate kiss into the center of each cookie.
- Let the cookies cool on the baking sheet for 5 minutes before transferring them to wire racks to cool completely.
Notes
Creative Variations
- Alternative Chocolates:
- Dark chocolate kisses for a less sweet option.
- Caramel-filled chocolates for indulgence.
- Mini peanut butter cups for extra peanut butter flavor.
- Fair trade chocolate squares for ethical sourcing.
- Dietary Modifications:
- Use a 1:1 gluten-free flour blend for gluten-free cookies.
- Substitute plant-based butter and a flax egg for vegan cookies.
- Opt for dairy-free chocolate to make the recipe vegan-friendly.
- Decorative Touches:
- Roll dough balls in colored sugar for festive flair.
- Drizzle cooled cookies with melted chocolate.
- Sprinkle with sea salt for a sweet-salty balance.
- Add finely chopped peanuts to the sugar coating for extra crunch.
Professional Tips
- Ensure butter is softened but not melted, and eggs are at room temperature for optimal mixing.
- If the dough becomes too soft, chill it before shaping and baking.
- Press chocolate kisses into cookies while hot for the best appearance and adhesion.
- Store cookies in airtight containers at room temperature for up to 5 days, or freeze for up to 3 months.

