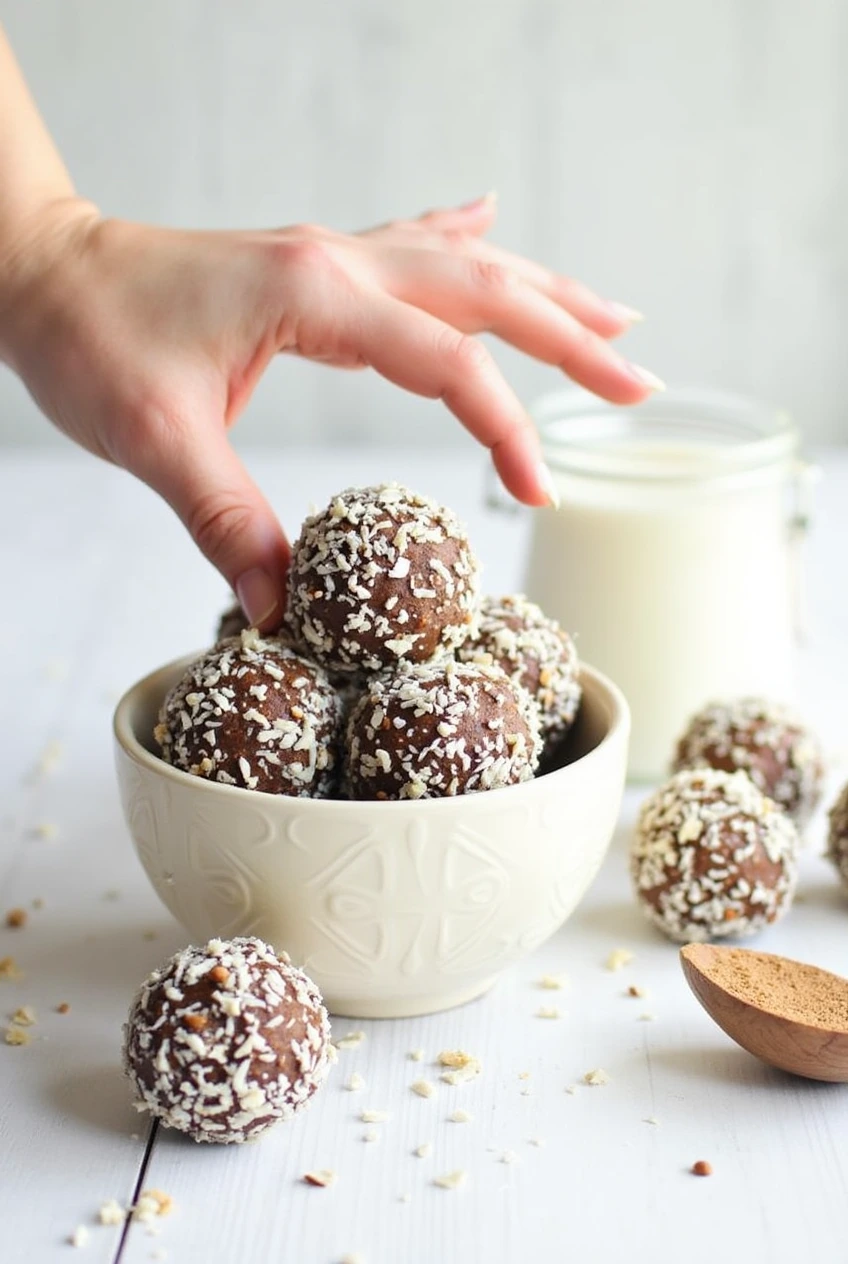
Today, I want to share something truly delightful: Vegan Coconut Bliss Balls. These little bites of joy are not only simple to make but also packed with health benefits. Imagine a treat that’s sweet, chewy, and guilt-free sounds like a dream, right?
These bliss balls are super versatile, making them perfect for snacks, desserts, or even meal prep. You can whip them up in no time and have a tasty treat ready whenever those cravings hit. They’re like little energy-packed hugs waiting for you in the fridge.
What Are Vegan Coconut Bliss Balls?
So, what exactly are Vegan Coconut Bliss Balls? Think of them as tiny, round bites of deliciousness made mainly from coconut. They’re soft, chewy, and perfect for popping in your mouth whenever you need a pick-me-up.
Coconut is the star ingredient here, and it’s a favorite in many vegan recipes. Not only does it add a lovely tropical flavor, but it’s also packed with healthy fats that keep you feeling full and satisfied. These bliss balls have become popular among vegans and health-conscious folks because they’re easy to make and taste amazing!
Ingredients for Vegan Coconut Bliss Balls
Ready to make some bliss balls? Here’s what you’ll need:
Main Ingredients:
- Desiccated Coconut: This is dried, shredded coconut that gives your bliss balls their chewy texture and coconut flavor. It’s like the fairy dust of the recipe!
- Coconut Oil or Cream: This helps bind everything together and adds richness. It’s like the glue that holds your bliss balls in harmony.
- Sweeteners: You can use maple syrup, dates, or agave syrup. These natural sweeteners add just the right amount of sweetness without any fuss.
- Protein or Oats: Adding protein powder or oats gives your bliss balls an extra texture and makes them more filling. Think of it as the backbone of your bliss ball army!
Optional Add-Ons:
- Nuts and Seeds: Want some crunch? Toss in your favorite nuts or seeds for added texture and nutrition.
- Dried Fruits: Add a bit of sweetness with raisins, cranberries, or apricots. They make each bite a little surprise!
- Cocoa or Matcha Powder: For those who love chocolate or a green tea kick, these powders can add a fun twist to your bliss balls.
When picking ingredients, go for organic and high-quality options. It makes a difference, just like using fresh herbs in cooking.
How to Make Vegan Coconut Bliss Balls
Now, let’s get into the fun part making Vegan Coconut Bliss Balls! Follow these steps, and you’ll have a tasty treat in no time.
1. Preparation
- Assemble Your Ingredients and Tools: Gather everything you need your coconut, sweeteners, and any add-ins. Don’t forget a food processor or blender; it’s the magic wand for this recipe!
- Importance of Using a Food Processor or Blender: This is essential for mixing everything smoothly. A good food processor will make your life easier, like having a helpful friend in the kitchen!
2. Mixing the Ingredients
- Combine the Ingredients: In your food processor, add 2 cups of desiccated coconut, 1/4 cup of coconut oil, 1/4 cup of sweetener, and any protein or oats you’re using.
- Achieve the Perfect Consistency: Blend everything until it’s well mixed but not too wet. You want a dough-like consistency that holds together. If it feels too dry, add a tiny bit of water or more coconut oil. It should feel like a soft playdough!
3. Shaping and Rolling
- Tips for Uniform Shaping: Scoop out small portions of the mixture (about a tablespoon each) and roll them into balls. Try to keep them the same size think of them as little coconut friends!
- Coating Options: Once shaped, you can roll them in coconut flakes, cocoa powder, or crushed nuts for an extra special touch. It’s like giving your bliss balls a fancy outfit!
4. Storing and Serving
- Refrigeration and Freezing Guidelines: Place your bliss balls in an airtight container and store them in the fridge for up to a week. If you want to keep them longer, pop them in the freezer, where they can last up to 3 months.
- How to Serve for Different Occasions: These bliss balls are perfect for snacks, parties, or even as a sweet treat after dinner. You can serve them on a pretty plate for guests or keep them in a jar on your kitchen counter for a quick grab-and-go option.
Variations of Vegan Coconut Bliss Balls
Let’s get creative with our Vegan Coconut Bliss Balls! Here are some fun variations to try:
1. Nut-Free Coconut Bliss Balls
If you or someone you know has nut allergies, don’t worry! You can still enjoy these bliss balls. Try using sunflower seeds or tahini instead of nuts. Sunflower seeds add a wonderful crunch without the nutty risk, while tahini brings a creamy texture. These nut-free options make perfect allergy-friendly snacks that everyone can enjoy!
2. Keto Coconut Bliss Balls
For those following a keto diet, you can easily make Keto Coconut Bliss Balls. Swap out regular sweeteners for low-carb ones like erythritol or stevia. Stick with coconut flour instead of oats for a lower carb count. The key is to maintain that delicious coconut flavor while keeping it low-carb. You won’t even miss the extra sugar!
3. Chocolate Coconut Bliss Balls
If you’re a chocolate lover (and who isn’t?), you’ll adore Chocolate Coconut Bliss Balls! Just add a few tablespoons of cocoa powder or toss in some dark chocolate chips for a rich twist. The combination of coconut and chocolate is like a tropical vacation for your taste buds sweet and satisfying!
4. Tropical Bliss Balls
Want to take a trip to the tropics? Try adding pineapple, mango, or lime zest to your bliss balls. These fruity additions create a refreshing flavor that will remind you of sunny beaches and warm breezes. It’s like a mini vacation in every bite!
Health Benefits of Vegan Coconut Bliss Balls
Vegan Coconut Bliss Balls aren’t just tasty; they come with some great health benefits, too! Coconut is packed with healthy fats that can help keep you full and satisfied. It also provides fiber, which is essential for a happy tummy, and important minerals like manganese and copper.
These bliss balls fit perfectly into various dietary lifestyles whether you’re vegan, gluten-free, or keto, you can enjoy them guilt-free. Plus, since they’re easy to portion out, you can control your serving sizes, making them a balanced snack for any time of day.
Common Mistakes to Avoid
When making your bliss balls, it’s easy to make a few common mistakes. Here’s how to avoid them:
- Over-Blending the Mixture: If you blend too much, your mixture can become too runny. You want a nice dough-like consistency, not a smoothie!
- Using Low-Quality or Overly Processed Coconut: Choose high-quality desiccated coconut. Low-quality or overly processed coconut can affect the flavor and texture of your bliss balls. Trust me, you want that fresh coconut goodness!
- Improper Storage Leading to Loss of Freshness: Make sure to store your bliss balls in an airtight container. If they aren’t stored properly, they can dry out or lose their delightful flavor. Keep them fresh and tasty.
FAQs About Vegan Coconut Bliss Balls
Let’s tackle some common questions about Vegan Coconut Bliss Balls!
How long do coconut bliss balls last?
If stored properly in an airtight container in the fridge, your bliss balls can last about a week. Just remember, they might not last that long because they’re so delicious.
Can I freeze bliss balls?
Absolutely! You can freeze your bliss balls for up to 3 months. Just make sure to separate them with parchment paper in a freezer-safe container so they don’t stick together.
What can I use instead of coconut oil?
If you don’t have coconut oil, you can substitute it with almond oil or even a bit of nut butter for a different flavor. Just keep in mind that it might change the texture a little.
Are bliss balls suitable for children?
Yes! These bliss balls are great for kids. They’re healthy, tasty, and perfect for little hands. Just keep an eye on any nut allergies if you’re using nuts.
Can I make them without a food processor?
You can! If you don’t have a food processor, simply mix the ingredients in a bowl and use a fork or your hands to combine them. It may take a little more effort, but you can still create delicious bliss balls.
Tips for Customizing Bliss Balls
Get creative when making your Vegan Coconut Bliss Balls! Here are some tips for customization:
- Experimenting with Flavors and Textures: Don’t be afraid to play around with different ingredients. Add spices like cinnamon or ginger for warmth, or throw in some vanilla extract for sweetness.
- Using Seasonal Ingredients for Variation: Take advantage of seasonal fruits or nuts to change up the flavors. For example, add pumpkin puree in the fall or fresh berries in the summer for a refreshing twist.
- Pairing with Dips or Sauces for a Gourmet Touch: Consider serving your bliss balls with a dip, like almond butter or a sweet chocolate sauce, for a gourmet experience. It’s like giving your bliss balls a fancy dinner party.
Conclusion
In conclusion, Vegan Coconut Bliss Balls are not only delicious but also versatile and easy to make. They’re perfect for snacks, desserts, or meal prep and offer numerous health benefits. I encourage you to try your own variations and have fun with different flavors.
If you create your own bliss ball recipes or have great ideas, please share them! Let’s inspire each other to enjoy these delightful treats! Happy cooking.
Print
Vegan Coconut Bliss Balls
Ingredients
- Chocolate: Dark, milk, or white chocolate (high-quality recommended).
- Peppermint Extract or Candy Canes: A few drops of peppermint extract or crushed candy canes for flavor.
- Cream or Plant-Based Alternatives: Heavy cream or coconut cream (for vegan versions).
- Sweeteners and Toppings: Optional powdered sugar or cocoa powder for balance and festive decoration.
Optional Add-Ons:
- Nuts: Chopped nuts for crunch.
- Sprinkles: For a decorative touch.
- Liqueur: A splash of peppermint schnapps or Irish cream for an adult twist.
Tips for Selecting Ingredients:
- Use chocolate with a high cocoa content for richness.
- Opt for natural peppermint extract for intense flavor.
Instructions
1. Preparation
- Assemble Ingredients and Tools: Gather chocolate, cream, peppermint extract, and desired toppings. Have a mixing bowl, saucepan, and parchment-lined baking sheet ready.
- Preparing the Ganache Base:
- Chop chocolate into small pieces and place in a bowl.
- Heat cream in a saucepan until it starts to simmer.
- Pour hot cream over the chocolate, let sit for a few minutes, and stir until smooth and glossy.
2. Shaping and Rolling
- Cooling and Setting the Ganache: Let the ganache cool at room temperature for about an hour, or refrigerate for 30 minutes if needed.
- Techniques for Uniform Shapes: Use a scoop or spoon to portion the ganache. Roll each piece into smooth balls using your palms.
3. Coating and Decorating
- Coating Options: Melt chocolate (dark or white) for coating, or roll the truffles in cocoa powder.
- Decorating Ideas: Add crushed peppermint, sprinkles, or drizzle melted chocolate for festive flair.
4. Storage Tips
- Refrigeration: Store in an airtight container in the fridge for up to a week.
- Freezing: Freeze truffles layered with parchment paper in a freezer-safe container for up to 3 months. Thaw in the fridge before serving.
Notes
- Health Benefits: Using dark chocolate provides antioxidants and heart health benefits. Peppermint aids digestion and reduces stress.
- Portion Control: Rich flavor means you can enjoy just a few without overindulging.
- Common Mistakes to Avoid:
- Avoid overheating chocolate to prevent graininess.
- Use peppermint extract sparingly to avoid overpowering flavor.
- Ensure ganache is properly cooled before rolling to avoid a sticky texture.

