
The first time I tasted roasted garlic aioli, it was love at first bite. I remember dipping a crispy, golden French fry into the creamy, flavorful sauce and marveling at how the mellow roasted garlic added a rich, caramelized depth that I had never experienced before. Since then, I’ve made it my mission to perfect the art of homemade roasted garlic aioli and let me tell you, it’s a game-changer.
There’s something truly magical about how this sauce elevates even the simplest foods. Whether you’re spreading it on a sandwich, serving it alongside grilled vegetables, or using it as a dipping sauce for fries, roasted garlic aioli adds an unbeatable burst of flavor.
What’s even better? It’s surprisingly easy to make at home with just a few simple ingredients. Trust me, once you try this recipe, you’ll never want to buy store-bought aioli again.
If you’ve ever wondered how to make creamy roasted garlic aioli that tastes like a gourmet treat, you’re in for a treat. Let’s dive into what makes this sauce so special.
What Is Roasted Garlic Aioli?
Aioli originates from the Mediterranean, where it traditionally refers to a simple emulsion of garlic and olive oil. Over time, it has evolved into a more versatile condiment that often includes egg yolks, lemon juice, and oil, much like mayonnaise. But what sets roasted garlic aioli apart is the magic of roasted garlic.
Roasted garlic is a game-changer in terms of flavor. Unlike raw garlic, which can be sharp and pungent, roasted garlic becomes sweet, buttery, and wonderfully aromatic. The roasting process mellows its bite and brings out a caramelized richness that blends beautifully into the aioli base.
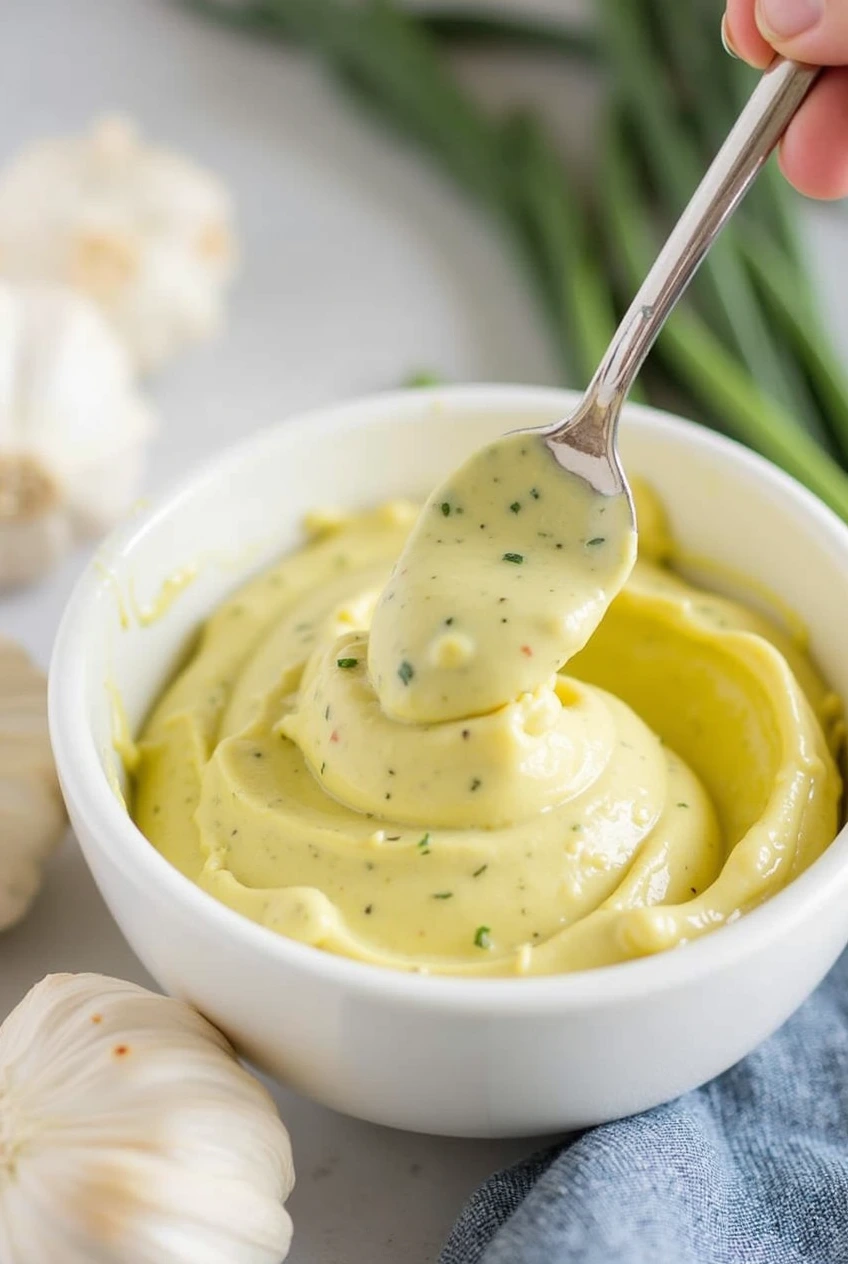
In this creamy roasted garlic aioli, we combine roasted garlic with a base of mayonnaise, olive oil, and lemon juice. The result? A velvety, garlicky sauce that’s perfect for dipping, spreading, and drizzling over your favorite dishes. Once you taste the smooth, balanced flavor, you’ll understand why this condiment is a must-have in any kitchen.
Why You’ll Love This Recipe
There are plenty of reasons to fall head over heels for this roasted garlic aioli recipe:
- Easy to Prepare: With just a few basic steps, you’ll have a luxurious sauce ready to enhance any meal.
- Better Than Store-Bought: Freshly roasted garlic makes all the difference, delivering a depth of flavor that you just can’t find in pre-packaged options.
- Versatile and Customizable: Whether you want to add herbs, a touch of heat, or even more garlic, this recipe welcomes your creative twists.
If you’re ready to savor the rich, creamy goodness of roasted garlic aioli, this recipe is here to transform your meals and impress your taste buds.
Ingredients and What Makes Them Special
The magic of roasted garlic aioli comes from using the right ingredients. Here’s what you’ll need:
- Garlic (1 whole head): Roasting the garlic brings out its natural sweetness and buttery texture, making it the star of this aioli.
- Mayonnaise (1/2 cup): Acts as the creamy base. Opt for good-quality or homemade mayonnaise for the best results.
- Olive Oil (2 tablespoons): Adds richness and enhances the flavor. Use extra-virgin olive oil for its fruity, robust notes.
- Lemon Juice (1 tablespoon): Freshly squeezed lemon juice brightens the aioli and adds a hint of acidity to balance the richness.
- Salt (1/2 teaspoon): Enhances all the flavors.
Optional Add-Ins: You can customize your aioli with herbs like parsley or chives, a dash of smoked paprika, or even a touch of heat with cayenne pepper.
By focusing on fresh, high-quality ingredients, you’ll create a roasted garlic aioli that’s bursting with flavor and perfect for any dish.
Step-by-Step Instructions
Roasting the Garlic
- Preheat your oven to 400°F (200°C).
- Slice off the top of the garlic head to expose the cloves.
- Drizzle with olive oil and wrap the garlic in aluminum foil.
- Roast for 30-40 minutes, until the cloves are golden and tender.
- Let the garlic cool, then squeeze the roasted cloves out of their skins.
Mixing the Aioli Base
- In a mixing bowl, combine the roasted garlic cloves and a pinch of salt.
- Mash the garlic into a smooth paste using a fork.
- Add the mayonnaise, olive oil, and lemon juice.
- Stir or whisk until the ingredients are fully combined and the aioli is smooth.
Final Blending and Serving Tips
- Taste the aioli and adjust seasoning as needed. Add more lemon juice for brightness or a bit more salt to enhance the flavors.
- For a thinner consistency, mix in a teaspoon of warm water at a time until desired texture is reached.
- Serve immediately or refrigerate in an airtight container for up to 4 days.
Tips for Perfect Roasted Garlic Aioli
Making roasted garlic aioli is a simple process, but there are a few key tips to ensure you get that perfect creamy texture and flavor every time. Trust me, once you get the hang of it, you’ll be whipping up this aioli for all kinds of meals!
Use Fresh Garlic
The star of this recipe is roasted garlic, and using fresh, quality garlic will make all the difference. Fresh garlic will give the aioli a rich, mellow flavor, while older garlic tends to have a more bitter taste, which can ruin your aioli. Make sure the garlic you roast is fresh to achieve that signature creamy and sweet taste that aioli is known for.
Control the Consistency
One of the most common mistakes I’ve seen when making aioli is getting the consistency wrong. If your aioli turns out too thick, simply add a bit more olive oil or lemon juice to loosen it up. On the flip side, if it’s too thin, try adding a little extra mayonnaise to help thicken it. Keep in mind that aioli should be smooth and spreadable, not runny.
Storage for Longer Shelf Life
Aioli is best served fresh, but you can store leftovers in the refrigerator for up to a week. To keep it at its best, place it in an airtight container and refrigerate it immediately after use. When you want to use it again, give it a quick stir, and if it’s too thick, just add a splash of water, lemon juice, or olive oil to bring it back to life. I always make a batch when I know I’ll be enjoying it over a few days it’s so easy to keep it fresh and ready to go!
How to Use Roasted Garlic Aioli
Now that you’ve made your roasted garlic aioli, you might be wondering how to use it! This versatile sauce can complement so many dishes, making it a must-have in your kitchen.
Dipping Sauce for Fries
One of my favorite ways to enjoy roasted garlic aioli is as a dipping sauce for crispy French fries. The creamy, garlicky aioli pairs so wonderfully with the salty fries, making every bite feel like a little indulgence. You can even serve it with sweet potato fries for a unique twist!
Spread for Sandwiches and Burgers
Aioli is also a fantastic spread for sandwiches and burgers. If you’re making a chicken sandwich, turkey club, or even a veggie burger, add a generous dollop of aioli for a creamy, garlicky kick. The flavor of the aioli will take a simple sandwich to the next level!
Creative Pairings with Roasted Vegetables or Seafood
Roasted vegetables, like carrots or Brussels sprouts, love the creamy texture of aioli. Simply drizzle it over the veggies or serve it on the side as a dipping sauce. If you’re making seafood, roasted garlic aioli is perfect for dipping shrimp or crab cakes. The garlic flavor in the aioli complements the delicate taste of seafood, creating a flavor explosion in your mouth!
As a Salad Dressing
For a richer take on salad dressing, try using aioli instead of your regular vinaigrette. The creaminess of the aioli pairs well with leafy greens like arugula or spinach. You can even add a little lemon juice or balsamic vinegar to balance out the richness of the aioli.
Variations and Flavor Twists
While roasted garlic aioli is delicious on its own, it’s so easy to customize it to suit your tastes. Here are some fun variations and twists you can try to keep things interesting.
Add Fresh Herbs
For an herbal twist, try adding finely chopped fresh herbs to your aioli. Fresh basil, parsley, thyme, or dill can all give the aioli a fresh, vibrant flavor. Just fold them in gently once you’ve made your aioli don’t overmix, or you’ll lose the herb’s vibrant color.
Smoked Paprika
Smoked paprika is one of my favorite ingredients to stir into aioli. It adds a subtle smoky depth of flavor that complements the roasted garlic. Just a small pinch will do smoked paprika is potent, and you don’t need much to make a big impact.
Hot Sauce or Sriracha
If you’re into a little heat, try adding a dash of hot sauce or Sriracha to your aioli. This will add a spicy kick that balances out the sweetness of the roasted garlic. Perfect for those who enjoy a little extra flavor in their aioli!
Vegan Roasted Garlic Aioli
You can easily make a vegan version of roasted garlic aioli by swapping out the mayonnaise for a plant-based alternative. Look for a good-quality vegan mayo or even use aquafaba (the liquid from canned chickpeas) to emulsify the aioli. The result is just as creamy and flavorful as the original, without any dairy!
Common Questions and Troubleshooting
Even with the best intentions, sometimes things can go wrong when making roasted garlic aioli. Here are some common questions and troubleshooting tips to help you out!
1. Why Is My Aioli Too Thin?
If your aioli turns out runny or too thin, it could be due to overmixing or using too much lemon juice. To fix it, simply add more mayonnaise to thicken it up, or use an extra tablespoon of olive oil to help emulsify the mixture. Just make sure to mix gently so you don’t break the emulsion.
2. My Aioli Is Splitting What Happened?
A split aioli happens when the oil and the liquid (like lemon juice or vinegar) separate. This can happen if your ingredients aren’t at room temperature or if you added the oil too quickly. To fix it, add a teaspoon of warm water to the mixture while whisking vigorously. The aioli should come back together.
3. How Do I Fix Aioli That’s Too Garlicky?
If your aioli tastes too strong on the garlic side, don’t worry it’s an easy fix! Add a little extra mayonnaise or a squeeze of lemon juice to balance out the flavor. The acidity from the lemon juice will mellow out the garlic’s potency, giving you a more balanced flavor profile.
4. Can I Make Aioli in Advance?
Yes, you can definitely make aioli ahead of time! In fact, I think it actually tastes better after sitting in the fridge for a few hours, as the flavors have time to meld together. Just be sure to store it in an airtight container and give it a quick stir before serving. It’ll last up to a week in the refrigerator.
Conclusion
Making homemade roasted garlic aioli is a rewarding experience that elevates so many dishes. With just a few simple ingredients, you can create a creamy, flavorful condiment that adds richness to sandwiches, burgers, and even roasted veggies.
The best part? You can customize it with different herbs, spices, or even make a vegan version to suit your tastes. Whether you’re a garlic lover or looking to try something new, this roasted garlic aioli is sure to impress!
I hope you try this recipe out and experiment with your own flavor variations. Once you do, you’ll never look at store-bought aioli the same way again!
Print
Roasted Garlic Aioli
Ingredients
- 1 whole head of garlic (for roasting)
- 1/2 cup mayonnaise
- 2 tablespoons olive oil (extra virgin)
- 1 tablespoon lemon juice (freshly squeezed)
- 1/2 teaspoon salt
- Optional add-ins: fresh herbs (parsley, chives), smoked paprika, cayenne pepper, hot sauce, or Sriracha
Instructions
Roasting the Garlic:
- Preheat oven to 400°F (200°C).
- Slice off the top of the garlic head to expose the cloves.
- Drizzle with olive oil and wrap in aluminum foil.
- Roast for 30-40 minutes, until golden and tender.
- Let cool, then squeeze out the roasted garlic cloves from their skins.
Mixing the Aioli:
- In a bowl, combine roasted garlic cloves and a pinch of salt.
- Mash the garlic into a smooth paste using a fork.
- Add mayonnaise, olive oil, and lemon juice.
- Stir or whisk until fully combined and smooth.
Final Blending:
- Taste and adjust seasoning with more salt or lemon juice as desired.
- For a thinner consistency, add a teaspoon of warm water at a time until desired texture is reached.
- Serve immediately or store in an airtight container in the fridge for up to 4 days.
Notes
- Fresh Garlic: Use fresh garlic for the best mellow, sweet flavor. Old garlic can add bitterness.
- Consistency: Adjust with more mayonnaise to thicken or more lemon juice to thin.
- Storage: Can be stored in the fridge for up to a week. Stir before serving.
- Serving Ideas: Serve as a dipping sauce for fries, as a spread for sandwiches, with roasted veggies, or as a seafood dipping sauce.