
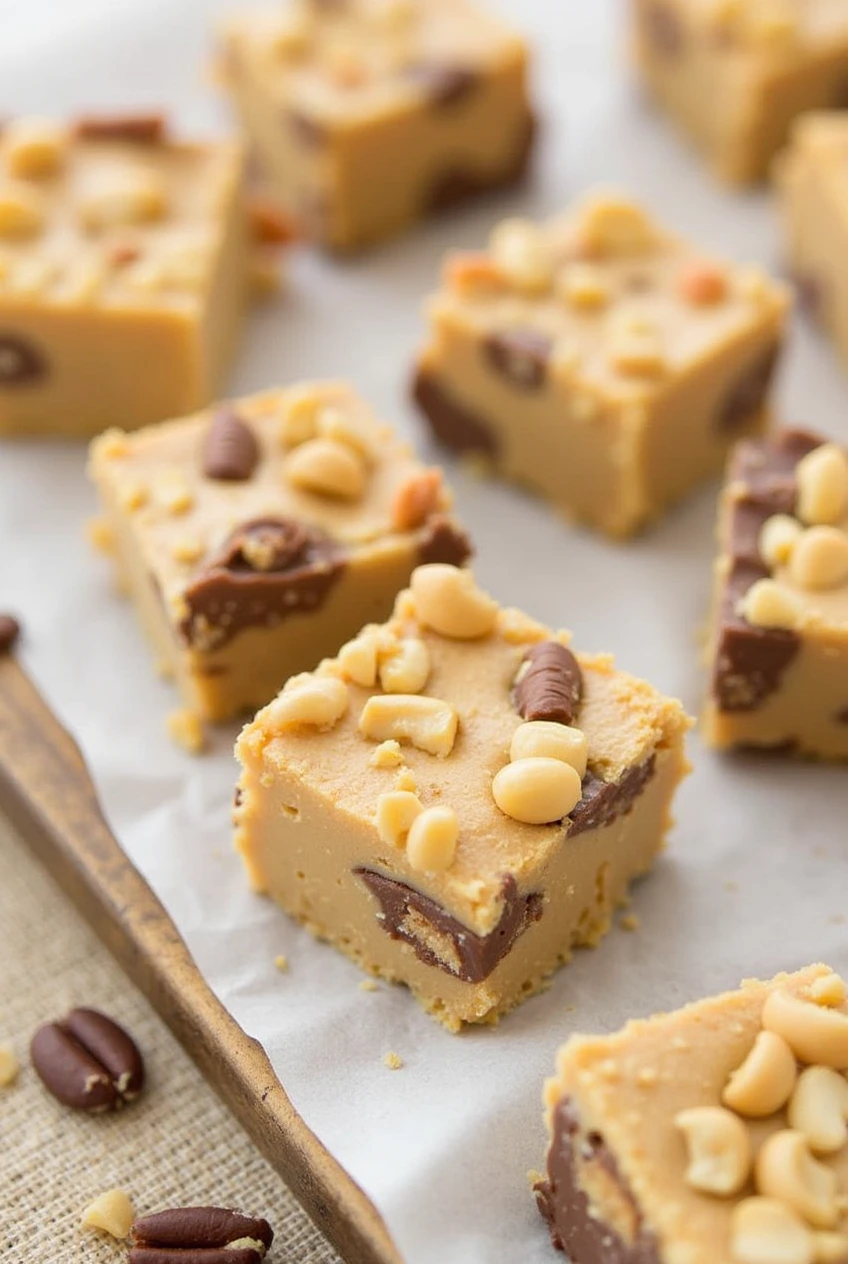
Let me tell you about the dessert that changed my baking game forever. One cozy autumn evening, while craving my favorite candy bar, I wondered if I could capture those beloved Snickers flavors in a homemade fudge. Dozens of chocolate-covered attempts later, I discovered the perfect recipe that makes everyone’s eyes light up at first bite.
The magic happens when smooth chocolate meets gooey caramel and toasted peanuts, creating layers of flavor that taste just like the classic candy bar, but even better because it’s made with love in your own kitchen. From casual weekend treats to holiday gift boxes, this fudge has earned its spot as my most requested recipe.
What is Snickers Fudge?
Snickers fudge is my take on transforming the beloved candy bar into a smooth, creamy fudge. Just like the original Snickers bar, my recipe features layers of chocolate, caramel, and peanuts, but in a fudge form that melts in your mouth.
I love how this dessert combines milk chocolate’s sweetness with salted peanuts’ crunch and caramel’s gooey goodness. Every time I make this fudge, it reminds me of childhood trips to the candy store, but with an elevated, homemade touch that makes it even more special.
Ingredients
For the Chocolate Fudge Base:
- 3 cups milk chocolate chips (I prefer using high-quality chocolate)
- 1 (14 oz) can sweetened condensed milk
- 4 tablespoons unsalted butter
- 1 teaspoon pure vanilla extract
- 1/4 teaspoon sea salt
For the Caramel Layer:
- 1 (11 oz) bag caramel squares, unwrapped
- 2 tablespoons heavy cream
- 1 cup salted peanuts, roughly chopped
- 1/4 teaspoon sea salt
For the Topping:
- 1 cup milk chocolate chips
- 1 tablespoon vegetable oil
- 1/2 cup chopped peanuts for garnish
Recommended Equipment
In my experience, having the right tools makes this recipe much easier to execute. Here’s what I use:
- 8×8 inch square baking pan
- Heavy-bottom saucepan
- Microwave-safe bowl
- Rubber spatula
- Parchment paper
- Double boiler (or a heat-safe bowl that fits over a pot)
- Measuring cups and spoons
- Sharp knife for cutting the fudge
- Candy thermometer (optional but helpful)
How To Make Snickers Fudge Recipe
I’ve broken down the process into manageable steps that I follow every time I make this incredible fudge:
- First, I prepare my pan by lining it with parchment paper, leaving some overhang for easy removal later. I’ve learned that spraying the pan lightly with cooking spray before placing the parchment paper helps it stick better to the sides.
- For the fudge base, I combine the milk chocolate chips, sweetened condensed milk, and butter in my double boiler. I melt these ingredients together over medium-low heat, stirring occasionally until everything is smooth and well combined. This usually takes about 5-7 minutes.
- Once melted, I remove the mixture from heat and stir in the vanilla extract and sea salt. I’ve found that this small amount of salt really enhances the chocolate flavor.
- I pour this mixture into my prepared pan, spreading it evenly with my spatula. This goes into the refrigerator for about 30 minutes until it’s set but not completely hard.
- While the base is chilling, I prepare the caramel layer. I place the unwrapped caramels and heavy cream in a microwave-safe bowl and heat in 30-second intervals, stirring between each interval, until completely melted and smooth.
- I stir the chopped peanuts and salt into the melted caramel mixture. Working quickly (as the caramel can set fast), I spread this mixture over the chilled fudge base.
- Back into the refrigerator it goes for another 30 minutes until the caramel layer is set.
- For the final touch, I combine the remaining chocolate chips and vegetable oil in the microwave, heating in 30-second intervals until melted and smooth.
- I pour this over the caramel layer and quickly sprinkle with the remaining chopped peanuts before the chocolate sets.
- The whole thing goes back into the refrigerator for at least 2 hours or until completely set.
Variations
Over time, I’ve experimented with several variations that have turned out wonderfully:
Dark Chocolate Version:
I sometimes swap the milk chocolate for dark chocolate when I want a more intense chocolate flavor. This creates a sophisticated twist that’s less sweet but equally delicious.
Peanut Butter Lover’s Version:
Adding a layer of peanut butter (mixed with powdered sugar for stability) between the fudge base and caramel layer takes this treat to new heights for peanut butter fans.
Nut Alternatives:
While peanuts are classic, I’ve successfully used almonds, pecans, or cashews when I want to switch things up. Each brings its own unique flavor profile to the fudge.
Dairy-Free Options:
For my lactose-intolerant friends, I’ve made this using coconut condensed milk and dairy-free chocolate chips. While the texture is slightly different, it’s still delicious.
How To Storage This Recipe
I’ve learned through trial and error the best ways to store this fudge:
In the refrigerator, I keep it in an airtight container with wax paper between layers, where it stays fresh for up to 2 weeks. At room temperature, it’s best consumed within 5-7 days, though it rarely lasts that long in my house!
For longer storage, I cut the fudge into pieces and store them in a freezer-safe container with parchment paper between layers. This way, it keeps well for up to 3 months. I just let it thaw in the refrigerator overnight before serving.
Tips for Perfect Snickers Fudge
My journey to perfecting this recipe has taught me several valuable lessons:
Temperature is crucial when working with chocolate and caramel. I always make sure my ingredients are at room temperature before starting. This helps prevent the chocolate from seizing or the caramel from becoming too stiff.
When melting chocolate, low and slow is the way to go. Rushing this step by using high heat can result in grainy or burned chocolate. I’ve learned this the hard way!
For clean cuts, I warm my knife under hot water and wipe it dry between each cut. This prevents the fudge from crumbling and gives those picture-perfect squares.
The quality of chocolate makes a significant difference in the final product. While any chocolate chips will work, using higher-quality chocolate elevates the taste and texture of the fudge.
Common Questions
1. Why did my chocolate seize up?
When this happened to me, it was usually because water got into the chocolate while melting. I make sure all my utensils are completely dry, and I avoid letting steam from the double boiler come in contact with the chocolate.
2. Can I make this fudge ahead of time?
Absolutely! I often make it up to a week before special occasions. Just store it properly in the refrigerator, and it stays perfectly fresh.
3. My caramel layer is too hard. What went wrong?
This usually happens when the caramel is overheated. I’ve found that melting it slowly and adding a touch more cream can help maintain a softer, more pleasant texture.
This Snickers fudge recipe has become my signature dessert, and I love sharing it with friends and family. The combination of smooth chocolate, gooey caramel, and crunchy peanuts creates a treat that’s impossible to resist. Whether you’re making it for a special occasion or just because, I’m confident you’ll love this fudge as much as I do!
Print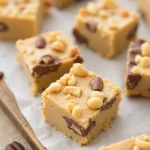
Homemade Snickers Fudge Recipe
- Total Time: 1 hour
- Yield: 24 servings 1x
Ingredients
For the Chocolate Fudge Base:
- 3 cups milk chocolate chips (I prefer using high-quality chocolate)
- 1 (14 oz) can sweetened condensed milk
- 4 tablespoons unsalted butter
- 1 teaspoon pure vanilla extract
- 1/4 teaspoon sea salt
For the Caramel Layer:
- 1 (11 oz) bag caramel squares, unwrapped
- 2 tablespoons heavy cream
- 1 cup salted peanuts, roughly chopped
- 1/4 teaspoon sea salt
For the Topping:
- 1 cup milk chocolate chips
- 1 tablespoon vegetable oil
- 1/2 cup chopped peanuts for garnish
Instructions
- First, I prepare my pan by lining it with parchment paper, leaving some overhang for easy removal later. I’ve learned that spraying the pan lightly with cooking spray before placing the parchment paper helps it stick better to the sides.
- For the fudge base, I combine the milk chocolate chips, sweetened condensed milk, and butter in my double boiler. I melt these ingredients together over medium-low heat, stirring occasionally until everything is smooth and well combined. This usually takes about 5-7 minutes.
- Once melted, I remove the mixture from heat and stir in the vanilla extract and sea salt. I’ve found that this small amount of salt really enhances the chocolate flavor.
- I pour this mixture into my prepared pan, spreading it evenly with my spatula. This goes into the refrigerator for about 30 minutes until it’s set but not completely hard.
- While the base is chilling, I prepare the caramel layer. I place the unwrapped caramels and heavy cream in a microwave-safe bowl and heat in 30-second intervals, stirring between each interval, until completely melted and smooth.
- I stir the chopped peanuts and salt into the melted caramel mixture. Working quickly (as the caramel can set fast), I spread this mixture over the chilled fudge base.
- Back into the refrigerator it goes for another 30 minutes until the caramel layer is set.
- For the final touch, I combine the remaining chocolate chips and vegetable oil in the microwave, heating in 30-second intervals until melted and smooth.
- I pour this over the caramel layer and quickly sprinkle with the remaining chopped peanuts before the chocolate sets.
- The whole thing goes back into the refrigerator for at least 2 hours or until completely set.
Notes
Temperature is crucial when working with chocolate and caramel. I always make sure my ingredients are at room temperature before starting. This helps prevent the chocolate from seizing or the caramel from becoming too stiff.
When melting chocolate, low and slow is the way to go. Rushing this step by using high heat can result in grainy or burned chocolate. I’ve learned this the hard way!
For clean cuts, I warm my knife under hot water and wipe it dry between each cut. This prevents the fudge from crumbling and gives those picture-perfect squares.
The quality of chocolate makes a significant difference in the final product. While any chocolate chips will work, using higher-quality chocolate elevates the taste and texture of the fudge.
- Prep Time: 30 minutes
- Cook Time: 30 minutes
- Category: Dessert
- Method: Microwave and stovetop preparation
- Cuisine: American
Nutrition
- Serving Size: 1 piece
- Calories: 302 kcal