
Growing up, cream horns were more than just a dessert in our family they were a cherished tradition. I remember watching my mom transform simple ingredients into magical pastry masterpieces, her hands moving with a grace that seemed almost effortless. Those delicate swirls of golden pastry and billowy cream weren’t just sweet treats; they were moments of pure joy captured in edible form.
Every time she pulled out the metal cones and started rolling dough, our kitchen would fill with an anticipation that was almost magical. These weren’t everyday desserts they were special occasion stars that marked birthdays, holidays, and those unexpected moments that needed a touch of sweetness. Now, after years of practicing her technique and adding my own little twists, I’m excited to pass down this family recipe.
This isn’t just about baking cream horns. It’s about creating memories, one delicate pastry at a time. Whether you’re a baking beginner or a kitchen pro, this recipe is your ticket to experiencing a little bit of the magic that made my childhood so sweet.
What Are Cream Horns?
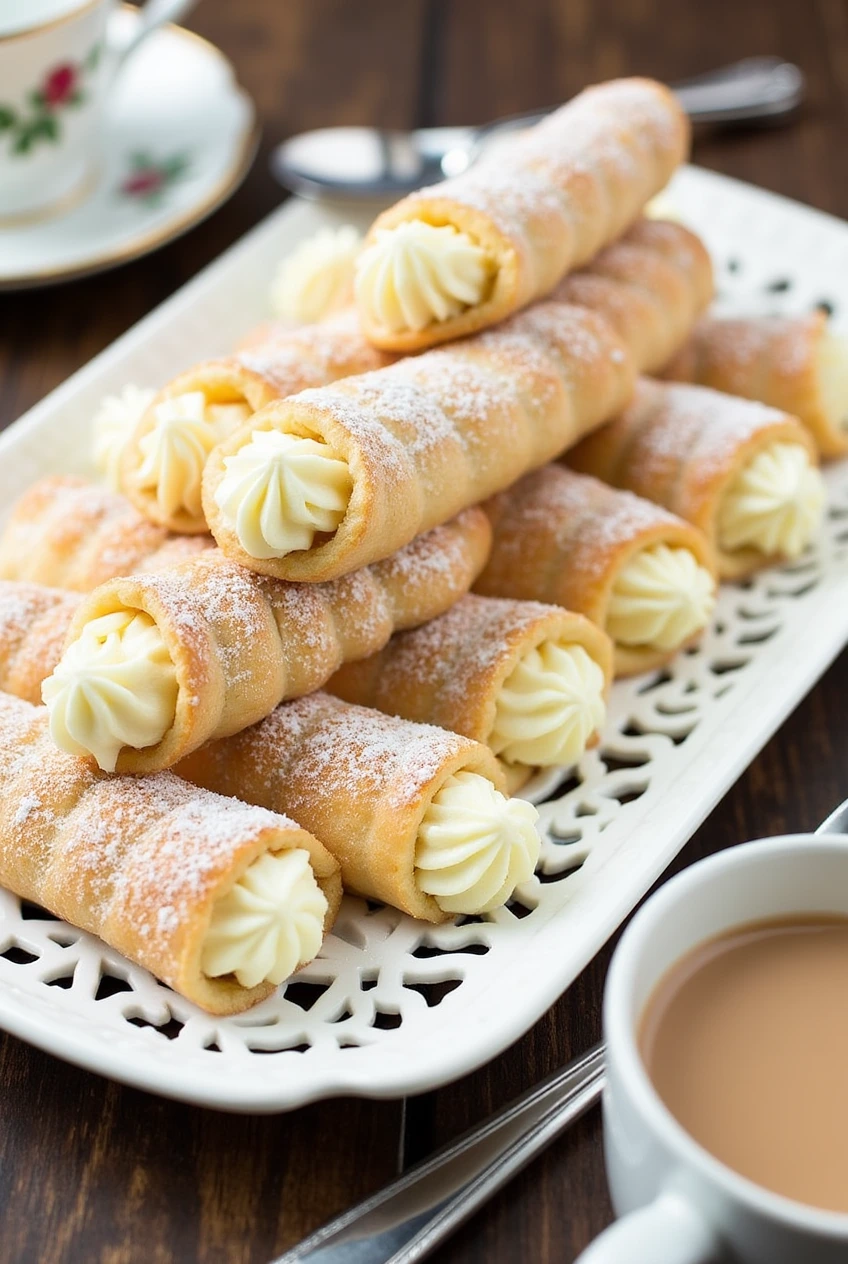
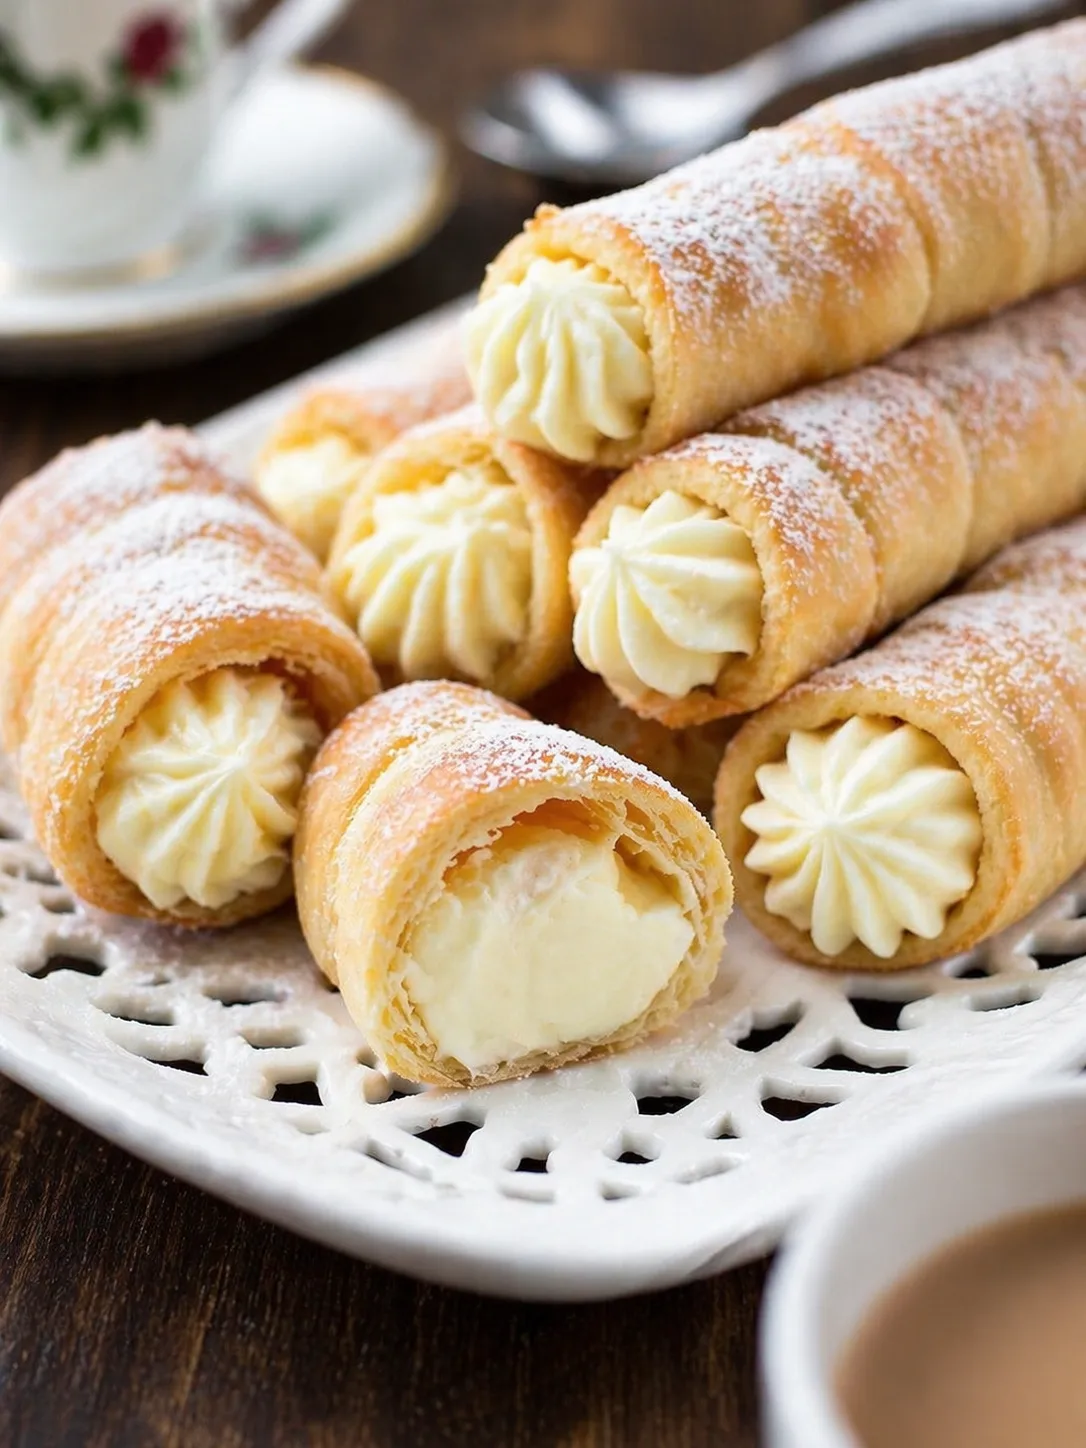
If you’ve never tasted a cream horn, imagine this: crisp, golden layers of pastry hugging a light, velvety filling sometimes vanilla, sometimes chocolate, always irresistible. Originating in Europe, these handheld treats became a staple in American bakeries by the mid-20th century. My mom’s version skips the fussiness of traditional recipes without sacrificing that luxurious texture.
The secret lies in her simplified puff pastry technique and a filling that’s rich but never cloying. What I love most about cream horns is their versatility. They’re fancy enough for a dinner party but casual enough to enjoy with morning coffee.
Over the years, I’ve learned that their charm isn’t just in the taste it’s in the process. Shaping the dough, watching it puff in the oven, and filling each horn with care turns baking into a ritual, a way to slow down and savor the moment.
Ingredients
- 1 package frozen puff pastry (thawed overnight in the fridge)
- 1 cup heavy whipping cream (very cold)
- ½ cup powdered sugar (plus extra for dusting)
- 1 tsp pure vanilla extract
- ¼ cup granulated sugar (for coating pastry)
- 12 cream horn molds or metal cone molds (see equipment notes)
- Optional: 2 tbsp fruit jam or melted chocolate for drizzling
Recommended Equipment
While specialty tools aren’t mandatory, a few items make the process smoother. Metal cream horn molds are ideal their tapered shape helps create the classic horn silhouette. If you don’t have molds, foil DIY cones work in a pinch (I’ll explain later!). A sturdy rolling pin ensures even pastry thickness, and a silicone baking mat prevents sticking without extra flour.
For the filling, an electric mixer is my go-to for achieving stiff peaks in the whipped cream, though a whisk and determination can suffice. I also swear by a large piping bag fitted with a star tip; it gives the cream a bakery-style flourish. Lastly, keep a small brush handy for sealing pastry edges it’s a tiny step that makes a big difference in keeping the horns intact during baking.
How To Make Mom’s Cream Horns
1. Prep the Pastry
Start by lightly dusting your counter with flour. Unfold the thawed puff pastry onto the surface, gently rolling it into a 12×12-inch square. Using a pizza cutter or sharp knife, slice the pastry into ½-inch strips. Mom always said, “Don’t stress about perfect widths they’ll puff up beautifully no matter what.”
2. Shape the Horns
Take one strip and loosely spiral it around a mold, overlapping slightly. Brush the end with water to seal. Repeat with remaining strips. Dip each wrapped mold into granulated sugar, coating evenly. The sugar caramelizes as it bakes, adding a delicate crunch.
3. Bake to Golden Perfection
Preheat the oven to 400°F (205°C). Arrange horns on a parchment-lined tray, sugar-side up. Bake for 15–18 minutes until deeply golden. Let them cool completely on the molds this is crucial! Removing them too early can cause collapse.
4. Whip the Filling
In a chilled bowl, combine heavy cream, powdered sugar, and vanilla. Whip on medium-high until stiff peaks form. For extra stability, I sometimes add a tablespoon of instant pudding mix (Mom’s sneaky trick!).
5. Assemble with Care
Once horns are cool, gently twist the molds to release. Pipe the cream into each shell using steady pressure. If you’re feeling fancy, drizzle with melted chocolate or a swipe of raspberry jam. Dust with powdered sugar just before serving.
Variations
One of the joys of Mom’s Cream Horns is how easily it adapts. For a chocolate twist, add 2 tbsp cocoa powder to the whipped cream. Lemon zest in the filling brightens the flavor, while a sprinkle of cinnamon sugar on the pastry nods to churros. If puff pastry feels intimidating, phyllo dough works just layer 3 sheets per horn and brush with butter.
Vegan? Swap heavy cream for coconut cream and use plant-based puff pastry. My niece loves rainbow-sprinkled horns, and my brother swears by a dash of espresso powder in the filling. The point is to make it yours. After all, the best family recipes evolve with each generation.
How to Store Cream Horns
These treats are best enjoyed fresh but keep well for up to two days. Store unfilled horns in an airtight container at room temperature. The filling should be refrigerated separately and piped in just before serving to prevent sogginess. For longer storage, freeze baked (but unfilled) horns in a ziplock bag for up to a month.
Thaw at room temperature and refresh in a 300°F oven for 5 minutes. I often bake a double batch and freeze half future me is always grateful!
Recipe Tips from My Kitchen to Yours
- Chill everything: Cold pastry is easier to handle, and cold cream whips faster.
- Don’t rush the cooling: Letting horns cool completely on the molds ensures they hold their shape.
- Pipe smart: If you lack a piping bag, snip the corner off a plastic bag it works nearly as well!
- Embrace imperfection: My first batch looked more like abstract art than horns. They still tasted divine.
Recipe FAQs
Why did my pastry stick to the molds?
This usually happens if the molds aren’t properly coated. Next time, spray them lightly with baking spray or rub with butter before wrapping.
Can I make these ahead for a party?
Absolutely! Bake the horns up to two days early and store unfilled. Whip the cream an hour before serving.
Do I need special molds?
Not at all. Create foil cones by shaping heavy-duty foil around a marker or thick pencil. Just ensure they’re sturdy enough to hold their shape.
Amazing Mom’s Cream Horns
- Total Time: 43 minutes
- Yield: Approximately 52 cream horns 1x
Ingredients
- 1 package frozen puff pastry (thawed overnight in the fridge)
- 1 cup heavy whipping cream (very cold)
- ½ cup powdered sugar (plus extra for dusting)
- 1 tsp pure vanilla extract
- ¼ cup granulated sugar (for coating pastry)
- 12 cream horn molds or metal cone molds (see equipment notes)
- Optional: 2 tbsp fruit jam or melted chocolate for drizzling
Instructions
1. Prep the Pastry
Start by lightly dusting your counter with flour. Unfold the thawed puff pastry onto the surface, gently rolling it into a 12×12-inch square. Using a pizza cutter or sharp knife, slice the pastry into ½-inch strips. Mom always said, “Don’t stress about perfect widths they’ll puff up beautifully no matter what.”
2. Shape the Horns
Take one strip and loosely spiral it around a mold, overlapping slightly. Brush the end with water to seal. Repeat with remaining strips. Dip each wrapped mold into granulated sugar, coating evenly. The sugar caramelizes as it bakes, adding a delicate crunch.
3. Bake to Golden Perfection
Preheat the oven to 400°F (205°C). Arrange horns on a parchment-lined tray, sugar-side up. Bake for 15–18 minutes until deeply golden. Let them cool completely on the molds this is crucial! Removing them too early can cause collapse.
4. Whip the Filling
In a chilled bowl, combine heavy cream, powdered sugar, and vanilla. Whip on medium-high until stiff peaks form. For extra stability, I sometimes add a tablespoon of instant pudding mix (Mom’s sneaky trick!).
5. Assemble with Care
Once horns are cool, gently twist the molds to release. Pipe the cream into each shell using steady pressure. If you’re feeling fancy, drizzle with melted chocolate or a swipe of raspberry jam. Dust with powdered sugar just before serving.
Notes
- Chill everything: Cold pastry is easier to handle, and cold cream whips faster.
- Don’t rush the cooling: Letting horns cool completely on the molds ensures they hold their shape.
- Pipe smart: If you lack a piping bag, snip the corner off a plastic bag it works nearly as well!
- Embrace imperfection: My first batch looked more like abstract art than horns. They still tasted divine.
- Prep Time: 25 minutes
- Cook Time: 18 minutes
- Category: Pastries
- Method: Baking
- Cuisine: Italian
Nutrition
- Serving Size: 1 cream horn
- Calories: 325 kcal
- Sugar: 13g
- Sodium: 85mg
- Fat: 21g
- Saturated Fat: 9g
- Trans Fat: 1g
- Carbohydrates: 26g
- Fiber: 1g
- Protein: 3g
- Cholesterol: 54mg