
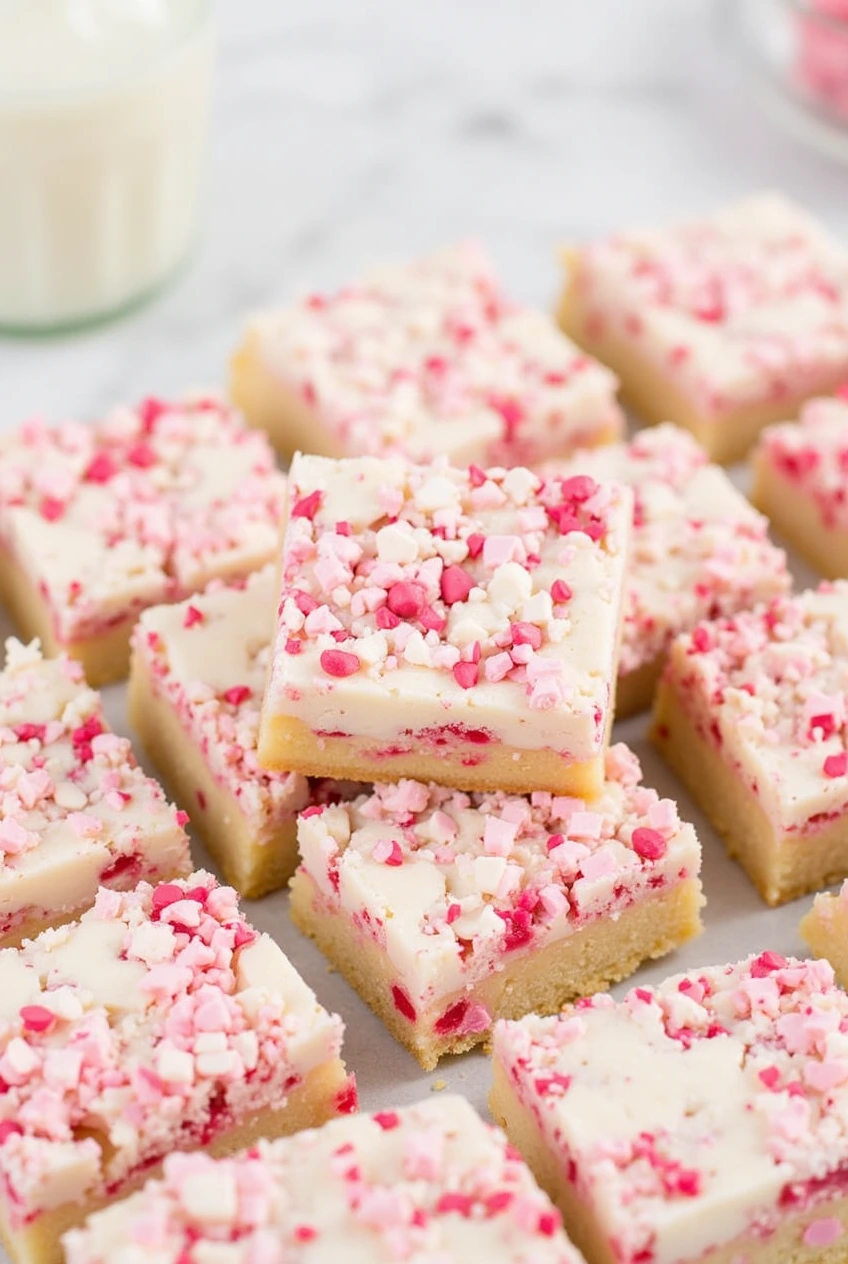
This Valentine Sugar Cookie Bar Recipe is a delightful twist on the traditional sugar cookie. In my kitchen, it’s more than just a dessert it’s a celebration of love and creativity. I discovered this recipe when I was searching for a fun, easy treat that didn’t require cutting out individual cookies.
Instead, the dough is spread into a pan and baked as a bar, making it super simple to whip up. The soft, chewy base is perfectly balanced with a smooth, sweet frosting that I decorate with festive sprinkles and candy hearts.
I love that the recipe is versatile; you can leave it classic or add your own creative touches to make it unique for each Valentine’s Day. The best part is that it brings a warm, homemade touch to any celebration whether it’s a small family gathering or a party with friends.
Ingredients
For the cookie base, I personally use these key ingredients:
- 1 cup white granulated sugar
- ½ cup unsalted butter, softened
- 2 large eggs (at room temperature)
- 1 teaspoon vanilla extract
- 2 cups all-purpose flour
- 1 teaspoon baking soda
- ¼ teaspoon salt
- 2 tablespoons festive Valentine sprinkles (I sometimes mix these into the dough for an extra pop of color)
For the frosting layer, I rely on:
- 1 tub of white buttercream frosting (store-bought works well, though I sometimes make mine from scratch using 1 stick butter, 3 cups powdered sugar, ¼ cup milk, and a dash of vanilla extract)
- Additional Valentine sprinkles and candy hearts or red M&Ms for decoration
I like to keep my ingredients simple and straightforward, so that each component shines through without overpowering the other flavors. The balance between the buttery cookie base and the sweet, creamy frosting is what makes these bars so irresistible.
Recommended Equipment
Main, having the right equipment makes all the difference in the kitchen. I personally use a few trusty tools when I bake these cookie bars. First and foremost, I rely on a quality stand mixer with a paddle attachment; it makes creaming the butter and sugars so much easier and gives me a light, fluffy batter every time.
I always measure my ingredients with accurate measuring cups and spoons, because precision is key for baking. An 8×8-inch or 9×9-inch nonstick baking pan lined with parchment paper is essential; I like to secure the parchment with binder clips so it stays in place. I also keep a couple of mixing bowls handy one for the wet ingredients and one for the dry.
A sturdy spatula and an offset spatula are indispensable when it comes to spreading the dough evenly and frosting the bars later. I even have a wire cooling rack where I let my freshly baked cookie bars cool completely before decorating. Each piece of equipment is a small helper that ensures my baking process is smooth and enjoyable.
Instructions
1. Preparation and Oven Setup
Main, I begin by preheating my oven to 350°F. I then take my 8×8-inch baking pan and line it with parchment paper. I secure the parchment with a few binder clips. This step saves me from scrubbing the pan later and makes it easy to lift the entire cookie bar out when it’s done.
2. Creaming the Butter and Sugar
In a large mixing bowl, I combine ½ cup of unsalted butter with 1 cup of white granulated sugar. I beat these on medium-high speed for 2 to 3 minutes until the mixture becomes light and fluffy. The reason I do this is that a well-creamed mixture incorporates air, making the cookie bars tender and soft. Next, I add 2 large eggs and 1 teaspoon of vanilla extract, continuing to beat until everything blends smoothly.
3. Mixing Dry Ingredients
In another bowl, I whisk together 2 cups of all-purpose flour, 1 teaspoon of baking soda, and ¼ teaspoon of salt. I then gradually add these dry ingredients to the creamed mixture on a low mixer setting. I’m careful not to overmix; I blend just until the flour is incorporated. Once that’s done, I gently fold in 2 tablespoons of Valentine sprinkles. These little sprinkles add a festive touch and a burst of color to each bite.
4. Spreading the Dough
After the dough is mixed, I transfer it into the prepared baking pan. Main, I press it down firmly and evenly using my hands and a spatula, making sure the dough reaches every corner. Spreading the dough uniformly helps it bake evenly, which is key for soft, chewy cookie bars.
5. Baking
I slide the pan into the preheated oven and bake the dough for 15 to 20 minutes. I keep a close watch on the bars—the edges should turn a light golden brown, while the center might appear slightly underbaked. That’s perfectly fine because the bars will firm up as they cool.
6. Cooling the Bars
When the baking time is complete, I remove the pan from the oven and place it on a wire rack to cool completely. Cooling is essential; if I try to frost warm bars, the frosting might melt and won’t set properly.
7. Frosting and Decorating
Once the cookie bars have cooled, I take my white buttercream frosting and spread it evenly over the top using an offset spatula. I love how the smooth frosting contrasts with the golden cookie base. Finally, I decorate the frosted bars with extra Valentine sprinkles, candy hearts, or even a few red M&Ms for an extra festive look.
8. Cutting and Serving
After decorating, I cut the cookie bars into squares or rectangles, depending on your preference. This method always gives me a batch of soft, chewy, and festive treats that are perfect for sharing on Valentine’s Day.
Variations And Substitutions
- Flexibility is Key:
- I really value this recipe because it adapts well to busy days and creative experiments.
- Time-Saving Substitution:
- When short on time, using a pre-made sugar cookie dough mix can simplify the process.
- Gluten-Free Option:
- I’ve tried substituting with gluten-free all-purpose flour, and the texture remains soft and delicious.
- Dairy-Free Twist:
- For a dairy-free version, you can replace butter with vegan margarine and opt for a frosting made with coconut cream.
- Creative Decoration Alternatives:
- Instead of traditional Valentine sprinkles, try using colored sugar or even edible glitter for a fun, festive look.
- Overall Essence Maintained:
- Each substitution may add a subtle flavor change, but the main character of the cookie bars soft, buttery, and festive stays intact
How to Store Sugar Cookie Bar
- Cool Completely:
- Let the cookie bars cool completely after baking, frosting, and decorating.
- Cut and Store:
- Cut the cooled cookie bars into individual squares and place them in an airtight container.
- Room Temperature Storage:
- Store at room temperature if you plan to eat them within a few days (up to 4 days) to keep the frosting soft and the bars chewy.
- Refrigeration Option:
- For longer storage, transfer the bars to the refrigerator, but allow them to sit at room temperature for 10–15 minutes before serving so the frosting softens.
- Freezing Unfrosted Bars:
- If you have a large batch, wrap the cooled, uncut cookie bars tightly in plastic wrap and then in foil.
- Freeze for up to 3 months, then thaw overnight in the fridge before frosting and decorating as usual.
Tips For Sugar Cookie Bar
- Avoid Overmixing:
- Mix the dough just until the flour is incorporated to keep it light and soft instead of tough and dense.
- Room Temperature Ingredients:
- Use eggs and butter at room temperature. This helps create a smooth, well-emulsified dough.
- Firmly Press the Dough:
- Press the dough evenly into every corner of the pan. This step is key for even baking throughout.
- Cool Completely Before Frosting:
- Allow the cookie bars to cool completely. Frosting warm bars can cause the icing to slide off and lose its decorative charm.
- Use Quality Tools:
- Use a good offset spatula when spreading the frosting to achieve an even layer that looks as beautiful as it tastes.
- Small Tips, Big Impact:
- These simple yet effective tips, honed over years of baking, have consistently ensured that every batch of cookie bars turns out perfectly every time.
Frequently Asked Questions
Can I use a pre-made sugar cookie mix instead of making the dough from scratch?
Absolutely, I sometimes use a pre-made mix to save time, and it works just as well. The main thing is to follow the instructions on the package and adjust for any extra ingredients like sprinkles or additional flavorings. This can be a lifesaver on a busy day, and the end result is still delicious and festive.
How do I ensure my cookie bars have that perfect chewy texture?
For me, the key is not overbaking. I always check the bars a minute or two before the recommended time, as the edges should be light golden while the center may look slightly underdone. Remember, the bars will firm up as they cool. Also, avoid overmixing the dough once you add the flour; this helps keep the texture tender and soft.
What if my frosting is too thick or too thin?
If the frosting is too thick, I add a little extra heavy cream just a teaspoon at a time until it reaches a smooth, spreadable consistency. On the other hand, if it’s too thin, I sift in a bit more powdered sugar, a tablespoon at a time. The main goal is to get a frosting that’s light and fluffy so that it spreads beautifully over the cookie bars without overwhelming them.
Conclusion
Main, baking these Valentine Sugar Cookie Bars has become a cherished tradition in my kitchen. Every time I pull them out of the oven, I’m reminded of the joy that simple homemade treats bring to life. I love how the soft, buttery base paired with the sweet, smooth frosting and playful sprinkles creates a dessert that is not only delicious but also visually festive.
Whether I’m making them for a small family gathering, a classroom party, or just as a personal treat to celebrate love, these cookie bars always hit the spot.
Print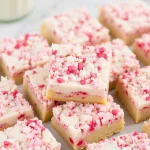
Valentine Sugar Cookie Bar
- Total Time: 35 minutes
- Yield: 24 bars 1x
- Diet: Vegetarian
Ingredients
For the cookie base, I personally use these key ingredients:
- 1 cup white granulated sugar
- ½ cup unsalted butter, softened
- 2 large eggs (at room temperature)
- 1 teaspoon vanilla extract
- 2 cups all-purpose flour
- 1 teaspoon baking soda
- ¼ teaspoon salt
- 2 tablespoons festive Valentine sprinkles (I sometimes mix these into the dough for an extra pop of color)
For the frosting layer, I rely on:
- 1 tub of white buttercream frosting (store-bought works well, though I sometimes make mine from scratch using 1 stick butter, 3 cups powdered sugar, ¼ cup milk, and a dash of vanilla extract)
- Additional Valentine sprinkles and candy hearts or red M&Ms for decoration
Instructions
1. Preparation and Oven Setup
Main, I begin by preheating my oven to 350°F. I then take my 8×8-inch baking pan and line it with parchment paper. I secure the parchment with a few binder clips. This step saves me from scrubbing the pan later and makes it easy to lift the entire cookie bar out when it’s done.
2. Creaming the Butter and Sugar
In a large mixing bowl, I combine ½ cup of unsalted butter with 1 cup of white granulated sugar. I beat these on medium-high speed for 2 to 3 minutes until the mixture becomes light and fluffy. The reason I do this is that a well-creamed mixture incorporates air, making the cookie bars tender and soft. Next, I add 2 large eggs and 1 teaspoon of vanilla extract, continuing to beat until everything blends smoothly.
3. Mixing Dry Ingredients
In another bowl, I whisk together 2 cups of all-purpose flour, 1 teaspoon of baking soda, and ¼ teaspoon of salt. I then gradually add these dry ingredients to the creamed mixture on a low mixer setting. I’m careful not to overmix; I blend just until the flour is incorporated. Once that’s done, I gently fold in 2 tablespoons of Valentine sprinkles. These little sprinkles add a festive touch and a burst of color to each bite.
4. Spreading the Dough
After the dough is mixed, I transfer it into the prepared baking pan. Main, I press it down firmly and evenly using my hands and a spatula, making sure the dough reaches every corner. Spreading the dough uniformly helps it bake evenly, which is key for soft, chewy cookie bars.
5. Baking
I slide the pan into the preheated oven and bake the dough for 15 to 20 minutes. I keep a close watch on the bars—the edges should turn a light golden brown, while the center might appear slightly underbaked. That’s perfectly fine because the bars will firm up as they cool.
6. Cooling the Bars
When the baking time is complete, I remove the pan from the oven and place it on a wire rack to cool completely. Cooling is essential; if I try to frost warm bars, the frosting might melt and won’t set properly.
7. Frosting and Decorating
Once the cookie bars have cooled, I take my white buttercream frosting and spread it evenly over the top using an offset spatula. I love how the smooth frosting contrasts with the golden cookie base. Finally, I decorate the frosted bars with extra Valentine sprinkles, candy hearts, or even a few red M&Ms for an extra festive look.
8. Cutting and Serving
After decorating, I cut the cookie bars into squares or rectangles, depending on your preference. This method always gives me a batch of soft, chewy, and festive treats that are perfect for sharing on Valentine’s Day.
Notes
- Avoid Overmixing:
- Mix the dough just until the flour is incorporated to keep it light and soft instead of tough and dense.
- Room Temperature Ingredients:
- Use eggs and butter at room temperature. This helps create a smooth, well-emulsified dough.
- Firmly Press the Dough:
- Press the dough evenly into every corner of the pan. This step is key for even baking throughout.
- Cool Completely Before Frosting:
- Allow the cookie bars to cool completely. Frosting warm bars can cause the icing to slide off and lose its decorative charm.
- Use Quality Tools:
- Use a good offset spatula when spreading the frosting to achieve an even layer that looks as beautiful as it tastes.
- Small Tips, Big Impact:
- These simple yet effective tips, honed over years of baking, have consistently ensured that every batch of cookie bars turns out perfectly every time.
- Prep Time: 15 minutes
- Cook Time: 20 minutes
- Category: Dessert
- Method: Baking
- Cuisine: American
Nutrition
- Serving Size: 1 bar (assuming the recipe yields 24 bars)
- Calories: 160 kcal
- Sugar: 9 g
- Sodium: 125 mg
- Fat: 6 g
- Saturated Fat: 3 g
- Trans Fat: 0 g
- Carbohydrates: 23 g
- Fiber: 1 g
- Protein: 2 g
- Cholesterol: 0 mg