
This Basque Burnt Cheesecake recipe will revolutionize your dessert game with its rustic charm and incredible flavor. I fell in love with this Spanish treat the first time I tasted it – you could say it has changed my baking forever. Its distinctive burnt top and creamy center create a contrast that’s absolutely divine. We don’t need complicated techniques here, but it delivers restaurant-quality results every time.
Table of Contents
What Is Basque Cheesecake?
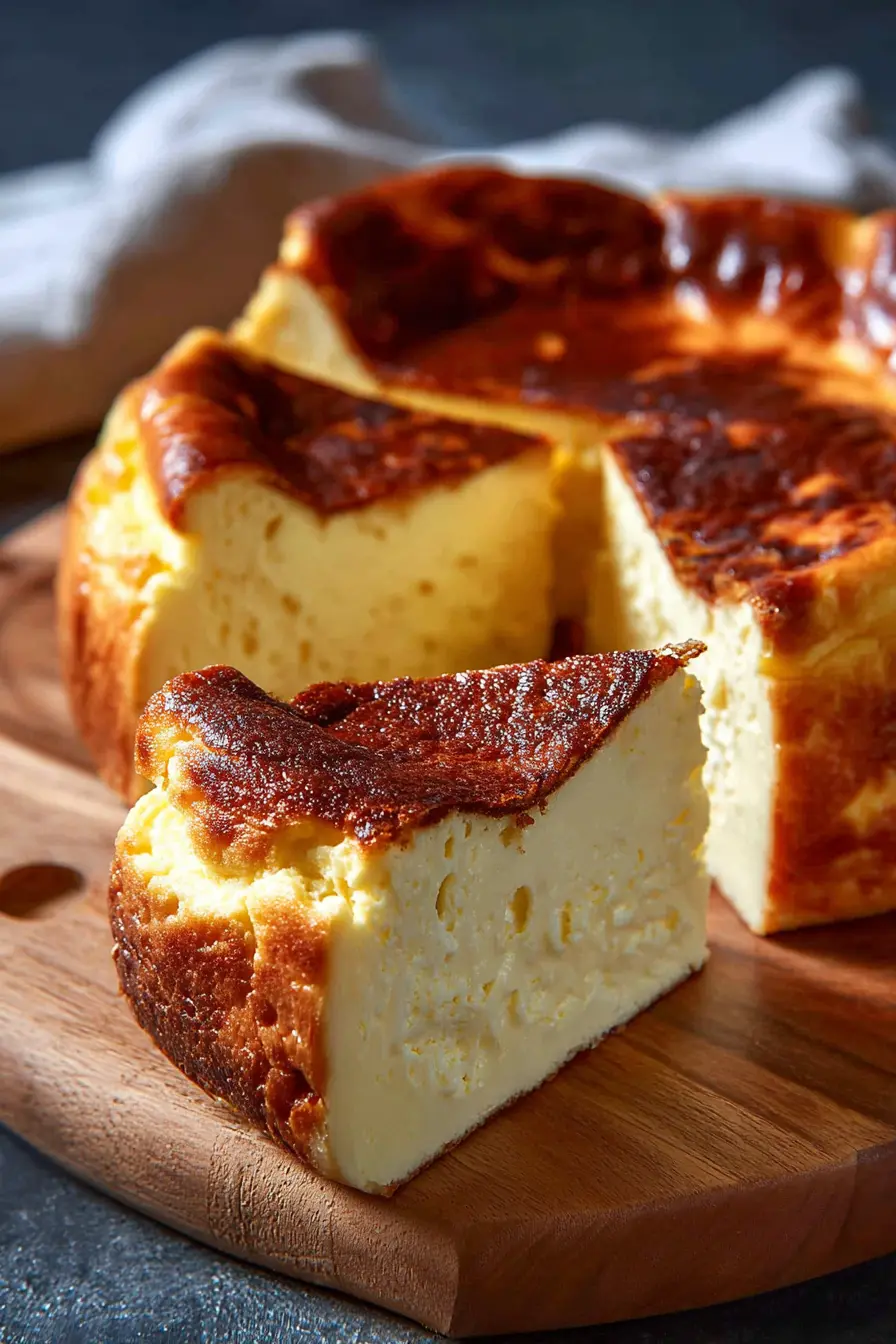
Basque cheesecake originated in the Basque region of Spain, specifically at La Viña restaurant in San Sebastian. Unlike traditional New York cheesecake, this version has no crust and gets baked at a very high temperature. The high heat creates that signature burnt, caramelized top while keeping the center wonderfully creamy and almost custard-like.
The beauty of this cheesecake lies in its simplicity and rustic appearance. There’s no water bath, no careful temperature monitoring, and no worry about cracks. In fact, the more rustic and burnt it looks, the more authentic it is. The parchment paper creates those characteristic wrinkled edges that make it look like it came straight from a Spanish bakery.
What makes this cheesecake special is its texture. It’s not as dense as American cheesecake but not as light as Japanese cheesecake either. It strikes this amazing balance between rich and airy, with a slight tang from the cream cheese and a deep caramelized flavor from the burnt top.
Why You’ll Love Burnt Basque Cheesecake
I love making this cheesecake because it’s surprisingly forgiving. You don’t need to worry about achieving a pristine surface or preventing cracks. The burnt top is exactly what you want, and any imperfections just add to its rustic charm. It’s also incredibly versatile – you can serve it warm, at room temperature, or chilled.
The flavor profile is complex yet simple. The burnt top provides a slightly bitter, caramelized note that balances beautifully with the sweet, creamy interior. It’s rich enough to satisfy chocolate lovers but light enough that you won’t feel overly full after a slice.
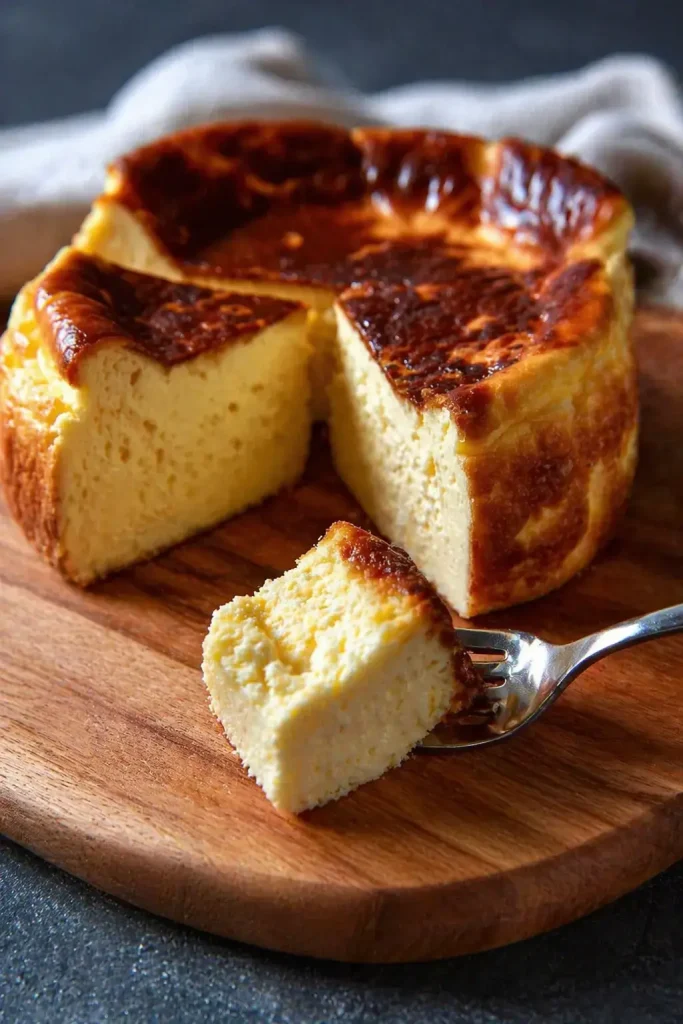
Another reason I adore this recipe is how it looks. The dramatic burnt top and ruffled parchment edges make it look like something from a high-end bakery, but it’s actually much easier than traditional cheesecake. You don’t need special equipment or advanced techniques – just mix, bake, and enjoy.
Key Ingredients
Equipment Needed:
- 9-inch springform pan
- Electric mixer (hand or stand mixer)
- Large mixing bowl
- Measuring cups and spoons
- Parchment paper
- Fine-mesh sieve (for flour)
Ingredients:
- 3½ cups cream cheese (room temperature)
- 1¼ cups granulated sugar
- ¼ teaspoon salt
- 5 large eggs
- 1 teaspoon vanilla bean paste
- 1¼ cups heavy cream
- 3 tablespoons all-purpose flour
The cream cheese must be at room temperature for smooth mixing. I usually take it out about 2 hours before baking. The vanilla bean paste adds those beautiful black specks and deeper flavor than regular vanilla extract, though you can substitute with extract if needed.
How to Make The Best Basque Cheesecake
1. Prepare Your Oven and Pan Preheat your oven to 410°F (210°C). This high temperature is crucial for creating that characteristic burnt top. Grease your 9-inch springform pan thoroughly with butter or cooking spray. Line it with parchment paper, allowing it to overhang the edges by about 2 inches. Don’t worry about making it neat – those wrinkled edges are part of the charm.
2. Mix the Cream Cheese and Sugar In a large mixing bowl, beat the room-temperature cream cheese and sugar together using an electric mixer on medium speed. Mix for 2-3 minutes until the mixture is completely smooth and fluffy. Make sure there are no lumps – this is crucial for a silky final texture.
3. Incorporate the Eggs Add the eggs one at a time, beating well after each addition. This gradual incorporation prevents the mixture from curdling. Scrape down the sides of the bowl frequently to ensure everything is well combined. The mixture should be smooth and pale yellow.
4. Add Cream and Flavorings Pour in the heavy cream, vanilla bean paste, and salt. Beat the mixture until it becomes silky smooth and well combined. The batter should be loose and pourable at this point. The cream adds richness and helps create that creamy interior texture.
5. Fold in the Flour Sift the flour directly into the mixture to prevent lumps. Mix just until the flour is incorporated – don’t overmix at this stage. The flour helps stabilize the cheesecake and gives it structure, but too much mixing can make it tough.
6. Bake the Cheesecake Pour the batter into your prepared pan and smooth the top gently. Bake for 50-60 minutes, or until the top is deeply golden brown and the center is still slightly jiggly when you gently shake the pan. The top should look almost burnt – that’s exactly what you want.
7. Cool and Chill Let the cheesecake cool completely at room temperature. This can take 2-3 hours. Once cooled, refrigerate for at least 4 hours, though overnight is better. This chilling time allows the texture to set properly and the flavors to develop.
8. Serve and Enjoy Carefully unmold the cheesecake and peel away the parchment paper. The rustic edges and burnt top are part of its appeal. Slice with a sharp knife, wiping it clean between cuts for neat slices.
Tips and Tricks
For the Best Results:
- Use room temperature cream cheese to avoid lumps
- Don’t overmix once you add the flour – just combine until smooth
- The center should still jiggle slightly when done – it will set as it cools
- Let it cool completely before refrigerating for best texture
- Serve at room temperature for the creamiest texture
Storage Tips:
- Store covered in the refrigerator for up to 5 days
- Can be frozen for up to 3 months (thaw overnight in fridge)
- Tastes best after resting overnight in the fridge
Troubleshooting:
- If the top isn’t burnt enough, broil for 1-2 minutes at the end
- Cracks are normal and add to the rustic charm
- If it’s too soft, it may need more baking time or longer chilling
Variations
You can customize this basic recipe in several ways. For a chocolate version, add 2 tablespoons of cocoa powder to the flour. Lemon lovers can add 2 tablespoons of lemon juice and 1 tablespoon of lemon zest. For a coffee twist, dissolve 2 tablespoons of instant coffee in the cream before adding it.
Fruit variations work well too. Swirl in some berry puree or add fresh berries on top before baking. You could also add a layer of fruit compote between two layers of batter for a hidden surprise.
For serving, this cheesecake is delicious plain, but you can dress it up with fresh berries, a drizzle of honey, or a dollop of whipped cream. Some people like it with a berry sauce or caramel drizzle, but I think the burnt flavor is beautiful on its own.
FAQs
Can I make this without a springform pan? You can use a regular 9-inch cake pan, but line it completely with parchment paper for easy removal. The springform pan makes unmolding much easier.
Why isn’t my cheesecake burnt enough? Your oven might run cool, or you may need to move the rack higher. Try broiling for 1-2 minutes at the end, watching carefully to prevent burning.
Can I make this ahead of time? Yes! This cheesecake actually improves after sitting overnight. You can make it up to 3 days ahead and store it covered in the refrigerator.
What if my cheesecake cracks? Cracks are completely normal and expected with this style of cheesecake. They add to the rustic, homemade appearance that makes it so appealing.
Can I use low-fat cream cheese? I don’t recommend it. The full-fat cream cheese is essential for the rich, creamy texture that makes this cheesecake special.
Print
Basque Burnt Cheesecake
- Total Time: 1 hour 5 minutes
- Yield: 8 servings 1x
- Diet: Vegetarian
Ingredients
Ingredients:
- 3½ cups cream cheese (room temperature)
- 1¼ cups granulated sugar
- ¼ teaspoon salt
- 5 large eggs
- 1 teaspoon vanilla bean paste
- 1¼ cups heavy cream
- 3 tablespoons all-purpose flour
The cream cheese must be at room temperature for smooth mixing. I usually take it out about 2 hours before baking. The vanilla bean paste adds those beautiful black specks and deeper flavor than regular vanilla extract, though you can substitute with extract if needed.
Instructions
1. Prepare Your Oven and Pan Preheat your oven to 410°F (210°C). This high temperature is crucial for creating that characteristic burnt top. Grease your 9-inch springform pan thoroughly with butter or cooking spray. Line it with parchment paper, allowing it to overhang the edges by about 2 inches. Don’t worry about making it neat – those wrinkled edges are part of the charm.
2. Mix the Cream Cheese and Sugar In a large mixing bowl, beat the room-temperature cream cheese and sugar together using an electric mixer on medium speed. Mix for 2-3 minutes until the mixture is completely smooth and fluffy. Make sure there are no lumps – this is crucial for a silky final texture.
3. Incorporate the Eggs Add the eggs one at a time, beating well after each addition. This gradual incorporation prevents the mixture from curdling. Scrape down the sides of the bowl frequently to ensure everything is well combined. The mixture should be smooth and pale yellow.
4. Add Cream and Flavorings Pour in the heavy cream, vanilla bean paste, and salt. Beat the mixture until it becomes silky smooth and well combined. The batter should be loose and pourable at this point. The cream adds richness and helps create that creamy interior texture.
5. Fold in the Flour Sift the flour directly into the mixture to prevent lumps. Mix just until the flour is incorporated – don’t overmix at this stage. The flour helps stabilize the cheesecake and gives it structure, but too much mixing can make it tough.
6. Bake the Cheesecake Pour the batter into your prepared pan and smooth the top gently. Bake for 50-60 minutes, or until the top is deeply golden brown and the center is still slightly jiggly when you gently shake the pan. The top should look almost burnt – that’s exactly what you want.
7. Cool and Chill Let the cheesecake cool completely at room temperature. This can take 2-3 hours. Once cooled, refrigerate for at least 4 hours, though overnight is better. This chilling time allows the texture to set properly and the flavors to develop.
8. Serve and Enjoy Carefully unmold the cheesecake and peel away the parchment paper. The rustic edges and burnt top are part of its appeal. Slice with a sharp knife, wiping it clean between cuts for neat slices.
Notes
- Use room temperature cream cheese to avoid lumps
- Don’t overmix once you add the flour – just combine until smooth
- The center should still jiggle slightly when done – it will set as it cools
- Let it cool completely before refrigerating for best texture
- Serve at room temperature for the creamiest texture
- Store covered in the refrigerator for up to 5 days
- Can be frozen for up to 3 months (thaw overnight in fridge)
- Tastes best after resting overnight in the fridge
- If the top isn’t burnt enough, broil for 1-2 minutes at the end
- Cracks are normal and add to the rustic charm
- If it’s too soft, it may need more baking time or longer chilling
- Prep Time: 15 minutes
- Cook Time: 50 minutes
- Category: Dessert
- Method: Baking
- Cuisine: Spanish
Nutrition
- Serving Size: 1 slice
- Calories: 400 kcal
- Sugar: 25 g
- Sodium: 150 mg
- Fat: 32 g
- Saturated Fat: 20 g
- Unsaturated Fat: 10 g
- Trans Fat: 0.5 g
- Carbohydrates: 20 g
- Fiber: 0 g
- Protein: 6 g
- Cholesterol: 130 mg