
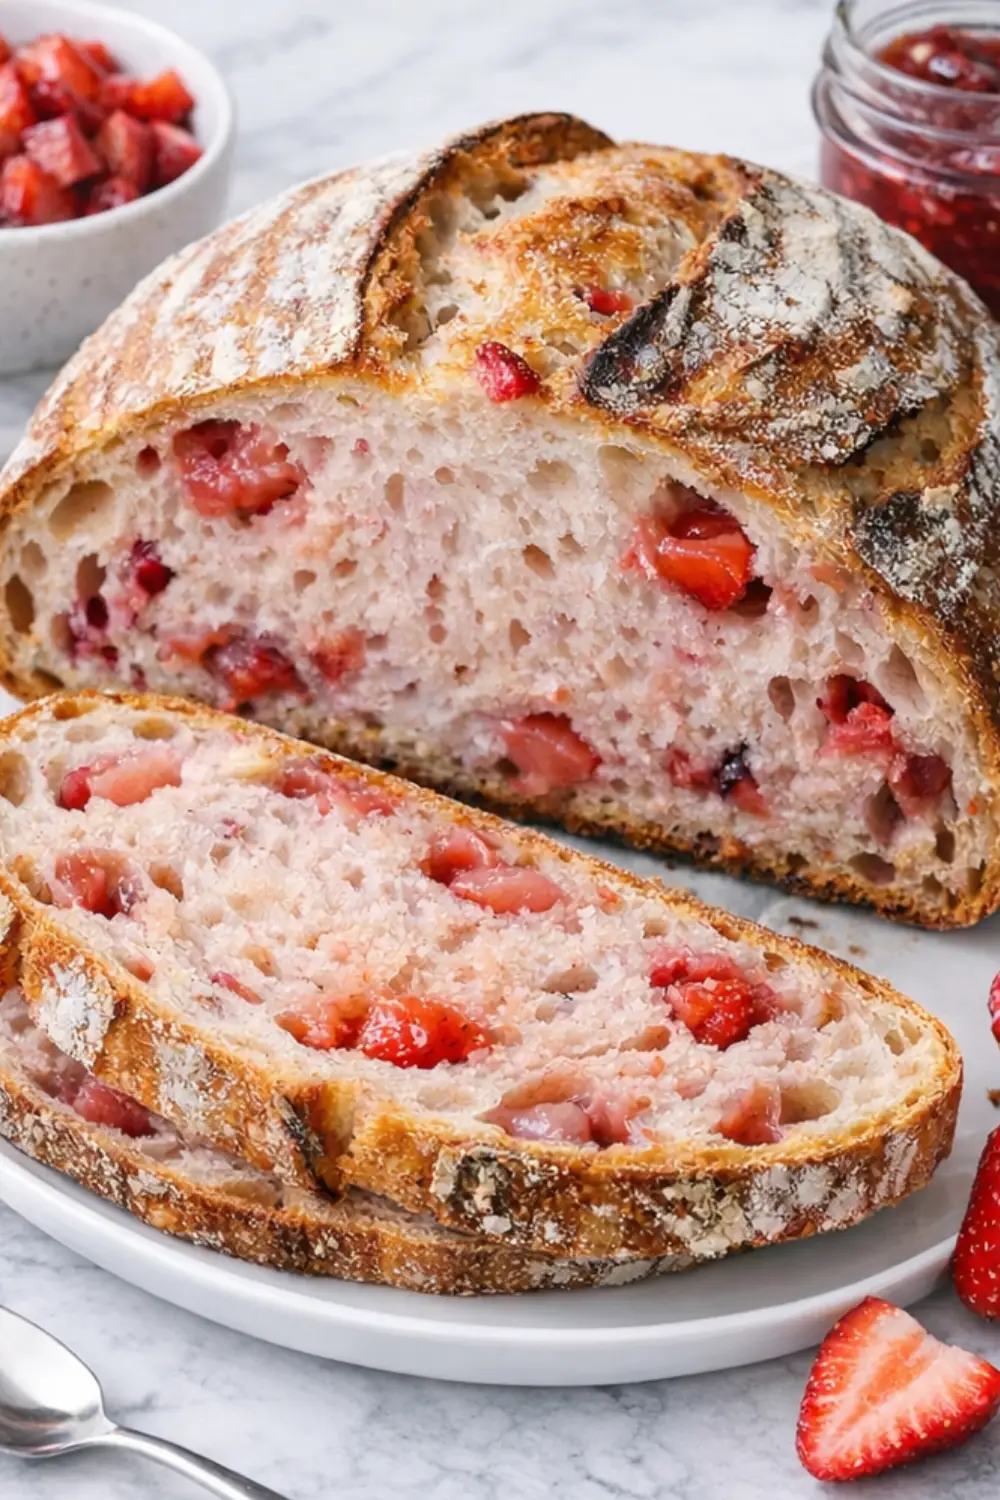
Strawberry sourdough bread has been on my baking list since last spring, when I had a bag of freeze-dried strawberries sitting in the pantry and an active starter ready to go. One loaf in, I was hooked. The crumb turns a soft pink, the crust gets that satisfying crackle, and the berry flavor comes through in every single slice without making the dough wet or hard to work with.
This recipe uses freeze-dried strawberries, which means you don’t need to wait for strawberry season. The moisture is already removed from them, so all you get is concentrated flavor and a gorgeous rosy color throughout the loaf. It’s a simple ingredients list, a straightforward process, and the kind of bread that disappears fast once it’s sliced.
Ingredients You’ll Need
- 115 g active sourdough starter (½ cup)
- 600 g bread flour (4 cups)
- 400 g water (1½ cups)
- 46 g sugar (¼ cup)
- 1 tsp salt
- 30 g freeze-dried strawberries (1 oz bag)
How To Make Your Strawberry Sourdough Bread
Step 1. Feed your starter. About 8 to 12 hours before you plan to mix the dough, feed your sourdough starter and let it rise until it’s doubled, bubbly, and just starting to fall back down from its peak. This is when it’s most active and ready to use.
Step 2. Crush the freeze-dried strawberries. Pour the freeze-dried strawberries into a zip-lock bag and crush them into a rough powder using a rolling pin or the bottom of a glass. You can keep some small pieces for texture, but a fine powder distributes color and flavor more evenly through the dough.
Step 3. Mix the dough. In a large bowl, combine the water and sourdough starter, stirring until the starter dissolves and the mixture looks milky. Add the bread flour, sugar, salt, and crushed freeze-dried strawberries. Mix everything together using a Danish dough whisk or your hands until a shaggy dough forms and no dry flour remains. Cover and let it rest for 30 minutes.
Step 4. Stretch and fold. Over the next 2 hours, perform 4 sets of stretch and folds, spaced 30 minutes apart. For each set, grab one side of the dough, stretch it up as high as it will go without tearing, and fold it over to the opposite side. Rotate the bowl a quarter turn and repeat four times total. After all four sets, the dough should feel noticeably smoother and more elastic.
Step 5. Bulk ferment. After the stretch and fold sets are complete, cover the bowl and let the dough ferment at room temperature for another 4 to 6 hours, or until it has grown by about 50% and looks airy. The timing will vary depending on how warm your kitchen is.
Step 6. Shape the loaf. Gently turn the dough out onto a lightly floured surface. Shape it into a round boule or an oval batard by folding the edges in toward the center, then flipping it over and using your hands to build surface tension. Transfer it seam-side up into a floured banneton or a bowl lined with a floured kitchen towel.
Step 7. Cold proof. Cover the shaped dough loosely and place it in the refrigerator for 8 to 16 hours. This slow, cold proof develops flavor and makes the dough easier to score cleanly.
Step 8. Preheat your oven. When you’re ready to bake, place your Dutch oven inside the oven and preheat to 500°F (260°C) for at least 45 to 60 minutes. The Dutch oven needs to be scorching hot before the bread goes in.
Step 9. Score and bake. Take the dough out of the refrigerator and flip it carefully onto a piece of parchment paper, seam-side down. Score the top with a sharp lame or razor blade in one confident slash. Lower the dough into the hot Dutch oven using the parchment paper, cover with the lid, and bake for 20 minutes.
Step 10. Remove the lid and finish baking. After 20 minutes, remove the lid and reduce the oven temperature to 450°F (230°C). Continue baking for 20 to 25 more minutes until the crust is deep golden brown and the loaf sounds hollow when tapped on the bottom. Transfer to a wire rack and cool for at least 1 hour before slicing.
Why Freeze-Dried Strawberries Work Better Than Fresh
This is a question I get asked a lot, and it’s worth explaining properly. Fresh strawberries carry a significant amount of water, and when that extra moisture gets added to a sourdough dough, it throws off the hydration and makes shaping a sticky nightmare. The final loaf can turn out dense and gummy instead of airy and chewy.
Freeze-dried strawberries have had all that moisture removed, leaving behind pure concentrated flavor and a bright natural color. When they rehydrate inside the dough, they blend right into the crumb and give you those beautiful pink streaks without compromising the structure.
Another bonus is that you can make this bread any time of year. No waiting for berry season, no worrying about mushy fruit at the bottom of the bowl. A one-ounce bag is typically available at most grocery stores, year-round.
How to Know Your Dough is Ready to Bake
Sourdough can be a little tricky because timing varies so much based on room temperature, the strength of your starter, and the season. Watching the dough carefully matters more than watching the clock.
During bulk fermentation, you’re looking for the dough to increase in volume by about 50%, feel jiggly and light when you shake the bowl, and show visible bubbles on the surface and sides. If you press it gently with a damp finger, it should spring back slowly rather than bouncing back immediately or leaving a permanent indent.
After the cold proof in the fridge, the dough should hold its shape when turned out and feel firm but not stiff. If it spread out flat or looks very slack, it may have overproofed. A slightly underproofed dough is much easier to recover from, so when in doubt, err on the side of less bulk fermentation time.
What to Serve With Strawberry Sourdough Bread
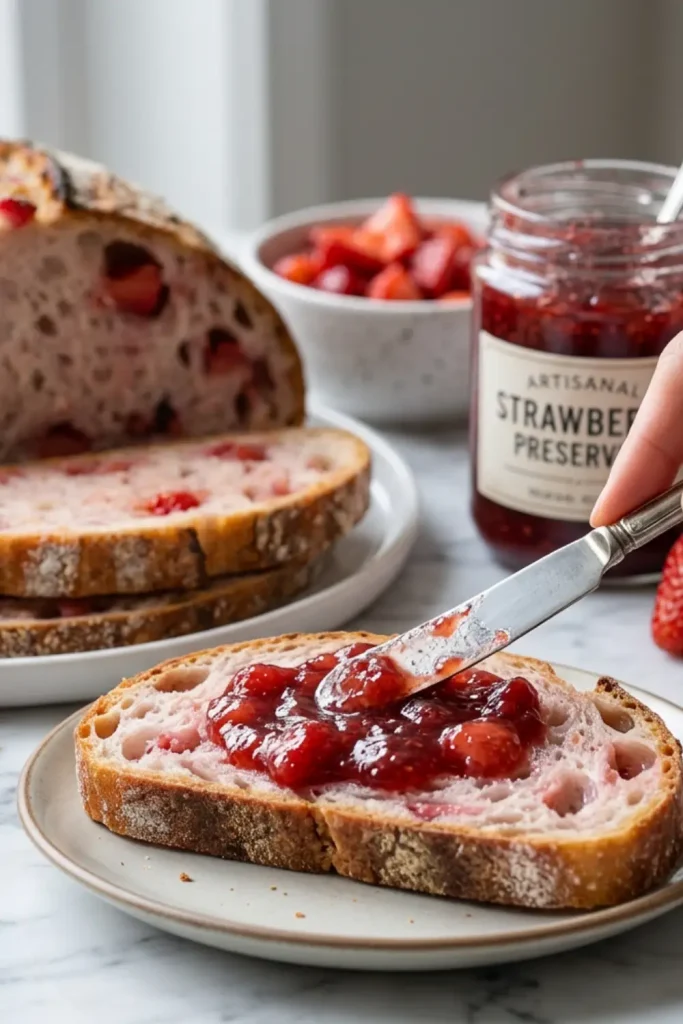
This loaf is lightly sweet with a tender crumb, so it pairs really well with simple toppings that don’t compete with the berry flavor. My personal favorite is a thick spread of salted butter, nothing else needed. The contrast between the salt and the subtle sweetness is just right.
It also works wonderfully as a base for a open-faced cream cheese toast, especially if you add a drizzle of honey or a few fresh slices of berry on top. Toasted slices with a swipe of strawberry jam are completely over the top in the best way. If you want something a bit more savory, mild cheeses like brie or ricotta balance the sweetness nicely.
For a lighter pairing, this bread goes really well with a fresh Strawberry Spinach Salad with Poppy Seed Dressing on the side, making it a lovely spring lunch that doesn’t feel heavy at all.
Storing and Freezing Your Loaf
Once the bread has fully cooled (and I mean fully, give it the full hour), store it cut-side down on a wooden cutting board or wrapped loosely in a clean kitchen towel. Sourdough keeps well at room temperature for 3 to 4 days this way. Avoid sealing it in plastic while it’s fresh, as that traps moisture and softens the crust faster than you’d want.
For longer storage, freezing works great. Slice the entire loaf first, then layer the slices into a freezer bag with pieces of parchment between them so you can pull out individual slices without thawing the whole thing. They thaw in about 20 minutes at room temperature or go straight into the toaster from frozen.
Don’t refrigerate the loaf unless you absolutely have to. The fridge actually accelerates staling in sourdough, which is the opposite of what most people expect.
Pro Tips for a Better Loaf
- Use bread flour, not all-purpose. The higher protein content gives this dough the strength it needs to support the inclusions without collapsing.
- Don’t skip the cold proof. Baking straight from the fridge gives you a cleaner score and better oven spring.
- Make sure your starter passes the float test before using it. Drop a small spoonful in water; if it floats, it’s ready.
- If your kitchen is cold (below 68°F), bulk fermentation will take longer. Set the dough near a warm oven or in a slightly preheated and then turned-off oven to speed things up.
- A Dutch oven is strongly recommended here. It traps steam in the first phase of baking, which is what gives sourdough its signature open crumb and blistered crust.
- Score with confidence. A hesitant, shallow score often drags rather than cuts cleanly. One decisive motion is better.
- The loaf needs to cool completely before cutting. I know it’s hard to wait, but cutting into warm sourdough results in a gummy interior because the starches haven’t fully set yet.
Recipe FAQs
Can I make this strawberry sourdough bread ahead of time?
Yes, and it actually benefits from it. You can shape the loaf and refrigerate it overnight for up to 16 hours before baking. The cold proof slows fermentation, deepens the flavor, and makes the dough easier to handle right out of the fridge.
Can I use fresh strawberries instead of freeze-dried?
This particular recipe is built around freeze-dried strawberries and it’s not recommended to swap in fresh ones directly. Fresh berries add too much moisture to the dough, which makes it sticky, harder to shape, and can result in a denser loaf. If you want to use fresh strawberries, look for a quick bread version instead.
Why did my sourdough spread out flat instead of holding its shape?
This usually means the dough overproofed during bulk fermentation. Once gluten structure breaks down, the dough can’t hold its shape during scoring and baking. The fix is to shorten your bulk ferment time on the next attempt, especially in warmer kitchens. It can also happen if your starter wasn’t active enough, so double-check that it’s properly fed and bubbly before using.
How long does strawberry sourdough bread keep?
At room temperature, properly stored, it stays fresh for about 3 to 4 days. Frozen slices will keep for up to 3 months with no noticeable quality loss.
Print
Strawberry Sourdough Bread
- Total Time: 13 hours
- Yield: 1 loaf (about 10 slices) 1x
- Diet: Vegetarian
Ingredients
- 115 g active sourdough starter (½ cup)
- 600 g bread flour (4 cups)
- 400 g water (1½ cups)
- 46 g sugar (¼ cup)
- 1 tsp salt
- 30 g freeze-dried strawberries (1 oz bag)
Instructions
Step 1. Feed your starter. About 8 to 12 hours before you plan to mix the dough, feed your sourdough starter and let it rise until it’s doubled, bubbly, and just starting to fall back down from its peak. This is when it’s most active and ready to use.
Step 2. Crush the freeze-dried strawberries. Pour the freeze-dried strawberries into a zip-lock bag and crush them into a rough powder using a rolling pin or the bottom of a glass. You can keep some small pieces for texture, but a fine powder distributes color and flavor more evenly through the dough.
Step 3. Mix the dough. In a large bowl, combine the water and sourdough starter, stirring until the starter dissolves and the mixture looks milky. Add the bread flour, sugar, salt, and crushed freeze-dried strawberries. Mix everything together using a Danish dough whisk or your hands until a shaggy dough forms and no dry flour remains. Cover and let it rest for 30 minutes.
Step 4. Stretch and fold. Over the next 2 hours, perform 4 sets of stretch and folds, spaced 30 minutes apart. For each set, grab one side of the dough, stretch it up as high as it will go without tearing, and fold it over to the opposite side. Rotate the bowl a quarter turn and repeat four times total. After all four sets, the dough should feel noticeably smoother and more elastic.
Step 5. Bulk ferment. After the stretch and fold sets are complete, cover the bowl and let the dough ferment at room temperature for another 4 to 6 hours, or until it has grown by about 50% and looks airy. The timing will vary depending on how warm your kitchen is.
Step 6. Shape the loaf. Gently turn the dough out onto a lightly floured surface. Shape it into a round boule or an oval batard by folding the edges in toward the center, then flipping it over and using your hands to build surface tension. Transfer it seam-side up into a floured banneton or a bowl lined with a floured kitchen towel.
Step 7. Cold proof. Cover the shaped dough loosely and place it in the refrigerator for 8 to 16 hours. This slow, cold proof develops flavor and makes the dough easier to score cleanly.
Step 8. Preheat your oven. When you’re ready to bake, place your Dutch oven inside the oven and preheat to 500°F (260°C) for at least 45 to 60 minutes. The Dutch oven needs to be scorching hot before the bread goes in.
Step 9. Score and bake. Take the dough out of the refrigerator and flip it carefully onto a piece of parchment paper, seam-side down. Score the top with a sharp lame or razor blade in one confident slash. Lower the dough into the hot Dutch oven using the parchment paper, cover with the lid, and bake for 20 minutes.
Step 10. Remove the lid and finish baking. After 20 minutes, remove the lid and reduce the oven temperature to 450°F (230°C). Continue baking for 20 to 25 more minutes until the crust is deep golden brown and the loaf sounds hollow when tapped on the bottom. Transfer to a wire rack and cool for at least 1 hour before slicing.
Notes
- Use bread flour, not all-purpose. The higher protein content gives this dough the strength it needs to support the inclusions without collapsing.
- Don’t skip the cold proof. Baking straight from the fridge gives you a cleaner score and better oven spring.
- Make sure your starter passes the float test before using it. Drop a small spoonful in water; if it floats, it’s ready.
- If your kitchen is cold (below 68°F), bulk fermentation will take longer. Set the dough near a warm oven or in a slightly preheated and then turned-off oven to speed things up.
- A Dutch oven is strongly recommended here. It traps steam in the first phase of baking, which is what gives sourdough its signature open crumb and blistered crust.
- Score with confidence. A hesitant, shallow score often drags rather than cuts cleanly. One decisive motion is better.
- The loaf needs to cool completely before cutting. I know it’s hard to wait, but cutting into warm sourdough results in a gummy interior because the starches haven’t fully set yet.
- Prep Time: 20 minutes
- Fermentation Time: 12 hours
- Cook Time: 45 minutes
- Category: Bread
- Method: Baking
- Cuisine: American
Nutrition
- Serving Size: 1 slice
- Calories: 200 kcal
- Sugar: 6 g
- Sodium: 220 mg
- Fat: 5 g
- Saturated Fat: 2 g
- Unsaturated Fat: 3 g
- Trans Fat: 0 g
- Carbohydrates: 35 g
- Fiber: 2 g
- Protein: 6 g
- Cholesterol: 15 mg