
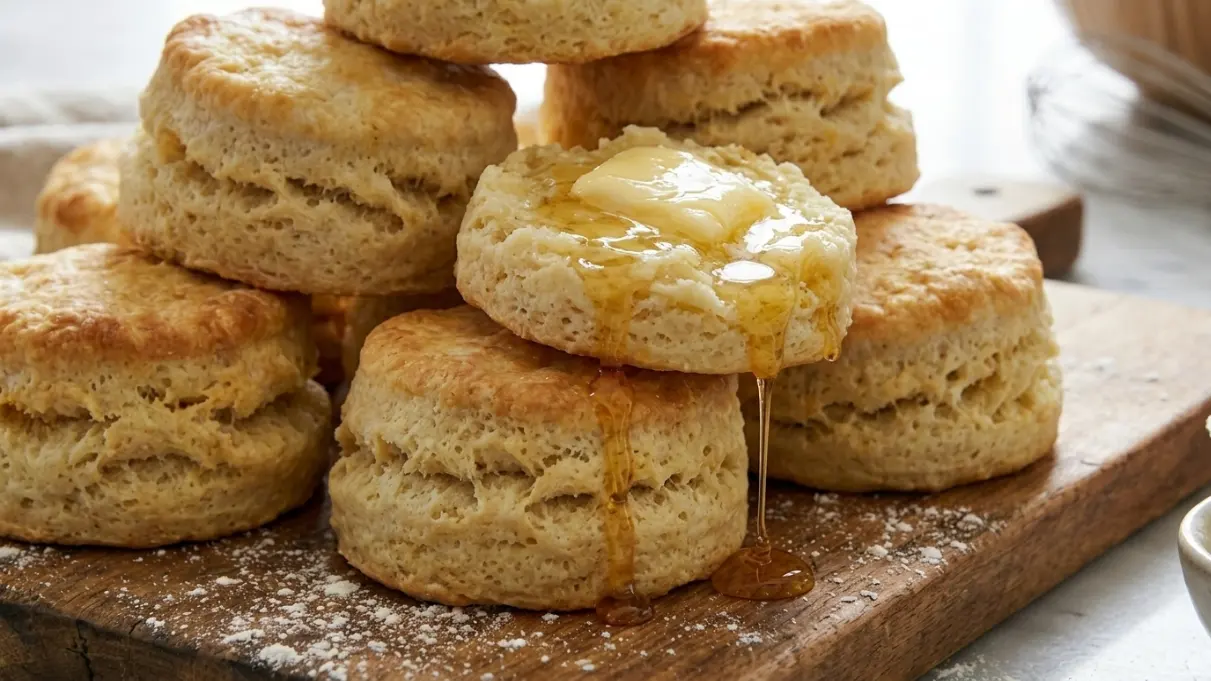
Grandma’s fluffy buttermilk biscuits are the kind of thing that stop you in your tracks the first time you pull them from the oven, golden-topped and steaming, with that unmistakable tang from the buttermilk. I made these on a Sunday morning when everyone was still half-asleep, and by the time the smell hit the hallway, we had a full house at the kitchen table.
These biscuits rise tall, pull apart in layers, and have a tender crumb that you really can’t get from a can. The trick is cold butter, cold buttermilk, and a light hand with the dough. Overwork it and you’ll get hockey pucks. Treat it gently and you’ll get biscuits worth making every weekend.
It’s a short ingredient list that you probably already have on hand, and the whole thing comes together in under 30 minutes. Serve them with butter and jam, alongside sausage gravy, or just eat one plain over the sink because you can’t wait. Any of those options work.
Ingredients
- 1 1/2 tsp salt
- 5 tsp baking powder
- 1/2 tsp baking soda
- 3 cups all-purpose flour (White Lily flour works especially well here)
- 1/2 cup cold unsalted butter or vegetable shortening
- 1 to 1 1/4 cups cold buttermilk
- Melted butter or heavy cream, for brushing the tops
How To Make Grandma’s Buttermilk Biscuits
- Preheat the oven to 425°F (220°C). Line a baking sheet or round baking pan with parchment paper, or lightly grease it. Place the rack in the upper third of the oven so the tops can get golden.
- Whisk the dry ingredients together. In a large bowl, combine the flour, baking powder, baking soda, and salt. Give it a good stir so everything is evenly mixed before you add anything cold.
- Cut in the cold butter. Slice the butter into small cubes, about 1/2 inch each. Work the butter into the flour mixture using your fingers, a pastry cutter, or a fork, pressing and rubbing until the mixture looks like coarse, uneven crumbs. You want pieces ranging from sandy to pea-sized. That variation is what builds layers. Keep everything as cold as possible.
- Add the buttermilk. Pour in 1 cup of cold buttermilk and stir gently with a fork or silicone spatula. Mix just until the dough starts to come together into a shaggy mass. If the dough feels dry and won’t hold together, drizzle in a little more buttermilk, a tablespoon at a time, until it just comes together. Don’t overmix.
- Turn out and fold the dough. Lightly flour your work surface and turn the dough out. Gently pat it into a rough rectangle about 3/4 inch thick. Fold one side in toward the center, then fold the other side over it (like folding a letter). Give it a quarter turn and gently flatten it back out to 3/4 inch. Repeat this folding process two more times. These folds create the flaky layers inside the biscuits.
- Cut the biscuits. Pat or gently roll the dough to about 1 inch thick. Use a 2 to 2.5 inch round biscuit cutter and press straight down without twisting. Place the biscuits on the prepared pan with the sides just barely touching. Gather the scraps, fold them together gently, and cut more biscuits until all the dough is used.
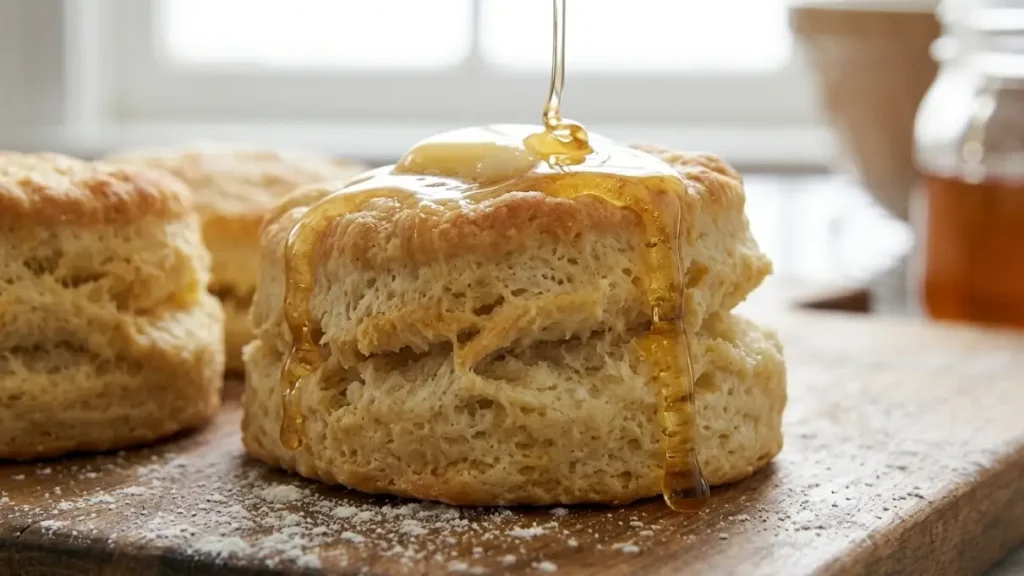
- Brush the tops. Brush each biscuit top with melted butter or a little heavy cream. This is what gives them that beautiful golden crust.
- Bake for 12 to 15 minutes until the tops are deep golden brown and the biscuits have risen tall. Remove from the oven and brush with a little extra melted butter right away if you’d like. Serve warm.
Why Cold Butter Makes All the Difference
If there’s one thing that separates a tall, fluffy buttermilk biscuit from a flat, dense one, it’s the temperature of your butter. Cold butter doesn’t melt into the flour as you mix. Instead, those small solid pieces stay intact and create steam pockets as they hit the hot oven. That steam is exactly what pushes the layers apart and makes the biscuit rise.
Some bakers even freeze their butter and grate it directly into the flour. It sounds a little extra, but it works. Room-temperature butter, on the other hand, blends into the flour too smoothly and you lose all that airy texture. Keep the butter cold right up until the moment you start cutting it in.
The same goes for the buttermilk. Cold liquid keeps the butter from warming up during mixing. It also reacts with the baking soda to give the biscuits a slight lift and a gentle tangy flavor that plain milk just can’t replicate.
The Real Reason You Should Use Buttermilk
Buttermilk does two things at once. The acidity reacts with the baking soda in the recipe, creating carbon dioxide bubbles that help the biscuits rise from the inside. And the fat and tang add a depth of flavor that makes these biscuits taste like something, not just bread.
If you don’t have buttermilk on hand, a common fix is to stir a tablespoon of lemon juice or vinegar into a cup of regular milk and let it sit for about 10 minutes. It curdles slightly and mimics buttermilk reasonably well. That said, the real thing does taste better, and most grocery stores carry it year-round.
If you find yourself with leftover buttermilk after making this recipe, it keeps well in the fridge for a couple of weeks and works beautifully in fluffy raspberry pancakes or apple cinnamon muffins. No waste.
What to Serve With Buttermilk Biscuits
The honest answer is, almost anything. Buttermilk biscuits are one of those things that fit into whatever meal you’re already making.
For breakfast or brunch, they’re hard to beat split open with a smear of salted butter and a spoonful of jam. They’re also a natural alongside scrambled eggs, bacon, or a hearty savory breakfast bowl. If you want something more filling, use them as the base for a biscuit sandwich with a fried egg and a slice of sharp cheddar.
For dinner, fluffy buttermilk biscuits go well with soups and stews. Dip them in a creamy mushroom soup or serve them alongside a classic chicken pot pie and you’ve got a full, comforting meal without any fuss. They also work as a simple side for roasted meats, replacing dinner rolls with something a little more interesting.
How to Store and Reheat Leftover Biscuits
Buttermilk biscuits are honestly at their best the day they’re baked, still slightly warm and soft in the center. But that doesn’t mean leftovers go to waste.
Store cooled biscuits in an airtight container at room temperature for up to two days. For longer storage, place them in a zip-top bag and refrigerate for up to five days. To reheat, wrap them loosely in foil and pop them in a 350°F oven for about 8 to 10 minutes. They won’t be quite as fresh as straight from the oven, but they come pretty close. Avoid the microwave if you can. It makes the texture go soft and gummy rather than keeping that light, tender crumb.
Biscuits also freeze beautifully. Let them cool completely, then freeze in a single layer on a baking sheet before transferring to a bag. Reheat straight from frozen at 350°F for 15 to 18 minutes.
Can You Make the Dough Ahead of Time?
Yes, and it’s one of the best ways to get fresh biscuits on a busy morning without much effort.
After cutting the biscuits, place them on a parchment-lined baking sheet and cover loosely with plastic wrap. Refrigerate overnight, then bake them straight from the fridge the next morning. They may need an extra minute or two in the oven since they’re starting cold, but they’ll rise just fine.
You can also freeze the unbaked, cut biscuits. Arrange them in a single layer on a sheet pan, freeze until solid, then transfer to a freezer bag. Bake from frozen at 425°F, adding 5 to 8 minutes to the baking time. No thawing needed.
Pro Tips for Perfect Biscuits Every Time
- Don’t twist the biscuit cutter when pressing down. A straight press keeps the edges clean so the layers rise up, not out.
- Placing the biscuits so they just barely touch on the pan helps them rise taller since they support each other.
- Work quickly so the heat from your hands doesn’t warm the butter.
- If your kitchen is warm, chill the flour before you start. Cold flour helps maintain the cold fat throughout the process.
- Use White Lily all-purpose flour if you can find it. It’s milled from softer wheat and produces a noticeably more tender biscuit than harder wheat flours.
- For extra flaky layers, do the fold-and-press technique at least three times.
- Don’t be tempted to open the oven early. Let them bake undisturbed for at least 12 minutes before checking.
FAQ
Can I use salted butter instead of unsalted? Yes, you can swap in salted butter if that’s what you have. Just reduce the salt in the recipe to 1 teaspoon instead of 1 1/2 teaspoons to keep the balance right. The biscuits will still turn out well.
Why didn’t my biscuits rise tall? A few things can cause flat biscuits. Overworked dough is the most common culprit since it develops the gluten too much and makes the biscuits tough and low. Butter that’s too warm is another issue. Also check that your baking powder is fresh. Baking powder loses its kick over time, and old leavener means less rise.
Can I freeze baked biscuits? Yes. Let them cool fully, then freeze in a zip-top bag for up to 3 months. Reheat in a 350°F oven for about 15 minutes, wrapped loosely in foil. They won’t be quite as light as fresh-baked, but they’re still very good, especially split and toasted.
Do I need a biscuit cutter or can I use something else? A biscuit cutter works best because it gives you clean, even edges. But a drinking glass with a thin rim works in a pinch. You can also skip the cutting step entirely and drop the dough by large spoonfuls onto the baking sheet for drop biscuits. The texture is a bit more rustic but the flavor is the same.
Print
Grandma’s Fluffy Buttermilk Biscuits
- Total Time: 27 minutes
- Yield: 10 biscuits 1x
- Diet: Vegetarian
Ingredients
- 1 1/2 tsp salt
- 5 tsp baking powder
- 1/2 tsp baking soda
- 3 cups all-purpose flour (White Lily flour works especially well here)
- 1/2 cup cold unsalted butter or vegetable shortening
- 1 to 1 1/4 cups cold buttermilk
- Melted butter or heavy cream, for brushing the tops
Instructions
- Preheat the oven to 425°F (220°C). Line a baking sheet or round baking pan with parchment paper, or lightly grease it. Place the rack in the upper third of the oven so the tops can get golden.
- Whisk the dry ingredients together. In a large bowl, combine the flour, baking powder, baking soda, and salt. Give it a good stir so everything is evenly mixed before you add anything cold.
- Cut in the cold butter. Slice the butter into small cubes, about 1/2 inch each. Work the butter into the flour mixture using your fingers, a pastry cutter, or a fork, pressing and rubbing until the mixture looks like coarse, uneven crumbs. You want pieces ranging from sandy to pea-sized. That variation is what builds layers. Keep everything as cold as possible.
- Add the buttermilk. Pour in 1 cup of cold buttermilk and stir gently with a fork or silicone spatula. Mix just until the dough starts to come together into a shaggy mass. If the dough feels dry and won’t hold together, drizzle in a little more buttermilk, a tablespoon at a time, until it just comes together. Don’t overmix.
- Turn out and fold the dough. Lightly flour your work surface and turn the dough out. Gently pat it into a rough rectangle about 3/4 inch thick. Fold one side in toward the center, then fold the other side over it (like folding a letter). Give it a quarter turn and gently flatten it back out to 3/4 inch. Repeat this folding process two more times. These folds create the flaky layers inside the biscuits.
- Cut the biscuits. Pat or gently roll the dough to about 1 inch thick. Use a 2 to 2.5 inch round biscuit cutter and press straight down without twisting. Place the biscuits on the prepared pan with the sides just barely touching. Gather the scraps, fold them together gently, and cut more biscuits until all the dough is used.
- Brush the tops. Brush each biscuit top with melted butter or a little heavy cream. This is what gives them that beautiful golden crust.
- Bake for 12 to 15 minutes until the tops are deep golden brown and the biscuits have risen tall. Remove from the oven and brush with a little extra melted butter right away if you’d like. Serve warm.
Notes
- Don’t twist the biscuit cutter when pressing down. A straight press keeps the edges clean so the layers rise up, not out.
- Placing the biscuits so they just barely touch on the pan helps them rise taller since they support each other.
- Work quickly so the heat from your hands doesn’t warm the butter.
- If your kitchen is warm, chill the flour before you start. Cold flour helps maintain the cold fat throughout the process.
- Use White Lily all-purpose flour if you can find it. It’s milled from softer wheat and produces a noticeably more tender biscuit than harder wheat flours.
- For extra flaky layers, do the fold-and-press technique at least three times.
- Don’t be tempted to open the oven early. Let them bake undisturbed for at least 12 minutes before checking.
- Prep Time: 15 minutes
- Cook Time: 12 minutes
- Category: Bread
- Method: Baking
- Cuisine: American
Nutrition
- Serving Size: 1 biscuit
- Calories: 210 Sugar
- Sugar: 2g
- Sodium: 420mg
- Fat: 10g
- Saturated Fat: 6g
- Unsaturated Fat: 3g
- Trans Fat: 0g
- Carbohydrates: 26g
- Fiber: 1g
- Protein: g
- Cholesterol: 25mg