
Let me share a breakfast discovery that changed my morning routine forever. One day, while looking for a healthy make-ahead breakfast, I started playing around with chia seeds and ripe bananas. After many tasty experiments, I created this banana chia pudding that’s become my absolute favorite.
It’s creamy, naturally sweet, and keeps me energized through busy mornings. What started as a simple breakfast experiment has turned into my most-shared recipe, with friends and family constantly asking me for the secret to making it just right.
What is Banana Chia Pudding?
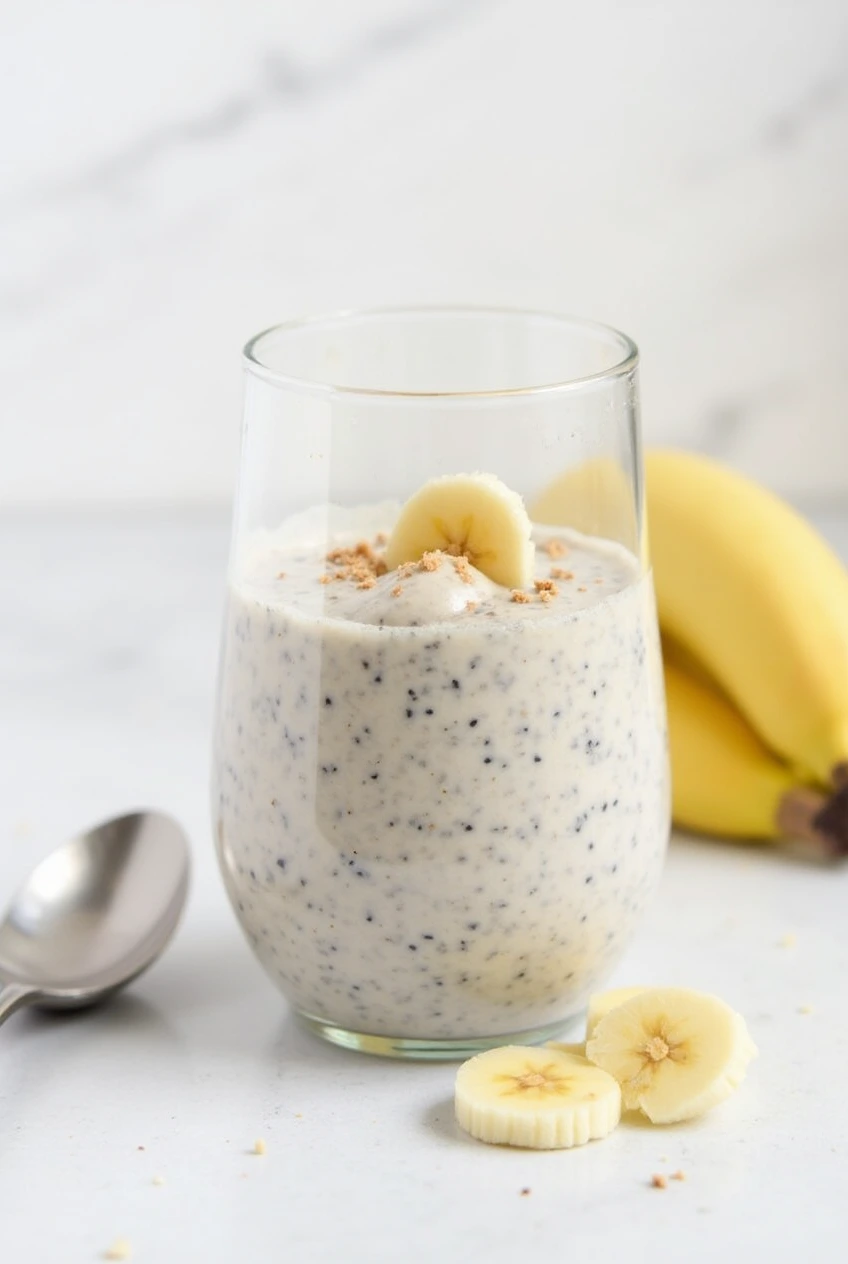
Imagine the creamiest pudding you’ve ever had, but healthier and more filling. My banana chia pudding combines the magic of chia seeds these tiny powerhouses that create an amazing pudding-like texture when soaked in liquid with sweet, ripe bananas. The chia seeds do something incredible overnight: they absorb liquid and create a thick, creamy texture that reminds me of traditional pudding, but with little pockets of texture that make each spoonful interesting.
When I first discovered chia pudding, I was amazed by how these tiny seeds transform into such a satisfying treat. Adding banana gives it natural sweetness and makes it even creamier. It’s like having dessert for breakfast, except this one’s packed with fiber, omega-3s, and potassium. Every time I make it, I think about how something so simple can be so delicious and good for you at the same time.
Ingredients
For the Base Pudding:
- 4 tablespoons chia seeds
- 2 ripe bananas (the spottier, the better!)
- 1½ cups plant-based milk (I love using almond milk)
- 1 teaspoon pure vanilla extract
- 1 tablespoon maple syrup (optional, depending on banana ripeness)
- ¼ teaspoon cinnamon
- Tiny pinch of sea salt
For the Toppings (My Favorite Combination):
- 1 fresh banana, sliced
- ¼ cup granola
- 2 tablespoons chopped nuts (I prefer walnuts or almonds)
- 1 tablespoon hemp seeds
- Drizzle of almond butter
- Extra sprinkle of cinnamon
Recommended Equipment
After making this recipe countless times, here’s what I’ve found most useful in my kitchen:
- Blender or food processor
- Mason jars or glass containers with lids
- Measuring cups and spoons
- Mixing bowl
- Whisk
- Rubber spatula
- Airtight containers for storage
- Potato masher (as a backup if you don’t have a blender)
Instructions
Here’s my step-by-step process that I’ve perfected over many morning preparations:
- First, I peel and mash my ripe bananas in a mixing bowl. The riper they are, the sweeter and more flavorful the pudding will be. I’ve found that really spotty bananas work best they’re sweeter and blend more smoothly.
- In my blender, I combine the mashed bananas with the plant-based milk, vanilla extract, maple syrup (if using), cinnamon, and that tiny pinch of salt. I blend until everything is smooth and creamy, usually about 30-45 seconds.
- Next comes the fun part! I pour the liquid mixture into a bowl and whisk in the chia seeds. I’ve learned to whisk really well at this stage it prevents clumping and ensures every chia seed gets evenly coated.
- Here’s a trick I discovered: I let the mixture sit for about 5 minutes, then give it another good whisk. This extra step makes sure the chia seeds don’t all sink to the bottom.
- I divide the mixture between my mason jars or containers. Each container gets filled about ¾ full to leave room for toppings later.
- The hardest part is waiting! I cover the containers and pop them in the refrigerator overnight, or for at least 4 hours. The chia seeds need this time to work their magic and create that perfect pudding texture.
- In the morning, I give each pudding a gentle stir and check the consistency. If it’s too thick, I add a splash of milk. If it’s too thin (which rarely happens), I add a few more chia seeds and wait another 30 minutes.
- Finally, I add my favorite toppings just before eating. I love the contrast of creamy pudding with crunchy nuts and granola.
Variations And Substitutions
Over time, I’ve experimented with several delicious variations:
Tropical Paradise Version:
I swap half the banana for mango and add a splash of coconut milk instead of almond milk. Sometimes I’ll top it with fresh pineapple and coconut flakes it’s like a vacation in a jar!
Berry Banana Blast:
I add a handful of mixed berries to the blending stage. The color turns out beautiful, and the flavor combination is incredible. Blueberries are my favorite addition.
Chocolate Lover’s Dream:
Adding a tablespoon of cocoa powder and using chocolate plant milk creates a dessert-like pudding that satisfies my sweet cravings. Sometimes I’ll add a few dark chocolate chips on top.
Protein-Packed Version:
When I need extra protein, I stir in a scoop of vanilla protein powder and add an extra splash of milk to maintain the right consistency.
How To Storage
Storage is key to maintaining the perfect texture. Here’s what I’ve learned:
In the refrigerator, my banana chia pudding stays fresh for up to 5 days in airtight containers. I prefer storing it in individual portions it makes grabbing breakfast super easy on busy mornings.
One thing I’ve discovered: the pudding continues to thicken over time. If I’m making it more than a day ahead, I add a little extra liquid at the start.
I always keep the toppings separate and add them just before eating. This keeps everything fresh and maintains different textures nobody likes soggy granola!
Tips for Perfect Banana Chia Pudding
Through countless batches, I’ve picked up some helpful tips:
- Temperature matters more than you might think. I’ve found that room temperature bananas mash more easily and blend more smoothly than cold ones.
- The ripeness of bananas dramatically affects the sweetness. When using super ripe bananas, I often skip the maple syrup entirely. With less ripe bananas, I might add an extra drizzle of sweetener.
- Texture troubles? The ratio of liquid to chia seeds is crucial. If your pudding turns out too thick or thin, adjust the liquid slightly next time. Remember, different plant milks may absorb differently.
- Don’t rush the setting process. While it’s tempting to eat it sooner, giving the pudding a full overnight rest leads to the best texture.
Common Questions
1. Why did my chia seeds clump together?
This used to happen to me too! The solution is double whisking once when you add the seeds, and again after 5 minutes. This prevents the seeds from clumping and ensures even distribution.
2. Can I make a bigger batch for the whole week?
Absolutely! I often make a week’s worth on Sunday night. Just multiply the ingredients, keeping the same ratios. The pudding stays fresh and delicious all week long.
3. My pudding is too thick/thin. How can I fix it?
For too thick pudding, I simply stir in a splash more milk until I reach my desired consistency. If it’s too thin, I add a few more chia seeds and wait another 30 minutes.
Can I use frozen bananas?
Yes! I’ve used frozen bananas many times. Just let them thaw completely and drain off any excess liquid before using. They’re actually perfect for this recipe because they’re usually frozen at peak ripeness.
Nutritional Benefits
Something I love about this recipe is how nutritious it is. The chia seeds are packed with omega-3 fatty acids, fiber, and protein. Bananas add potassium and natural sweetness, while plant-based milk provides calcium and vitamins. When I eat this for breakfast, I feel energized and satisfied until lunchtime.
Seasonal Adaptations
I’ve found ways to enjoy this pudding year-round by adapting the toppings:
- Spring: Fresh berries and mint
- Summer: Peaches and nectarines
- Fall: Sautéed apples and pecans
- Winter: Poached pears and warming spices
This banana chia pudding has become more than just a breakfast it’s my morning ritual. It’s amazing how something so simple can bring so much joy to the start of my day. Whether you’re new to chia puddings or a seasoned pro, I hope you’ll give this recipe a try and make it your own.
The possibilities for customization are endless, and there’s something special about starting your day with a breakfast that’s both delicious and nourishing.
Print
Banana Chia Pudding
- Total Time: 2-4 hours (including chilling)
- Yield: 2 servings 1x
- Diet: Gluten Free
Ingredients
For the Base Pudding:
- 4 tablespoons chia seeds
- 2 ripe bananas (the spottier, the better!)
- 1½ cups plant-based milk (I love using almond milk)
- 1 teaspoon pure vanilla extract
- 1 tablespoon maple syrup (optional, depending on banana ripeness)
- ¼ teaspoon cinnamon
- Tiny pinch of sea salt
For the Toppings (My Favorite Combination):
- 1 fresh banana, sliced
- ¼ cup granola
- 2 tablespoons chopped nuts (I prefer walnuts or almonds)
- 1 tablespoon hemp seeds
- Drizzle of almond butter
- Extra sprinkle of cinnamon
Instructions
- First, I peel and mash my ripe bananas in a mixing bowl. The riper they are, the sweeter and more flavorful the pudding will be. I’ve found that really spotty bananas work best they’re sweeter and blend more smoothly.
- In my blender, I combine the mashed bananas with the plant-based milk, vanilla extract, maple syrup (if using), cinnamon, and that tiny pinch of salt. I blend until everything is smooth and creamy, usually about 30-45 seconds.
- Next comes the fun part! I pour the liquid mixture into a bowl and whisk in the chia seeds. I’ve learned to whisk really well at this stage it prevents clumping and ensures every chia seed gets evenly coated.
- Here’s a trick I discovered: I let the mixture sit for about 5 minutes, then give it another good whisk. This extra step makes sure the chia seeds don’t all sink to the bottom.
- I divide the mixture between my mason jars or containers. Each container gets filled about ¾ full to leave room for toppings later.
- The hardest part is waiting! I cover the containers and pop them in the refrigerator overnight, or for at least 4 hours. The chia seeds need this time to work their magic and create that perfect pudding texture.
- In the morning, I give each pudding a gentle stir and check the consistency. If it’s too thick, I add a splash of milk. If it’s too thin (which rarely happens), I add a few more chia seeds and wait another 30 minutes.
- Finally, I add my favorite toppings just before eating. I love the contrast of creamy pudding with crunchy nuts and granola.
Notes
- Temperature matters more than you might think. I’ve found that room temperature bananas mash more easily and blend more smoothly than cold ones.
- The ripeness of bananas dramatically affects the sweetness. When using super ripe bananas, I often skip the maple syrup entirely. With less ripe bananas, I might add an extra drizzle of sweetener.
- Texture troubles? The ratio of liquid to chia seeds is crucial. If your pudding turns out too thick or thin, adjust the liquid slightly next time. Remember, different plant milks may absorb differently.
- Don’t rush the setting process. While it’s tempting to eat it sooner, giving the pudding a full overnight rest leads to the best texture.
- Prep Time: 5 minutes
- Cook Time: 0 minutes (chilling time: 2-4 hours or overnight)
- Category: Breakfast
- Method: No-cook, Refrigeration
- Cuisine: Healthy
Nutrition
- Serving Size: 1 cup
- Calories: 250-300 kcal
- Sugar: 10-15g
- Sodium: 50mg
- Fat: 10-12g
- Saturated Fat: 1g
- Unsaturated Fat: 8-10g
- Trans Fat: 0g
- Carbohydrates: 35-40g
- Fiber: 8-10g
- Protein: 6-8g
- Cholesterol: 0mg