
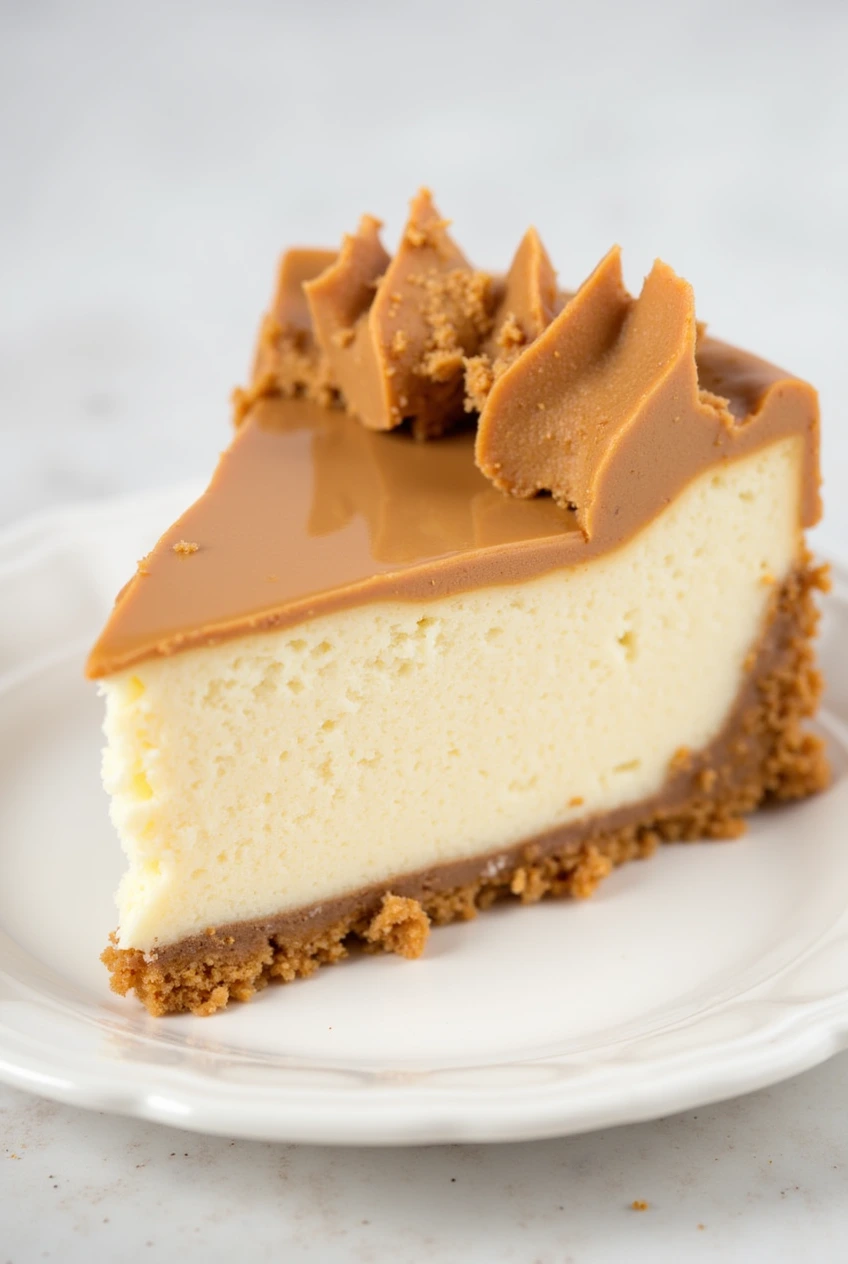
When envisioning desserts that marry creamy textures with bold flavors, this Biscoff Cheesecake immediately comes to mind. It’s rich, indulgent, and utterly irresistible everything a cheesecake should be. The buttery Biscoff cookie crust pairs perfectly with the velvety cream cheese filling swirled with Biscoff spread.
It’s as easy to make as it is delicious. Whether you’re baking for a special occasion or simply craving something sweet, this no-bake recipe is sure to impress.
Why You’ll Love This Biscoff Cheesecake
Here’s why this cheesecake stands out:
- No-Bake Simplicity: No oven required just mix, chill, and serve.
- Perfect Balance of Flavors: The spiced sweetness of Biscoff cookies complements the creamy cheesecake beautifully.
- Customizable: Add extra toppings or adjust sweetness to suit your taste.
- Crowd-Pleasing: This dessert is always a hit at parties, potlucks, or family gatherings.
Have you ever tried combining Biscoff cookies with cheesecake? If not, this recipe will show you how magical it can be.
Recipe Ingredients
COOKIE CRUST
- 250 g Biscoff cookies (blended into fine crumbs)
- 75 g melted butter
CHEESECAKE FILLING
- 400 g cream cheese
- 110 g Biscoff spread
- 100 g powdered sugar
- 1 teaspoon vanilla extract
- 240 g heavy cream
TOPPING
- 150 g Biscoff spread (melted)
- 2 Biscoff cookies (crumbled)
How To Make Biscoff Cheesecake
COOKIE CRUST
- In a food processor, blend the Biscoff cookies until they resemble fine sand. Melt the butter and add it to the food processor, blending until the mixture is evenly combined.
- Line a 22 cm springform cake pan with parchment paper on the bottom and sides. Press the cookie crumbs firmly into the pan using the bottom of a glass, ensuring the crust is evenly packed and pressed up against the sides. Place the crust in the freezer while preparing the filling.
CHEESECAKE FILLING
- Using a hand mixer or stand mixer with the paddle attachment, cream the cream cheese on medium speed for 1 minute until smooth.
- Add the Biscoff spread, powdered sugar, and vanilla extract. Mix on low speed until fully combined and smooth, about 1 minute. Scrape down the sides of the bowl to ensure everything is incorporated.
- In a separate bowl, whisk the heavy cream with a hand mixer or stand mixer until stiff peaks form. Be careful not to over-whip.
- Gently fold the whipped cream into the cream cheese mixture using a rubber spatula. Take care not to deflate the whipped cream. Once combined, pour the filling into the prepared springform pan and smooth the top with an offset spatula.
- Cover the pan with cling film and refrigerate for a minimum of 8–12 hours, or until the cheesecake is set.
TOPPING
- Once the cheesecake is chilled, carefully transfer it to a serving dish.
- Melt the Biscoff spread in the microwave and drizzle it evenly over the top of the cheesecake.
- Crumble the remaining Biscoff cookies and sprinkle them around the edges for a decorative touch.
Expert Tips and Tricks
To ensure your Biscoff Cheesecake turns out perfectly every time, here are some expert tips:
- Use Room-Temperature Ingredients: Softened cream cheese blends more smoothly, preventing lumps in your filling.
- Don’t Overmix: Mix the cheesecake batter only until combined to avoid incorporating too much air, which can cause cracks.
- Chill Properly: Let the cheesecake set in the fridge for at least 8 hours to achieve the perfect texture.
- Press the Crust Firmly: A well-packed crust ensures it holds together when sliced.
Recipe Variations & Possible Substitutions
This recipe is versatile, so feel free to experiment based on your preferences:
- Crust Options: Swap Biscoff cookies for graham crackers or digestive biscuits for a different flavor profile.
- Dairy-Free Version: Use vegan cream cheese and dairy-free Biscoff spread to make this recipe plant-based.
- Add-Ins: Fold chopped nuts, chocolate chips, or caramel drizzle into the filling for added texture and flavor.
- Layering Ideas: Add a thin layer of melted Biscoff spread between the crust and cheesecake for an even richer experience.
Serving and Pairing Suggestions
This Biscoff Cheesecake shines as a standalone dessert, but pairing it with complementary flavors takes it to the next level:
- Beverages: Serve with a cup of coffee, tea, or a glass of cold milk to balance the richness.
- Toppings: Dust with powdered sugar or drizzle melted chocolate over the top for an elegant touch.
- Fruit Pairings: Add fresh berries like raspberries or strawberries for a tart contrast to the sweetness.
- Ice Cream Combo: Pair with a scoop of vanilla ice cream for a warm-meets-cold dessert experience.
Storage and Reheating Tips
Proper storage keeps your Biscoff Cheesecake fresh and delicious:
- Room Temperature: Keep covered for up to 2 days. Avoid leaving it out longer to prevent spoilage.
- Refrigeration: Store in an airtight container for up to 5 days. Chill before serving for best texture.
- Freezing: Wrap individual slices tightly in plastic wrap and freeze for up to 3 months. Thaw overnight in the fridge before enjoying.
- Reviving Leftovers: If the cheesecake loses its freshness, place it in the fridge for 30 minutes to firm up again.
Biscoff Cheesecake FAQs
Q: Can I halve the recipe?
Yes! Simply divide all ingredient amounts by half and use a smaller pan.
Q: Can I substitute the cream cheese?
For best results, stick with full-fat cream cheese. Low-fat versions may affect texture.
Q: Why did my cheesecake crack?
Overmixing or rapid cooling can cause cracks. To prevent this, mix gently and let the bars cool gradually.
Q: Can I use homemade Biscoff spread?
Absolutely! Homemade Biscoff spread adds a personal touch and often has less sugar than store-bought versions.
Troubleshooting Tips
Even experienced bakers run into issues sometimes. Here’s how to fix common problems:
- Lumpy Filling: Strain the mixture through a fine-mesh sieve or blend longer to smooth it out.
- Soggy Crust: Pre-bake the crust for a few extra minutes to ensure it’s fully set before adding the filling.
- Flat Taste: Boost flavor by adding a pinch of salt or a splash of lemon juice to the cheesecake batter.
- Uneven Swirls: Practice swirling gently with a toothpick or skewer. Less is more when creating patterns.
- Bars Sticking to Pan: Line the pan with parchment paper for easy removal.
Conclusion
This Biscoff Cheesecake is a delightful fusion of creamy cheesecake and rich Biscoff spread, offering a dessert that’s both simple to make and utterly indulgent.
Print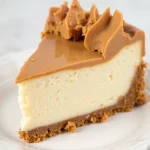
Biscoff Cheesecake
- Total Time: 20 minutes, plus chilling time
- Yield: 12 servings 1x
- Diet: Vegetarian
Ingredients
COOKIE CRUST
- 250 g Biscoff cookies (blended into fine crumbs)
- 75 g melted butter
CHEESECAKE FILLING
- 400 g cream cheese
- 110 g Biscoff spread
- 100 g powdered sugar
- 1 teaspoon vanilla extract
- 240 g heavy cream
TOPPING
- 150 g Biscoff spread (melted)
- 2 Biscoff cookies (crumbled)
Instructions
COOKIE CRUST
- In a food processor, blend the Biscoff cookies until they resemble fine sand. Melt the butter and add it to the food processor, blending until the mixture is evenly combined.
- Line a 22 cm springform cake pan with parchment paper on the bottom and sides. Press the cookie crumbs firmly into the pan using the bottom of a glass, ensuring the crust is evenly packed and pressed up against the sides. Place the crust in the freezer while preparing the filling.
CHEESECAKE FILLING
- Using a hand mixer or stand mixer with the paddle attachment, cream the cream cheese on medium speed for 1 minute until smooth.
- Add the Biscoff spread, powdered sugar, and vanilla extract. Mix on low speed until fully combined and smooth, about 1 minute. Scrape down the sides of the bowl to ensure everything is incorporated.
- In a separate bowl, whisk the heavy cream with a hand mixer or stand mixer until stiff peaks form. Be careful not to over-whip.
- Gently fold the whipped cream into the cream cheese mixture using a rubber spatula. Take care not to deflate the whipped cream. Once combined, pour the filling into the prepared springform pan and smooth the top with an offset spatula.
- Cover the pan with cling film and refrigerate for a minimum of 8–12 hours, or until the cheesecake is set.
Notes
- Use Room-Temperature Ingredients: Softened cream cheese blends more smoothly, preventing lumps in your filling.
- Don’t Overmix: Mix the cheesecake batter only until combined to avoid incorporating too much air, which can cause cracks.
- Chill Properly: Let the cheesecake set in the fridge for at least 8 hours to achieve the perfect texture.
- Press the Crust Firmly: A well-packed crust ensures it holds together when sliced.
- Prep Time: 20 minutes
- Cook Time: 0 minutes (no baking required)
- Category: Dessert
- Method: No-Bake
- Cuisine: International
Nutrition
- Serving Size: 1 slice
- Calories: 479 kcal
- Sugar: 31 grams
- Sodium: 786 milligrams
- Fat: 20 grams
- Saturated Fat: 9 grams
- Unsaturated Fat: 8 grams
- Trans Fat: 0 grams
- Carbohydrates: 40 grams
- Fiber: 1 gram
- Protein: 34 grams
- Cholesterol: 149 milligrams