
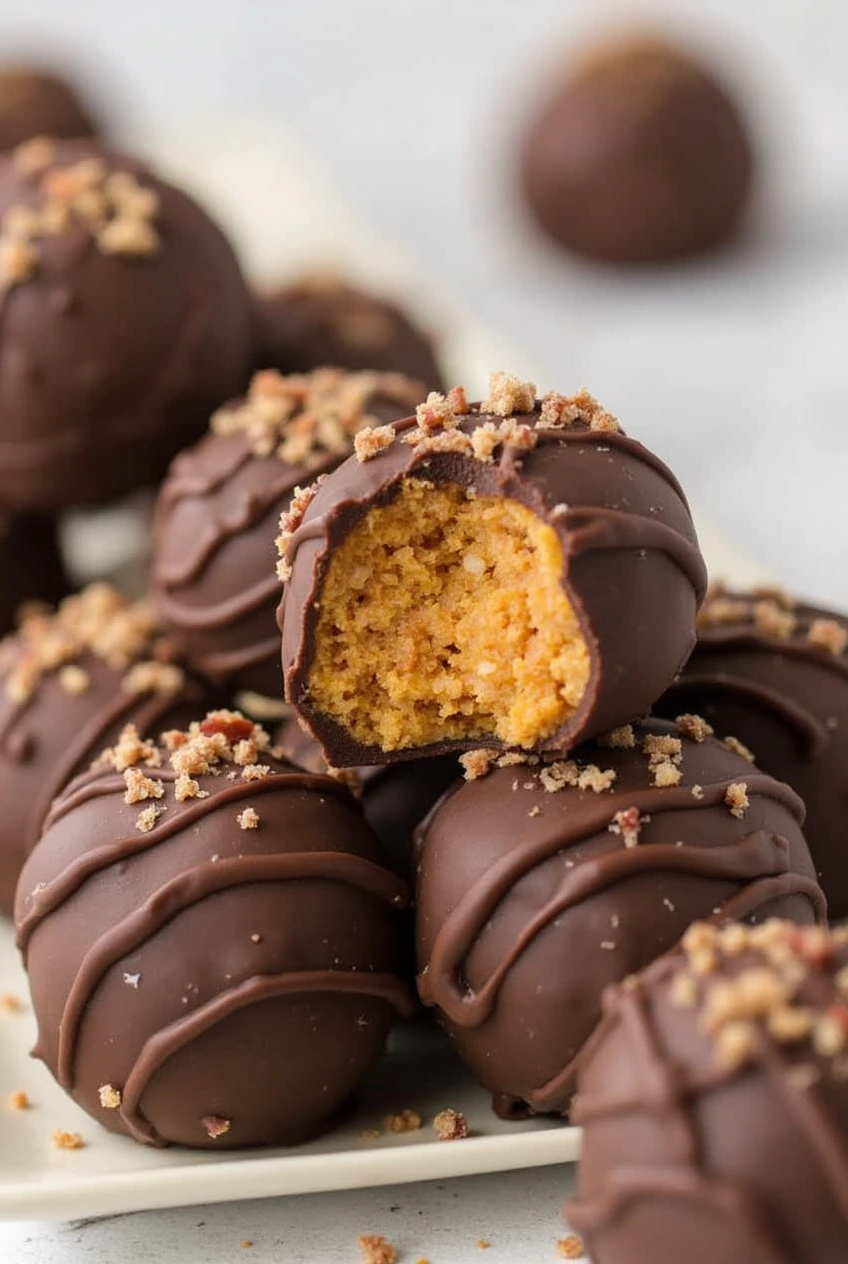
Butterfinger Balls have become a delightful treat in my household, especially during the holiday season. These no-bake confections combine the creamy richness of peanut butter with the satisfying crunch of crushed Butterfinger candy bars, all enveloped in a smooth chocolate coating. They’re not only delicious but also incredibly easy to prepare, making them a favorite for both casual snacking and festive gatherings.
Tools You Need
To whip up a batch of these delectable Butterfinger Balls, you’ll need the following tools:
- Mixing Bowl: A medium-sized bowl (2-3 quarts) works perfectly for combining your ingredients.
- Handheld Mixer: This will help achieve a smooth, creamy mixture.
- Cookie Scoop: A 1-tablespoon scoop ensures uniform ball sizes.
- Baking Sheet: Lining it with parchment paper prevents sticking.
- Microwave-Safe Bowls: Essential for melting the chocolate coating.
- Fork or Candy Dipping Scoop: Useful for dipping the balls into melted chocolate.
Ingredients
Here’s what you’ll need to create approximately 20-25 Butterfinger Balls:
- 1 cup creamy peanut butter: Opt for brands like Jif or Skippy; natural peanut butter can be too oily.
- ¼ cup salted butter, softened: This adds a rich, buttery flavor.
- 1 teaspoon pure vanilla extract: Enhances the overall taste.
- 1 cup powdered sugar: Provides sweetness and helps bind the mixture.
- ¾ cup graham cracker crumbs: Adds texture and a subtle sweetness.
- ½ cup crushed Butterfinger candy: Approximately 6 fun-size bars, plus extra for optional garnish.
- 10 ounces chocolate-flavored almond bark: Divided into 8 ounces for coating and 2 ounces for drizzling.
How To Make Butterfinger Balls
- Mixing the Base: In your mixing bowl, combine the creamy peanut butter, softened butter, and pure vanilla extract. Using a handheld mixer on medium-high speed, blend until the mixture is smooth and well combined, which should take about a minute.
- Incorporating Dry Ingredients: Reduce the mixer speed to medium-low and add the powdered sugar, graham cracker crumbs, and ½ cup of crushed Butterfinger candy. Continue mixing for approximately 1.5 to 2 minutes until all ingredients are thoroughly combined.
- Forming the Balls: Line a baking sheet with parchment paper. Using a 1-tablespoon cookie scoop, portion out the mixture, rolling each scoop into a smooth ball with your hands. Place each ball onto the prepared baking sheet. Once all balls are formed, refrigerate them for at least 30 minutes to firm up.
- Preparing the Chocolate Coating: In a microwave-safe bowl, melt 8 ounces of the chocolate-flavored almond bark. Heat it in the microwave at full power for 45 seconds, stir, and then continue heating in 30-second intervals, stirring after each, until the chocolate is completely melted and smooth.
- Coating the Balls: Remove the chilled balls from the refrigerator. Using a fork or candy dipping scoop, dip each ball into the melted chocolate, ensuring it’s fully coated. Allow any excess chocolate to drip off before placing the coated ball back onto the parchment-lined baking sheet. Repeat this process for all the balls.
- Adding the Drizzle and Garnish: Melt the remaining 2 ounces of almond bark in a small microwave-safe bowl, heating in 30-second intervals and stirring until smooth. Using a fork or a piping bag with a tiny slit, drizzle the melted chocolate over each coated ball. While the drizzle is still wet, sprinkle a pinch of the extra crushed Butterfinger candy on top for garnish.
- Setting the Coating: Once all the balls are decorated, refrigerate them until the chocolate has fully set.
Expert Tips
- Peanut Butter Selection: Avoid using natural peanut butter, as its oil content can prevent the balls from setting properly.
- Chilling is Crucial: Allowing the peanut butter mixture to chill for at least 30 minutes before dipping ensures the balls maintain their shape during the coating process.
- Maintaining Chocolate Temperature: If the chocolate begins to harden during the dipping process, gently reheat it in the microwave in short intervals to maintain a smooth consistency.
Ways to Serve
Butterfinger Balls are versatile and can be enjoyed in various settings:
- Festive Platters: Arrange them on a decorative plate for holiday gatherings or parties.
- Gift Boxes: Pack them in decorative tins or boxes lined with parchment paper as thoughtful homemade gifts.
- Sweet Cravings: Keep a stash in the refrigerator for a quick and satisfying treat whenever the mood strikes.
Storage Tips
To maintain their freshness and texture:
- Refrigeration: Store the Butterfinger Balls in an airtight container in the refrigerator. They will remain fresh for up to two weeks.
- Freezing: For longer storage, place the balls in a freezer-safe container
Frequently Asked Questions
- Can I use unsalted butter instead of salted? Yes, you can use unsalted butter. If you prefer a slight salty contrast to the sweetness, consider adding a pinch of salt to the mixture.
- Is there an alternative to almond bark for coating? Absolutely. You can use chocolate chips or melting wafers as substitutes. Adding a teaspoon of coconut oil can help achieve a smoother coating.
- How do I crush the Butterfinger candy bars? Placing the candy bars in a sealed plastic bag and gently pounding them with a rolling pin works well. Alternatively, pulsing them a few times in a food processor achieves a fine consistency.
- Can I freeze Butterfinger Balls? Yes, these treats freeze well. Place them in a single layer in an airtight container, separating layers with parchment paper, and freeze for up to three months. Thaw in the refrigerator before serving.
Butterfinger Balls
- Total Time: 15 minutes
- Yield: 24 balls 1x
- Diet: Vegetarian
Ingredients
- 1 cup creamy peanut butter: Opt for brands like Jif or Skippy; natural peanut butter can be too oily.
- ¼ cup salted butter, softened: This adds a rich, buttery flavor.
- 1 teaspoon pure vanilla extract: Enhances the overall taste.
- 1 cup powdered sugar: Provides sweetness and helps bind the mixture.
- ¾ cup graham cracker crumbs: Adds texture and a subtle sweetness.
- ½ cup crushed Butterfinger candy: Approximately 6 fun-size bars, plus extra for optional garnish.
- 10 ounces chocolate-flavored almond bark: Divided into 8 ounces for coating and 2 ounces for drizzling.
Instructions
- Mixing the Base: In your mixing bowl, combine the creamy peanut butter, softened butter, and pure vanilla extract. Using a handheld mixer on medium-high speed, blend until the mixture is smooth and well combined, which should take about a minute.
- Incorporating Dry Ingredients: Reduce the mixer speed to medium-low and add the powdered sugar, graham cracker crumbs, and ½ cup of crushed Butterfinger candy. Continue mixing for approximately 1.5 to 2 minutes until all ingredients are thoroughly combined.
- Forming the Balls: Line a baking sheet with parchment paper. Using a 1-tablespoon cookie scoop, portion out the mixture, rolling each scoop into a smooth ball with your hands. Place each ball onto the prepared baking sheet. Once all balls are formed, refrigerate them for at least 30 minutes to firm up.
- Preparing the Chocolate Coating: In a microwave-safe bowl, melt 8 ounces of the chocolate-flavored almond bark. Heat it in the microwave at full power for 45 seconds, stir, and then continue heating in 30-second intervals, stirring after each, until the chocolate is completely melted and smooth.
- Coating the Balls: Remove the chilled balls from the refrigerator. Using a fork or candy dipping scoop, dip each ball into the melted chocolate, ensuring it’s fully coated. Allow any excess chocolate to drip off before placing the coated ball back onto the parchment-lined baking sheet. Repeat this process for all the balls.
- Adding the Drizzle and Garnish: Melt the remaining 2 ounces of almond bark in a small microwave-safe bowl, heating in 30-second intervals and stirring until smooth. Using a fork or a piping bag with a tiny slit, drizzle the melted chocolate over each coated ball. While the drizzle is still wet, sprinkle a pinch of the extra crushed Butterfinger candy on top for garnish.
- Setting the Coating: Once all the balls are decorated, refrigerate them until the chocolate has fully set.
Notes
Peanut Butter Selection: Avoid using natural peanut butter, as its oil content can prevent the balls from setting properly.
Chilling is Crucial: Allowing the peanut butter mixture to chill for at least 30 minutes before dipping ensures the balls maintain their shape during the coating process.
Maintaining Chocolate Temperature: If the chocolate begins to harden during the dipping process, gently reheat it in the microwave in short intervals to maintain a smooth consistency.
- Prep Time: 15 minutes
- Cook Time: 0 minutes (no baking required)
- Category: Dessert
- Method: No-Bake
- Cuisine: American
Nutrition
- Serving Size: 1 ball
- Calories: 150 kcal
- Sugar: 12g
- Sodium: 60mg
- Fat: 9g
- Saturated Fat: 4g
- Unsaturated Fat: 4g
- Trans Fat: 0g
- Carbohydrates: 16g
- Fiber: 1g
- Protein: 2g
- Cholesterol: 5mg