
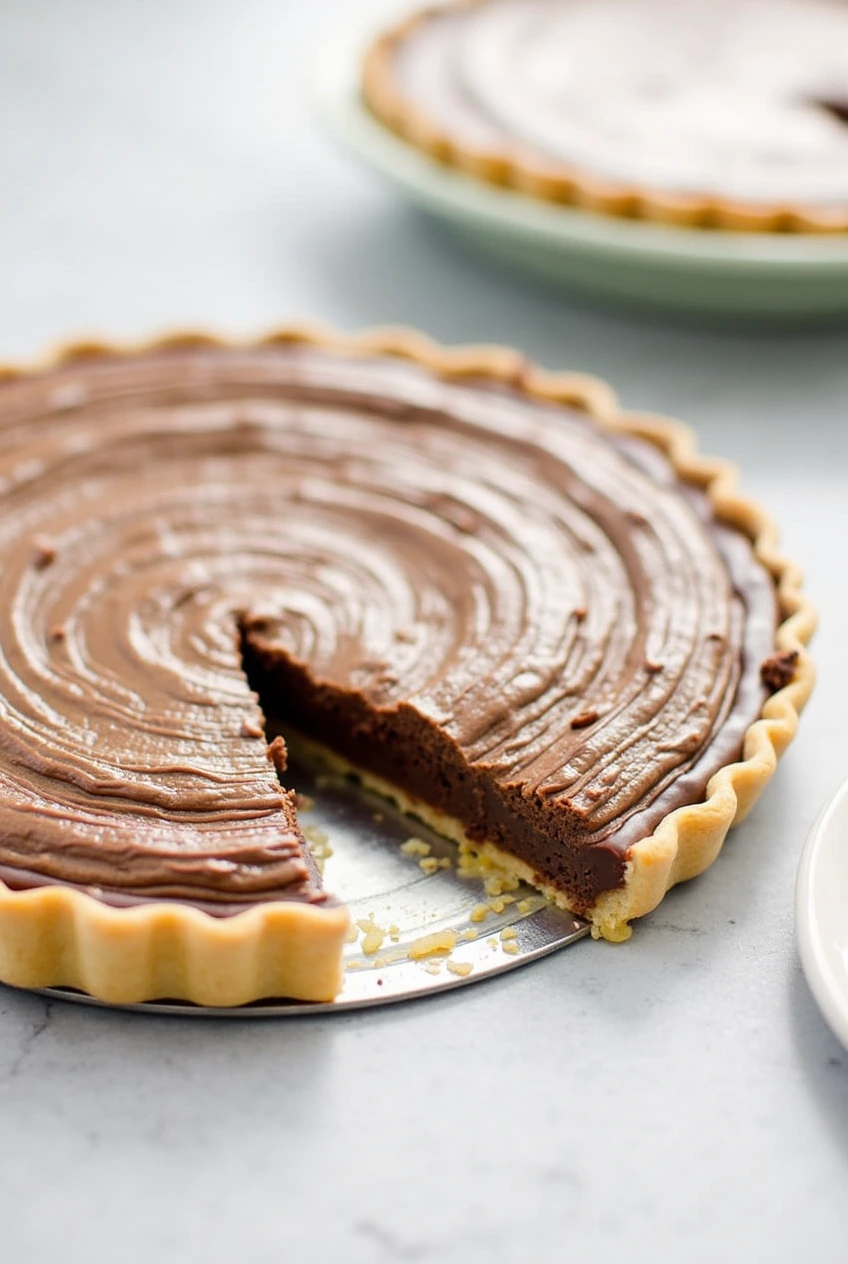
Whenever I think about comfort food, chocolate chess pie always comes to mind. It’s one of those desserts that feels like a warm hug, combining rich, fudgy chocolate with a creamy, custard-like texture that’s absolutely irresistible. Growing up, this pie was a staple at family gatherings, and I’ve carried the tradition of making it for my own family.
What I love most about chocolate chess pie is how deceptively simple it is to prepare. It’s indulgent enough to satisfy a sweet tooth but made with basic pantry staples, making it accessible for everyone. Whether you’re whipping it up for a holiday celebration, a potluck, or just a cozy night in, chocolate chess pie is always a winner.
Why Choose Chocolate Chess Pie?
Rich Chocolate Goodness
Chocolate chess pie delivers a deep, chocolatey flavor that feels decadent but not overly heavy. Its fudgy texture and rich taste make it a go-to for chocolate lovers. There’s just something magical about slicing into this pie and watching the creamy filling hold its shape while melting in your mouth.
Southern Classic Charm
This pie has its roots in the South, where simple ingredients were turned into extraordinary dishes. The “chess” in the name may be a nod to its long history, and it’s a testament to how timeless recipes can be passed down through generations. Making a chocolate chess pie feels like stepping into a piece of culinary history.
Easy to Make
If you’re new to baking, don’t worry this recipe is as simple as it gets. With no complicated techniques or fancy equipment required, it’s perfect for beginners. Even experienced bakers love it for its quick prep and foolproof results. You’ll be amazed at how such basic ingredients come together to create something so spectacular.
Ingredients Overview
Key Ingredients
- Cocoa Powder: The key to the rich chocolate flavor. Opt for high-quality unsweetened cocoa powder for the best results.
- Sugar: Adds sweetness and helps create the pie’s signature custard-like texture.
- Butter: Brings richness and creaminess to the filling.
- Eggs: Essential for binding the ingredients and creating that silky consistency.
- Milk: Adds moisture and balances the richness of the other ingredients.
- Pie Crust: You can use a store-bought crust for convenience or make your own if you’re feeling ambitious.
Optional Add-Ins
- Vanilla Extract: Enhances the overall flavor and adds a warm, sweet aroma.
- Espresso Powder: A small pinch intensifies the chocolate flavor without making it taste like coffee.
- Salt: Balances the sweetness and enhances the chocolate’s richness.
Step-by-Step Recipe Instructions
Prepare the Ingredients
Before you start, gather all your ingredients. Here’s what you’ll need:
- ¾ cup unsweetened cocoa powder
- 2 cups granulated sugar
- ½ cup (1 stick) unsalted butter, melted
- 3 large eggs
- ¾ cup milk (dairy or non-dairy)
- 1 teaspoon vanilla extract (optional)
- 1 unbaked pie crust
Make the Filling
- Preheat your oven to 350°F (175°C).
- In a large mixing bowl, whisk together the sugar and cocoa powder until well combined.
- Add the eggs one at a time, whisking thoroughly after each addition. This helps create a smooth, lump-free filling.
- Gradually pour in the melted butter and milk, stirring until the mixture is smooth and creamy.
- If you’re using vanilla extract or espresso powder, add them now and mix well.
Prepare the Pie Crust
Roll out your pie crust and fit it into a 9-inch pie dish. Crimp the edges for a decorative touch or keep them simple. If you’re using a store-bought crust, let it come to room temperature for easier handling.
Assemble and Bake
- Pour the chocolate filling into the prepared crust, spreading it out evenly with a spatula.
- Place the pie on the center rack of your oven and bake for 45-50 minutes. The edges should be set, and the center should have a slight jiggle.
- Remove the pie from the oven and let it cool completely. As it cools, the filling will firm up to the perfect consistency.
Cool and Serve
Once the pie is fully cooled, slice it into wedges and serve. For an extra indulgent touch, top it with whipped cream, a dusting of powdered sugar, or a handful of fresh berries. It’s also divine with a scoop of vanilla ice cream on the side.
Creative Variations
Double Chocolate Chess Pie
For the ultimate chocolate experience, stir in a handful of mini chocolate chips or chunks before baking. The result? Pockets of melted chocolate in every bite.
Nutty Chocolate Chess Pie
Add a layer of chopped pecans or walnuts to the bottom of the crust before pouring in the filling. The nuts add a delightful crunch and a toasty flavor that pairs beautifully with the rich chocolate.
Spicy Chocolate Chess Pie
Spice things up with a pinch of cayenne pepper or cinnamon in the filling. It adds a subtle warmth and complexity, inspired by Mexican hot chocolate.
Mint Chocolate Chess Pie
A few drops of peppermint extract transform this dessert into a refreshing, holiday-ready treat. Garnish with crushed candy canes or a sprig of mint for a festive touch.
Why Chocolate Chess Pie Stands Out
Timeless Appeal
There’s something magical about a dessert that’s been loved for generations. Chocolate chess pie has stood the test of time, and it’s easy to see why. Its simple ingredients and incredible flavor make it a dessert that never goes out of style.
Perfect for Any Occasion
Whether you’re celebrating a special event or just want a sweet treat to end the day, chocolate chess pie fits the bill. It’s equally at home on a holiday table as it is at a casual backyard barbecue.
Budget-Friendly
Because it’s made with basic pantry staples, chocolate chess pie is an economical dessert that doesn’t skimp on flavor. You don’t need fancy ingredients to create something truly special.
FAQs About Chocolate Chess Pie
What’s the difference between chess pie and chocolate chess pie?
While traditional chess pie is a custard-based dessert flavored with vanilla or lemon, chocolate chess pie adds cocoa powder to the mix for a rich, chocolatey twist.
Can I use a different crust?
Absolutely! While a traditional pie crust is classic, you can experiment with graham cracker or cookie crusts for a fun variation. Gluten-free crusts also work well for those with dietary restrictions.
How long does chocolate chess pie last?
Stored in an airtight container in the fridge, chocolate chess pie can last up to 4 days. It’s also delicious served cold!
Can I make it ahead of time?
Yes! Chocolate chess pie is a great make-ahead dessert. Prepare it the day before and let it cool completely. Store it in the fridge until you’re ready to serve.
What should I serve with chocolate chess pie?
Whipped cream, a scoop of ice cream, or even a drizzle of caramel sauce are all excellent accompaniments. Pair it with a cup of coffee or a glass of milk for the ultimate indulgence.
Conclusion
Chocolate chess pie is more than just a dessert; it’s a celebration of simple, comforting flavors that bring people together. Whether you’re a seasoned baker or trying your hand at baking for the first time, this recipe is approachable, rewarding, and utterly delicious.
I hope you give it a try and make it your own with some creative variations. Don’t forget to share your experience I’d love to hear how your chocolate chess pie turns out.
Print
Chocolate Chess Pie
Ingredients
- ¾ cup unsweetened cocoa powder
- 2 cups granulated sugar
- ½ cup (1 stick) unsalted butter, melted
- 3 large eggs
- ¾ cup milk (dairy or non-dairy)
- 1 teaspoon vanilla extract (optional)
- 1 unbaked pie crust
Instructions
- Preheat the oven to 350°F (175°C).
- In a large bowl, whisk together sugar and cocoa powder until combined.
- Add eggs one at a time, whisking thoroughly after each addition for a smooth filling.
- Gradually mix in the melted butter and milk until the mixture is smooth and creamy.
- Add vanilla extract, if using, and mix well.
- Roll out the pie crust and place it in a 9-inch pie dish. Crimp or smooth the edges as desired.
- Pour the filling into the prepared crust, spreading it evenly with a spatula.
- Bake for 45-50 minutes or until the edges are set, and the center has a slight jiggle.
- Remove from the oven and cool completely to allow the filling to firm up.
- Slice and serve with whipped cream, powdered sugar, or fresh berries for garnish.