
Chocolate mousse brownies are the ultimate dessert mashup that combines two of my favorite treats into one irresistible package. I’ve been perfecting this recipe for years, and let me tell you, it’s a game-changer for chocolate lovers! The foundation is a rich, fudgy brownie layer that would be delicious on its own, but then I top it with a cloud-like chocolate mousse that takes these brownies to a whole new level of indulgence.
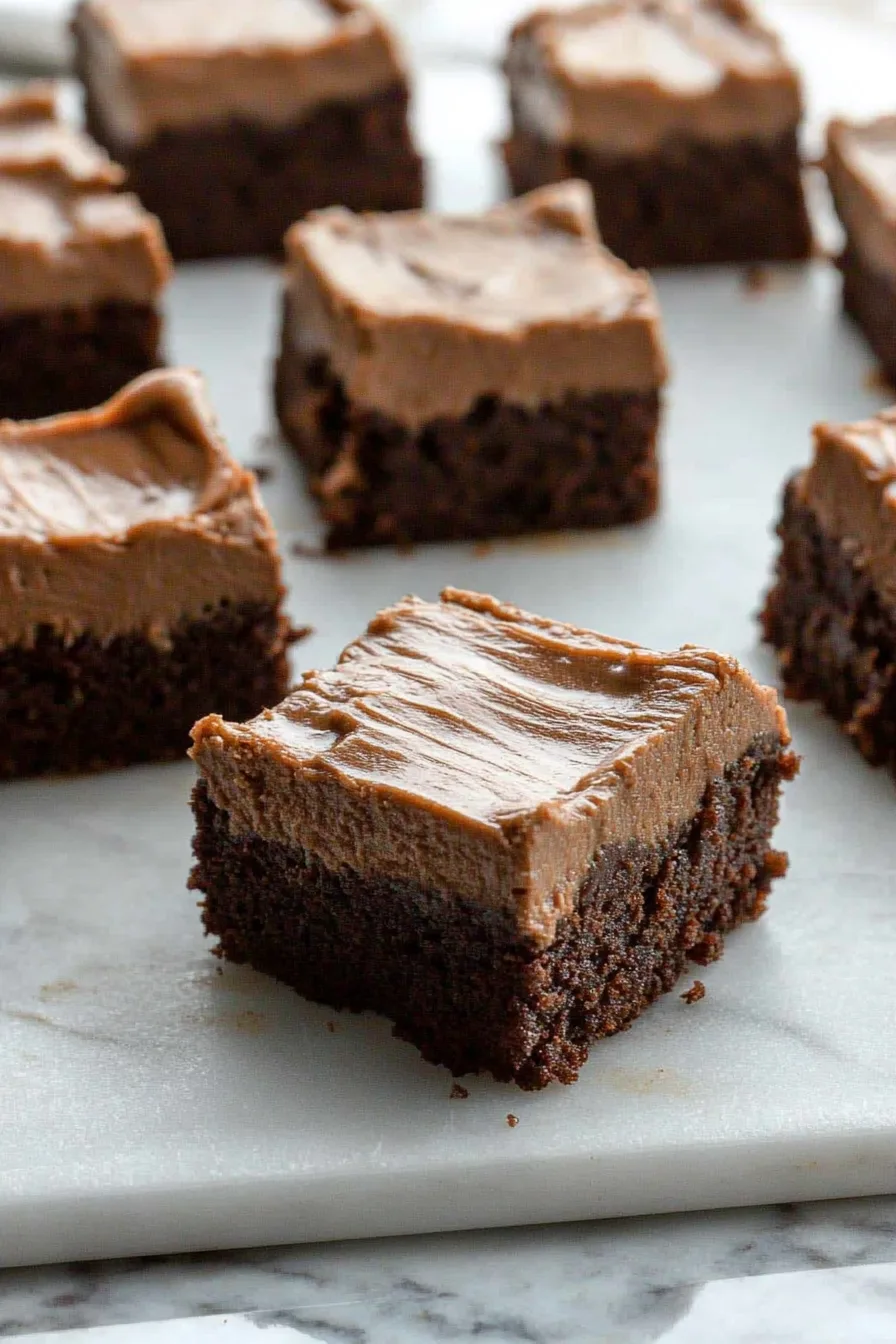
What makes these chocolate mousse brownies so special is the contrast between the dense, chewy brownie base and the light, airy mousse topping. It’s like getting two desserts in one! The first time I served these at a family gathering, my aunt asked if I’d bought them from a fancy bakery. When I told her I made them myself, she immediately demanded the recipe.
Now whenever there’s a potluck or special occasion, I’m always asked to bring my chocolate mousse brownies. They look impressive, taste amazing, and are actually easier to make than you might think!
Why You’ll Love This Recipe
You’re going to absolutely fall in love with these chocolate mousse brownies for so many reasons! First off, they’re a total showstopper without requiring professional baking skills. I can barely frost a cake evenly, but I can make these look bakery-worthy every time.
The texture combination is what makes these brownies truly special. The bottom layer is dense and fudgy, not cakey or dry, while the top layer is light and silky. When you take a bite, you get both experiences at once, which is so much more exciting than a regular brownie.
I love these brownies actually taste better the day after you make them. The flavors deepen and the mousse sets perfectly, which means they’re an ideal make-ahead dessert for parties or holidays. I’ve brought these to countless gatherings, and they’re always the first thing to disappear from the dessert table.
Another reason to love this recipe is its versatility. Sometimes I add a bit of espresso powder to intensify the chocolate flavor, or a dash of peppermint extract during the holidays. You can easily make it your own while keeping the basic structure that makes it so delicious.
Plus, despite looking fancy, these brownies are surprisingly straightforward to make. There’s no complicated techniques or hard-to-find ingredients, just good, honest chocolate decadence that’ll make everyone think you spent hours in the kitchen!
Ingredient For Chocolate Mousse Brownies
For the Brownie Layer:
All-purpose flour (1½ cups): I use regular all-purpose flour here. No need for anything fancy! Make sure to measure it correctly by spooning it into your measuring cup and leveling it off, this prevents dense brownies.
Cornstarch (1 tablespoon): This might seem unusual, but cornstarch is my secret weapon for extra tender brownies. It softens the protein in the flour for a more delicate texture.
Dutch-processed cocoa powder (⅓ cup): I love the deep, rich color and flavor this gives the brownies. Regular cocoa powder works too, but Dutch-processed creates that intense chocolate flavor that makes these brownies special.
Baking powder (½ teaspoon): Just a touch gives a slight lift without making them cakey. We want fudgy, not fluffy!
Kosher salt (¼ teaspoon): Don’t skip the salt! It enhances the chocolate flavor and balances the sweetness.
Eggs (4 large): Using room temperature eggs helps them incorporate better with the butter. I set mine out about 30 minutes before baking.
Granulated sugar (2 cups): This might seem like a lot, but it creates that characteristic crinkly brownie top that we all love.
Unsalted butter (¾ cup): I always use unsalted so I can control the salt level. Make sure it’s at room temperature for proper creaming with the sugar.
Vanilla extract (2 teaspoons): Pure vanilla extract adds depth to the chocolate flavor. I sometimes splurge on the good stuff for these brownies, it’s worth it!
For the Mousse Layer:
Heavy whipping cream (1½ cups, divided): The key to perfect mousse! Make sure it’s COLD for the portion you’ll be whipping it whips up much better that way.
Chocolate chips (1 cup): I typically use semi-sweet, but you can use milk chocolate for a sweeter mousse or dark chocolate for a more intense flavor.
Chocolate curls: These are optional but make the brownies look extra fancy. I sometimes skip them when I’m just making these for family, but always add them for special occasions.
Instructions
- First things first, I preheat my oven to 350°F. This is super important for proper brownie baking! Then I line my 9×13-inch baking dish with parchment paper, leaving some hanging over the edges. This parchment paper “sling” makes it so easy to lift the finished brownies out later.
- For the brownie layer, I start by whisking together 1½ cups of flour, 1 tablespoon cornstarch, ⅓ cup cocoa powder, ½ teaspoon baking powder, and ¼ teaspoon salt in a large bowl. I make sure everything is well mixed with no cocoa powder lumps hiding anywhere.
- Next, I grab my stand mixer with the paddle attachment and add 4 eggs, 2 cups sugar, ¾ cup butter, and 2 teaspoons vanilla. I beat these on medium speed until the mixture looks light and fluffy. This usually takes about 2-3 minutes, and the color changes to a lighter shade which tells me it’s just right.
- With the mixer turned off, I add all my dry ingredients at once. Then I turn the mixer back on low speed and mix until everything is just combined. I’m careful not to overmix here that can make brownies tough!
- I pour this thick, luscious batter into my prepared baking dish, using a spatula to spread it evenly into the corners. Then into the oven it goes for 30-35 minutes. I know they’re done when the edges look set but the center still looks a bit shiny. For super fudgy brownies (my favorite!), I err on the side of underbaking rather than overbaking.
- The hardest part is next waiting for the brownies to cool completely at room temperature! This is essential before adding the mousse layer, so I usually make the brownie base in the morning if I’m serving these for dinner.
- For the mousse layer, I start by heating ½ cup of heavy cream in a microwave-safe bowl for about 50 seconds. Once it’s hot (but not boiling), I add 1 cup of chocolate chips and stir gently. The residual heat from the cream melts the chocolate, and after a minute or two of stirring, I have a smooth, glossy mixture. I set this aside to cool to room temperature.
- While that’s cooling, I pour the remaining 1 cup of cold heavy cream into a medium bowl. Using my hand mixer (or stand mixer with the whisk attachment), I beat the cream until soft peaks form. Then I continue beating until I get stiff peaks when I lift the beater, the cream should stand up firmly.
- Here comes the magic moment! I gently fold the cooled chocolate mixture into the whipped cream using a rubber spatula. I start by adding a small amount of whipped cream to the chocolate to lighten it, then fold in the rest, using a gentle under-and-over motion until it’s evenly combined but still fluffy.
- I spread this cloud-like mousse over my cooled brownies, creating an even layer with swirls and peaks. Sometimes I add chocolate curls on top if I’m feeling fancy. Then the whole thing goes into the refrigerator for at least 2 hours, though overnight is even better.
- When it’s time to serve, I use the parchment paper overhang to lift the entire dessert out of the pan, place it on a cutting board, and cut into squares with a sharp knife that I wipe clean between cuts for perfect edges.
Helpful Tips
For the fudgiest brownie base, I’m careful not to overbake. I start checking at the 28-minute mark by inserting a toothpick in the center it should come out with a few moist crumbs, not completely clean.
When melting the chocolate with the cream for the mousse, I’ve learned to be patient. Sometimes it seems like the chocolate isn’t going to melt, but resist the urge to microwave it again! Just keep stirring gently, and it will eventually become smooth.
The temperature matters for the mousse components. I make sure the chocolate mixture has cooled to room temperature before folding it into the whipped cream. If it’s too warm, it will deflate the whipped cream and ruin that light, airy texture.
If I’m in a hurry, I’ll put the brownie layer in the freezer for about 15 minutes after it’s cooled to room temperature. This speeds up the cooling process without freezing the brownies.
When whipping the cream, I sometimes add a teaspoon of powdered sugar to help stabilize it, especially if I’m making these in hot weather or if they need to sit out for a while at a party.
Storage and Reheating Options
These chocolate mousse brownies keep beautifully in the refrigerator for up to 5 days, though they’ve never lasted that long in my house! I store them in an airtight container with the layers separated by parchment paper to prevent sticking.
For the best flavor and texture, I take them out of the refrigerator about 15-20 minutes before serving. This takes the chill off and allows the brownie layer to soften slightly, making the contrast between the layers even more delightful.
If you’re wondering about freezing, yes, you can! I’ve frozen these brownies for up to a month with great results. I cut them into individual squares first, then wrap each one in plastic wrap and place them in a freezer bag. To thaw, I transfer them to the refrigerator overnight.
I don’t recommend reheating these brownies since it would melt the mousse layer. They’re meant to be enjoyed cold or at cool room temperature. However, if you only want to serve the brownie layer heated (saving the mousse for another use), you can warm individual brownies in the microwave for about 15 seconds.
Recipe Notes
- For a mocha variation, add 1 tablespoon of instant espresso powder to the brownie batter.
- White chocolate chips can be substituted in the mousse for a striking color contrast against the dark brownie.
- Add ½ teaspoon of mint extract to the mousse for chocolate mint brownies, perfect for the holidays!
- Sprinkle the top with sea salt before serving for a sweet-salty combination.
- For extra richness, add ¼ cup of melted chocolate to the brownie batter.
- These brownies can be made gluten-free by substituting a 1:1 gluten-free flour blend.
- For a festive touch, add seasonal sprinkles or colored sugar to the top of the mousse.
- The brownies freeze well for up to 1 month when properly wrapped.
Frequently Asked Questions
Can I make these brownies in advance for a party?
Absolutely! I actually prefer making these a day ahead. The flavors meld together beautifully overnight, and the mousse sets to the perfect consistency. Just cover them well in the refrigerator, and they’ll be ready to wow your guests the next day. I’ve even made them two days in advance with great results. Just wait to add any garnishes like chocolate curls until a few hours before serving for the freshest appearance.
Why did my mousse layer not set properly?
This usually happens for one of two reasons. First, the heavy cream might not have been whipped to stiff enough peaks before folding in the chocolate. Make sure you’re using cold cream straight from the refrigerator and that you whip it until it stands up firmly when you lift the beaters. Second, the chocolate mixture might have been too warm when you folded it in, causing the whipped cream to deflate. Always let the chocolate cool to room temperature first, it should feel barely warm to the touch. If your mousse still seems too soft after refrigeration, pop the brownies in the freezer for 30 minutes before serving to firm them up.
Can I use a brownie mix instead of making the brownie layer from scratch?
You definitely can! I’ve done this in a pinch when I’m short on time, and while the homemade brownies have a better flavor and texture in my opinion, a good quality boxed mix works fine. Just prepare and bake the mix according to the package directions for a 9×13-inch pan. Make sure they’re completely cooled before adding the mousse layer. The chocolate mousse topping is really what makes these special anyway, so your brownies will still be a hit even with this shortcut!
Perfect Chocolate Pairings
These chocolate mousse brownies are divine on their own, but I love serving them with complementary flavors that enhance the chocolate experience. A scoop of vanilla ice cream alongside creates a wonderful temperature and flavor contrast that brings out the richness of the brownies.
Fresh raspberries or strawberries make an excellent accompaniment, adding a bright, fruity note that cuts through the richness. I sometimes even make a quick raspberry sauce by blending raspberries with a touch of sugar.
For drinks, these pair beautifully with coffee or a glass of milk. For adult gatherings, a dessert wine like port or even a bold red wine can create a sophisticated pairing experience.
When I’m serving these as part of a dessert buffet, I like to include some lighter options like fruit-based desserts to balance the richness of these indulgent brownies. Your guests will appreciate the variety, though I’ve noticed these chocolate mousse brownies are always the first to disappear!
Print
Chocolate Mousse Brownies
- Total Time: 2 hours (includes chilling time)
- Yield: 16 brownies
- Diet: Vegetarian
Ingredients
Brownie Layer
- All-purpose flour – 1½ cups
- Cornstarch – 1 tablespoon
- Dutch-processed cocoa powder – ⅓ cup
- Baking powder – ½ teaspoon
- Kosher salt – ¼ teaspoon
- Eggs – 4 large
- Granulated sugar – 2 cups
- Unsalted butter – ¾ cup
- Vanilla extract – 2 teaspoons
Mousse Layer
- Heavy whipping cream – 1½ cups (divided)
- Chocolate chips – 1 cup
- Chocolate curls (optional)
Instructions
- First things first, I preheat my oven to 350°F. This is super important for proper brownie baking! Then I line my 9×13-inch baking dish with parchment paper, leaving some hanging over the edges. This parchment paper “sling” makes it so easy to lift the finished brownies out later.
- For the brownie layer, I start by whisking together 1½ cups of flour, 1 tablespoon cornstarch, ⅓ cup cocoa powder, ½ teaspoon baking powder, and ¼ teaspoon salt in a large bowl. I make sure everything is well mixed with no cocoa powder lumps hiding anywhere.
- Next, I grab my stand mixer with the paddle attachment and add 4 eggs, 2 cups sugar, ¾ cup butter, and 2 teaspoons vanilla. I beat these on medium speed until the mixture looks light and fluffy. This usually takes about 2-3 minutes, and the color changes to a lighter shade which tells me it’s just right.
- With the mixer turned off, I add all my dry ingredients at once. Then I turn the mixer back on low speed and mix until everything is just combined. I’m careful not to overmix here that can make brownies tough!
- I pour this thick, luscious batter into my prepared baking dish, using a spatula to spread it evenly into the corners. Then into the oven it goes for 30-35 minutes. I know they’re done when the edges look set but the center still looks a bit shiny. For super fudgy brownies (my favorite!), I err on the side of underbaking rather than overbaking.
- The hardest part is next waiting for the brownies to cool completely at room temperature! This is essential before adding the mousse layer, so I usually make the brownie base in the morning if I’m serving these for dinner.
- For the mousse layer, I start by heating ½ cup of heavy cream in a microwave-safe bowl for about 50 seconds. Once it’s hot (but not boiling), I add 1 cup of chocolate chips and stir gently. The residual heat from the cream melts the chocolate, and after a minute or two of stirring, I have a smooth, glossy mixture. I set this aside to cool to room temperature.
- While that’s cooling, I pour the remaining 1 cup of cold heavy cream into a medium bowl. Using my hand mixer (or stand mixer with the whisk attachment), I beat the cream until soft peaks form. Then I continue beating until I get stiff peaks when I lift the beater, the cream should stand up firmly.
- Here comes the magic moment! I gently fold the cooled chocolate mixture into the whipped cream using a rubber spatula. I start by adding a small amount of whipped cream to the chocolate to lighten it, then fold in the rest, using a gentle under-and-over motion until it’s evenly combined but still fluffy.
- I spread this cloud-like mousse over my cooled brownies, creating an even layer with swirls and peaks. Sometimes I add chocolate curls on top if I’m feeling fancy. Then the whole thing goes into the refrigerator for at least 2 hours, though overnight is even better.
- When it’s time to serve, I use the parchment paper overhang to lift the entire dessert out of the pan, place it on a cutting board, and cut into squares with a sharp knife that I wipe clean between cuts for perfect edges.
Notes
For a mocha variation, add 1 tablespoon of instant espresso powder to the brownie batter.
White chocolate chips can be substituted in the mousse for a striking color contrast against the dark brownie.
Add ½ teaspoon of mint extract to the mousse for chocolate mint brownies, perfect for the holidays!
Sprinkle the top with sea salt before serving for a sweet-salty combination.
For extra richness, add ¼ cup of melted chocolate to the brownie batter.
These brownies can be made gluten-free by substituting a 1:1 gluten-free flour blend.
For a festive touch, add seasonal sprinkles or colored sugar to the top of the mousse.
The brownies freeze well for up to 1 month when properly wrapped.
- Prep Time: 25 minutes
- Cook Time: 30 minutes
- Category: Dessert
- Method: Baking
- Cuisine: American
Nutrition
- Serving Size: 1 brownie
- Calories: 320 kcal
- Sugar: 26 g
- Sodium: 90 mg
- Fat: 18 g
- Saturated Fat: 11 g
- Unsaturated Fat: 6 g
- Trans Fat: 0.2 g
- Carbohydrates: 35 g
- Fiber: 2 g
- Protein: 4 g
- Cholesterol: 55 mg