
What I love most about Chocolate Whipped Cream is how easy it is to make. You don’t need fancy tools or hours in the kitchen just a few basic ingredients and a little bit of patience.
The result? A velvety, chocolate-infused whipped cream that feels like a hug for your taste buds. And trust me, once you try it, you’ll wonder how you ever lived without it.
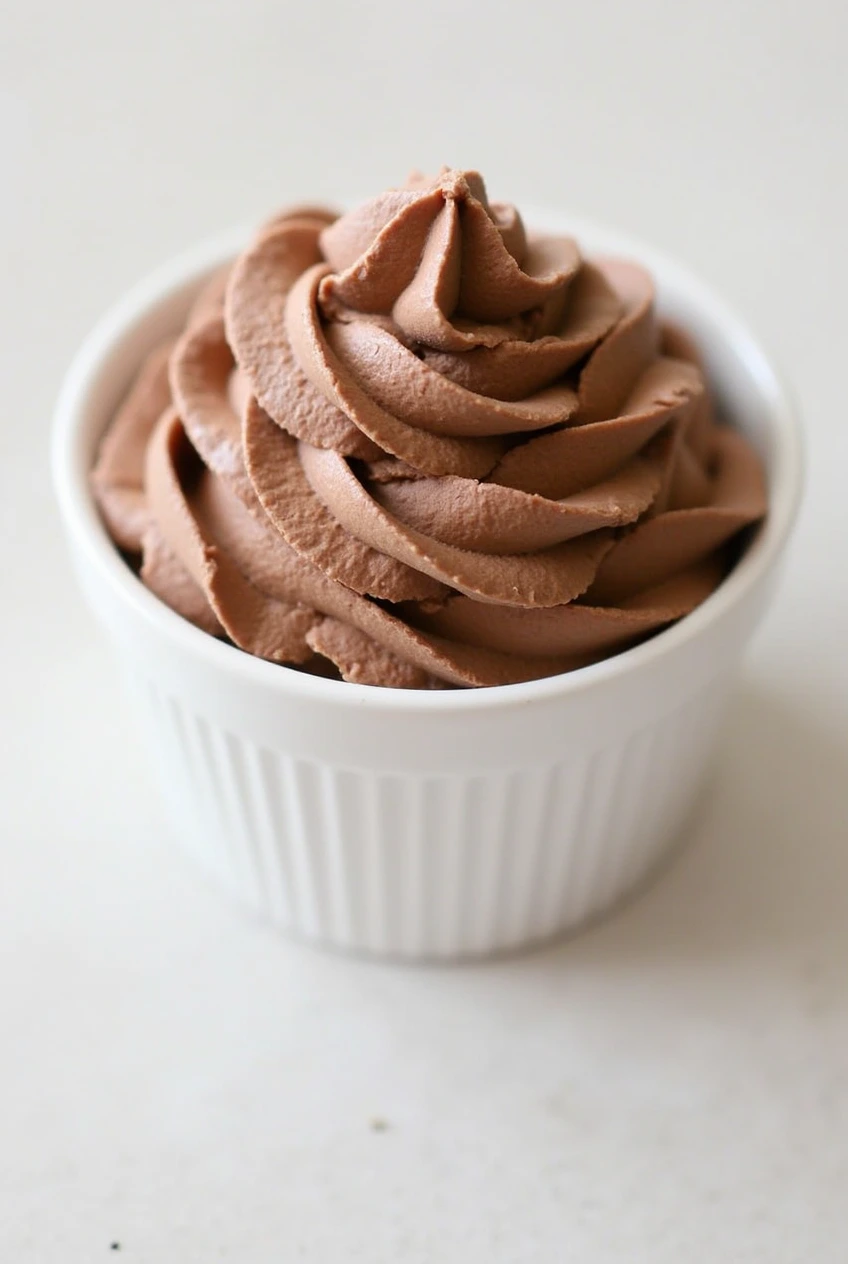
Why You’ll Love This Chocolate Whipped Cream
Let’s talk about why this Chocolate Whipped Cream is worth making. First, it’s incredibly versatile. You can use it as a topping, a filling, or even as a standalone treat. Imagine spreading it between layers of cake or dolloping it onto a steaming mug of hot chocolate. Sounds amazing, right?
Another reason you’ll love this recipe is its simplicity. There are no complicated steps or hard-to-find ingredients. In fact, you probably already have most of what you need in your pantry. Plus, it’s customizable. If you prefer milk chocolate over dark chocolate, you can easily adjust the recipe to suit your taste.
And here’s the best part it’s not just for dessert. I’ve used this Chocolate Whipped Cream on pancakes, waffles, and even as a decadent addition to my morning coffee. It’s proof that a little creativity can turn something ordinary into something extraordinary.
Ingredients for Chocolate Whipped Cream
Before we dive into the process, let’s gather everything you’ll need. Here’s what I use:
- 4 ounces of chocolate (milk, dark, or semi-sweet, depending on your preference)
- 1 cup heavy cream
- 3 tablespoons water
- A pinch of salt (optional, but it enhances the chocolate flavor)
For the finishing touch:
- 1 teaspoon vanilla extract (optional, but it adds a lovely depth of flavor)
These are basic ingredients, and chances are you already have them at home. If not, they’re easy to find at any grocery store. Now, let’s move on to how to make this magical whipped cream.
Instructions for Making Chocolate Whipped Cream
Here’s how I make this Chocolate Whipped Cream step by step:
- Melt the Chocolate: Start by chopping your chocolate into small, even pieces. This helps it melt smoothly. Place the chocolate in a heatproof bowl. Heat the water in a small saucepan until it’s simmering, then pour it over the chocolate. Let it sit for a minute or two, then stir gently until the chocolate is completely melted and smooth.
- Chill the Mixture: Once the chocolate is melted, pop the bowl into the refrigerator. Let it chill for about 30 minutes. This step ensures the mixture is cool enough to whip properly later.
- Whip the Cream: Pour the heavy cream into a mixing bowl. Using a hand mixer or a stand mixer, whip the cream on medium speed until soft peaks form. Be careful not to overwhip it should still look light and fluffy.
- Combine the Chocolate and Cream: Slowly fold the chilled chocolate mixture into the whipped cream. Use a spatula and mix gently to avoid deflating the cream. If you’re adding vanilla extract, stir it in now.
- Chill Again: Transfer the Chocolate Whipped Cream to a container and refrigerate it for at least an hour. This gives it time to firm up and develop its full flavor.
- Serve and Enjoy: Once it’s chilled, give it a quick stir before serving. It’s ready to be used however you like!
Expert Tips and Tricks
Over the years, I’ve picked up a few tricks to make this Chocolate Whipped Cream even better. Here’s what I’ve learned:
- Use High-Quality Chocolate: The flavor of your whipped cream depends heavily on the chocolate you use. Opt for a brand you enjoy eating on its own.
- Don’t Skip the Salt: Even a tiny pinch of salt can balance the sweetness and enhance the chocolate flavor. Don’t worry it won’t taste salty.
- Chill Everything: Cold bowls and beaters help the cream whip up faster and hold its shape longer. Pop them in the fridge for 10–15 minutes before you start.
- Be Patient: Rushing the chilling steps can lead to a runny texture. Take the extra time to let the chocolate and cream set properly.
Recipe Variations & Possible Substitutions
One of the things I love about this Chocolate Whipped Cream is how flexible it is. Here are some ideas to make it your own:
- Switch Up the Chocolate: Try using white chocolate for a sweeter, creamier version. Or go for bittersweet chocolate if you want something richer and less sugary.
- Add Flavorings: A splash of almond extract or a sprinkle of cinnamon can add a fun twist. You could even stir in a tablespoon of instant coffee powder for a mocha flavor.
- Make It Dairy-Free: If you’re avoiding dairy, swap the heavy cream for coconut cream. It whips up beautifully and pairs wonderfully with chocolate.
- Experiment with Sweetness: If you prefer a less sweet whipped cream, reduce the amount of chocolate or skip the vanilla extract.
Serving and Pairing Suggestions
This Chocolate Whipped Cream is incredibly versatile. Here are some of my favorite ways to serve it:
- On Desserts: Dollop it onto slices of pie, cheesecake, or brownies. It’s also fantastic sandwiched between cake layers.
- With Fruit: Fresh strawberries, bananas, or raspberries pair beautifully with this whipped cream. It’s like a grown-up version of chocolate-covered fruit.
- In Drinks: Swirl it into hot chocolate or coffee for a decadent treat. It melts slightly, creating a rich, creamy layer.
- As a Frosting: Spread it onto cupcakes or use it to fill donuts. It’s lighter than traditional buttercream but just as delicious.
Storage and Reheating Tips
If you have leftovers (which is rare in my house!), here’s how to store them:
- Refrigerate: Keep the Chocolate Whipped Cream in an airtight container in the fridge. It should last for up to 3 days.
- Re-whip Before Serving: After sitting in the fridge, the texture might soften slightly. Give it a quick whip with a hand mixer to restore its fluffiness.
- Freeze: While freezing isn’t ideal, you can freeze small portions in airtight containers for up to a month. Thaw in the fridge overnight and re-whip before using.
Recipe FAQs
Here are answers to some common questions I get about this Chocolate Whipped Cream:
- Can I use whipping cream instead of heavy cream?
Yes, you can. Whipping cream has a slightly lower fat content, so the texture might be a bit lighter, but it will still work well. - How do I fix grainy whipped cream?
Graininess usually happens when the chocolate seizes. To prevent this, make sure your chocolate is finely chopped and melted gently. - Can I make this ahead of time?
Absolutely! This whipped cream can be made a day in advance and stored in the fridge.
Troubleshooting Tips
Even the simplest recipes can sometimes go wrong. Here’s how to fix common issues:
- Runny Texture: If your whipped cream doesn’t hold its shape, it might not be cold enough. Chill the bowl and cream before whipping.
- Overwhipped Cream: If the cream turns grainy or curdled, you’ve gone too far. Unfortunately, there’s no saving it, but you can use it in another recipe like ice cream base.
- Chocolate Not Melting Smoothly: If your chocolate seizes, try adding a teaspoon of warm cream or butter to smooth it out.
Final Thoughts
There’s something truly special about Chocolate Whipped Cream. It’s rich, indulgent, and surprisingly easy to make. Whether you’re using it to elevate a dessert or simply enjoying it straight from the spoon, it’s a recipe that never disappoints. I hope you’ll give it a try and see just how versatile and delicious it can be.
Print
CHOCOLATE WHIPPED CREAM
- Total Time: 5 minutes
- Yield: About 2 cups 1x
- Diet: Vegetarian
Ingredients
- 4 ounces of chocolate (milk, dark, or semi-sweet, depending on your preference)
- 1 cup heavy cream
- 3 tablespoons water
- A pinch of salt (optional, but it enhances the chocolate flavor)
For the finishing touch:
- 1 teaspoon vanilla extract (optional, but it adds a lovely depth of flavor)
Instructions
-
Melt the Chocolate : Start by chopping your chocolate into small, even pieces. This helps it melt smoothly. Place the chocolate in a heatproof bowl. Heat the water in a small saucepan until it’s simmering, then pour it over the chocolate. Let it sit for a minute or two, then stir gently until the chocolate is completely melted and smooth.
-
Chill the Mixture : Once the chocolate is melted, pop the bowl into the refrigerator. Let it chill for about 30 minutes. This step ensures the mixture is cool enough to whip properly later.
-
Whip the Cream : Pour the heavy cream into a mixing bowl. Using a hand mixer or a stand mixer, whip the cream on medium speed until soft peaks form. Be careful not to overwhip it should still look light and fluffy.
-
Combine the Chocolate and Cream : Slowly fold the chilled chocolate mixture into the whipped cream. Use a spatula and mix gently to avoid deflating the cream. If you’re adding vanilla extract, stir it in now.
-
Chill Again : Transfer the Chocolate Whipped Cream to a container and refrigerate it for at least an hour. This gives it time to firm up and develop its full flavor.
-
Serve and Enjoy : Once it’s chilled, give it a quick stir before serving. It’s ready to be used however you like!
Notes
-
Use High-Quality Chocolate : The flavor of your whipped cream depends heavily on the chocolate you use. Opt for a brand you enjoy eating on its own.
-
Don’t Skip the Salt : Even a tiny pinch of salt can balance the sweetness and enhance the chocolate flavor. Don’t worry it won’t taste salty.
-
Chill Everything : Cold bowls and beaters help the cream whip up faster and hold its shape longer. Pop them in the fridge for 10–15 minutes before you start.
-
Be Patient : Rushing the chilling steps can lead to a runny texture. Take the extra time to let the chocolate and cream set properly.
- Prep Time: 5 minutes
- Cook Time: 0 minutes
- Category: Topping
- Method: Whipping
- Cuisine: American
Nutrition
- Serving Size: 2 tablespoons
- Calories: 60-80 kcal
- Sugar: 2-4g
- Sodium: 5-10mg
- Fat: 6g
- Saturated Fat: 4g
- Unsaturated Fat: 2g
- Trans Fat: 0g
- Carbohydrates: 3g
- Fiber: 0.5g
- Protein: 0.5g
- Cholesterol: 15mg