
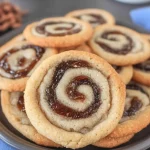
Date Pinwheel Cookies have always caught my eye with their pretty spiral design and that chewy date center. I first tried them during a family baking day, and now I pull out this recipe when I want something a bit different from plain cookies. The dough is straightforward to handle, and the filling comes together quickly on the stove. If you’re looking for a cookie that mixes sweet fruit with a crisp edge, these fit the bill. They remind me of old-school treats that feel homemade without too much fuss.
I like how these cookies use basic pantry items, but the result looks impressive enough to share at a gathering. The dates get cooked down into a thick paste that holds everything together, and the nuts add a nice crunch. Rolling them up takes a little practice, but once you get the hang of it, it’s simple. I’ve made batches for holidays and just-because days, and they always disappear fast.
Equipment
- Large mixing bowl
- Medium saucepan
- Electric mixer or sturdy spoon
- Plastic wrap
- Rolling pin
- Sharp knife
- Baking sheets
- Parchment paper or silicone mats
- Wire cooling rack
Ingredients
- 2 cups all-purpose flour
- ¼ teaspoon baking soda
- ¼ teaspoon salt
- ½ cup butter, softened
- ¾ cup granulated sugar, divided
- ½ cup light brown sugar
- 1 egg
- 1 teaspoon pure vanilla extract
- 8 ounces fresh dates, chopped (approximately 1 cup)
- ½ cup water
- 1 cup chopped pecans or walnuts
How to Make Date Pinwheel Cookies
- Start with the date filling to give it time to cool. Grab your medium saucepan and add the chopped fresh dates, ½ cup water, and ¼ cup of the granulated sugar. Place it over medium heat and stir often as it simmers. The dates will soften and turn into a thick, jam-like mixture after about 8 to 10 minutes. Once it’s ready, mix in the chopped pecans or walnuts. Take it off the heat and let it sit until it’s completely cool—this step is key so it doesn’t make the dough too soft later.
- While the filling cools, work on the dough. In a large mixing bowl, sift or whisk the all-purpose flour, baking soda, and salt. This dry mix will give the cookies their structure, so set it aside nearby.
- In another bowl, take the softened butter and beat it with the remaining ½ cup granulated sugar and the light brown sugar. Use an electric mixer on medium speed for 3 to 4 minutes until it’s creamy and pale. If you’re doing it by hand, it might take a bit longer, but keep going until it’s fluffy.
- Crack in the egg and add the vanilla extract. Beat everything together until it’s smooth and fully incorporated. The egg helps bind the dough, and vanilla gives that warm scent I enjoy.
- Now, slowly fold in the dry ingredients from step 2. Add them in parts and mix just until no streaks of flour remain. The dough should come together into a soft ball—stop mixing as soon as it does to avoid tough cookies.
- Dust a clean surface with a little flour and turn out the dough. Use a rolling pin to shape it into a rectangle roughly 12 inches long by 8 inches wide and about ¼ inch thick. Keep the edges straight for even rolling later.
- Spread the cooled date filling evenly over the entire rectangle of dough. Leave a small ½-inch border around the edges so the filling doesn’t squeeze out when you roll.
- Begin rolling from one of the long sides, like you’re making a jelly roll. Keep it gentle but firm to get a tight spiral. Once rolled, wrap the log snugly in plastic wrap and pop it in the fridge for at least 2 hours. Overnight works even better for clean slices.
- When you’re ready to bake, heat your oven to 375°F and line baking sheets with parchment paper. Take the chilled log out and use a sharp knife to cut it into ¼-inch thick slices. Place each slice cut-side up on the sheets, about 2 inches apart—they’ll spread a little.
- Slide the sheets into the oven and bake for 10 to 12 minutes. Look for lightly golden edges; the centers will still look soft. Pull them out and let them cool on the sheet for 5 minutes before moving to a wire rack. They’ll firm up as they cool.
Storage
I find these Date Pinwheel Cookies hold up well in an airtight container on the counter for about a week. The flavors actually deepen after a couple of days, making them even tastier. If you want to keep them longer, layer them between sheets of wax paper in the fridge for up to two weeks. For freezing, wrap the whole log tightly and store it for up to three months. Just thaw slightly before slicing, or bake from frozen with an extra minute or two. Baked cookies freeze nicely too—up to two months in a freezer bag.
Serving Suggestions
I usually enjoy these straight from the jar with a hot drink in the morning. They pair nicely with coffee’s bitterness or tea’s lightness. For a snack, I plate a few with fresh fruit like apple slices to balance the sweetness. At get-togethers, I stack them on a tiered stand next to cheese and crackers for contrast. Kids like them dunked in milk, and I sometimes add a dusting of powdered sugar for extra appeal. They’re versatile enough for lunchboxes or as a simple dessert after dinner.
Tips for the Best Date Pinwheel Cookies
- Pick soft, plump dates for the filling; if yours are dry, simmer them a minute longer with extra water to rehydrate
- Cool the filling fully before spreading—warm filling can make the dough sticky and hard to roll
- Refrigerate the dough log longer if it’s warm in your kitchen; this keeps the pinwheels from flattening out
- Wipe your knife with a damp cloth between slices for smooth, even cuts without squishing the dough
- Bake one sheet at a time if your oven runs hot; this ensures even browning all around
- If the dough tears while rolling, press it back together gently— the filling will hide any small flaws once baked
Date Pinwheel Cookies FAQs
What if I don’t have fresh dates—can I use dried?
Sure, dried dates work fine. Chop them up and soak in hot water for 10-15 minutes to soften, then drain and proceed with the recipe. You might need to cook the filling a tad longer to thicken it.
How do I fix dough that’s too sticky to roll?
Add a sprinkle of flour to your work surface and hands as you roll. If it’s still tricky, chill the dough ball for 15 minutes first to firm it up without over-flouring, which could make the cookies dry.
Are there nut-free options for the filling?
Yes, skip the nuts or swap them for rolled oats, raisins, or even a bit of shredded coconut. The cookies will still have that great texture and hold their shape well.
Easy Date Pinwheel Cookies
- Total Time: 2 hours 30 minutes
- Yield: 30 cookies 1x
- Diet: Vegetarian
Ingredients
- 2 cups all-purpose flour
- ¼ teaspoon baking soda
- ¼ teaspoon salt
- ½ cup butter, softened
- ¾ cup granulated sugar, divided
- ½ cup light brown sugar
- 1 egg
- 1 teaspoon pure vanilla extract
- 8 ounces fresh dates, chopped (approximately 1 cup)
- ½ cup water
- 1 cup chopped pecans or walnuts
Instructions
- Start with the date filling to give it time to cool. Grab your medium saucepan and add the chopped fresh dates, ½ cup water, and ¼ cup of the granulated sugar. Place it over medium heat and stir often as it simmers. The dates will soften and turn into a thick, jam-like mixture after about 8 to 10 minutes. Once it’s ready, mix in the chopped pecans or walnuts. Take it off the heat and let it sit until it’s completely cool—this step is key so it doesn’t make the dough too soft later.
- While the filling cools, work on the dough. In a large mixing bowl, sift or whisk the all-purpose flour, baking soda, and salt. This dry mix will give the cookies their structure, so set it aside nearby.
- In another bowl, take the softened butter and beat it with the remaining ½ cup granulated sugar and the light brown sugar. Use an electric mixer on medium speed for 3 to 4 minutes until it’s creamy and pale. If you’re doing it by hand, it might take a bit longer, but keep going until it’s fluffy.
- Crack in the egg and add the vanilla extract. Beat everything together until it’s smooth and fully incorporated. The egg helps bind the dough, and vanilla gives that warm scent I enjoy.
- Now, slowly fold in the dry ingredients from step 2. Add them in parts and mix just until no streaks of flour remain. The dough should come together into a soft ball—stop mixing as soon as it does to avoid tough cookies.
- Dust a clean surface with a little flour and turn out the dough. Use a rolling pin to shape it into a rectangle roughly 12 inches long by 8 inches wide and about ¼ inch thick. Keep the edges straight for even rolling later.
- Spread the cooled date filling evenly over the entire rectangle of dough. Leave a small ½-inch border around the edges so the filling doesn’t squeeze out when you roll.
- Begin rolling from one of the long sides, like you’re making a jelly roll. Keep it gentle but firm to get a tight spiral. Once rolled, wrap the log snugly in plastic wrap and pop it in the fridge for at least 2 hours. Overnight works even better for clean slices.
- When you’re ready to bake, heat your oven to 375°F and line baking sheets with parchment paper. Take the chilled log out and use a sharp knife to cut it into ¼-inch thick slices. Place each slice cut-side up on the sheets, about 2 inches apart—they’ll spread a little.
- Slide the sheets into the oven and bake for 10 to 12 minutes. Look for lightly golden edges; the centers will still look soft. Pull them out and let them cool on the sheet for 5 minutes before moving to a wire rack. They’ll firm up as they cool.
Notes
- Pick soft, plump dates for the filling; if yours are dry, simmer them a minute longer with extra water to rehydrate
- Cool the filling fully before spreading—warm filling can make the dough sticky and hard to roll
- Refrigerate the dough log longer if it’s warm in your kitchen; this keeps the pinwheels from flattening out
- Wipe your knife with a damp cloth between slices for smooth, even cuts without squishing the dough
- Bake one sheet at a time if your oven runs hot; this ensures even browning all around
- If the dough tears while rolling, press it back together gently— the filling will hide any small flaws once baked
- Prep Time: 20 minutes
- Chill Time: 2 hours
- Cook Time: 10 minutes
- Category: Cookies
- Method: bake
- Cuisine: American
Nutrition
- Serving Size: 1 cookie
- Calories: 140 kcal
- Sugar: 14 g
- Sodium: 59 mg
- Fat: 6 g
- Saturated Fat: 2 g
- Unsaturated Fat: 4 g
- Trans Fat: 0 g
- Carbohydrates: 21 g
- Fiber: 1 g
- Protein: 2 g
- Cholesterol: 14 mg