
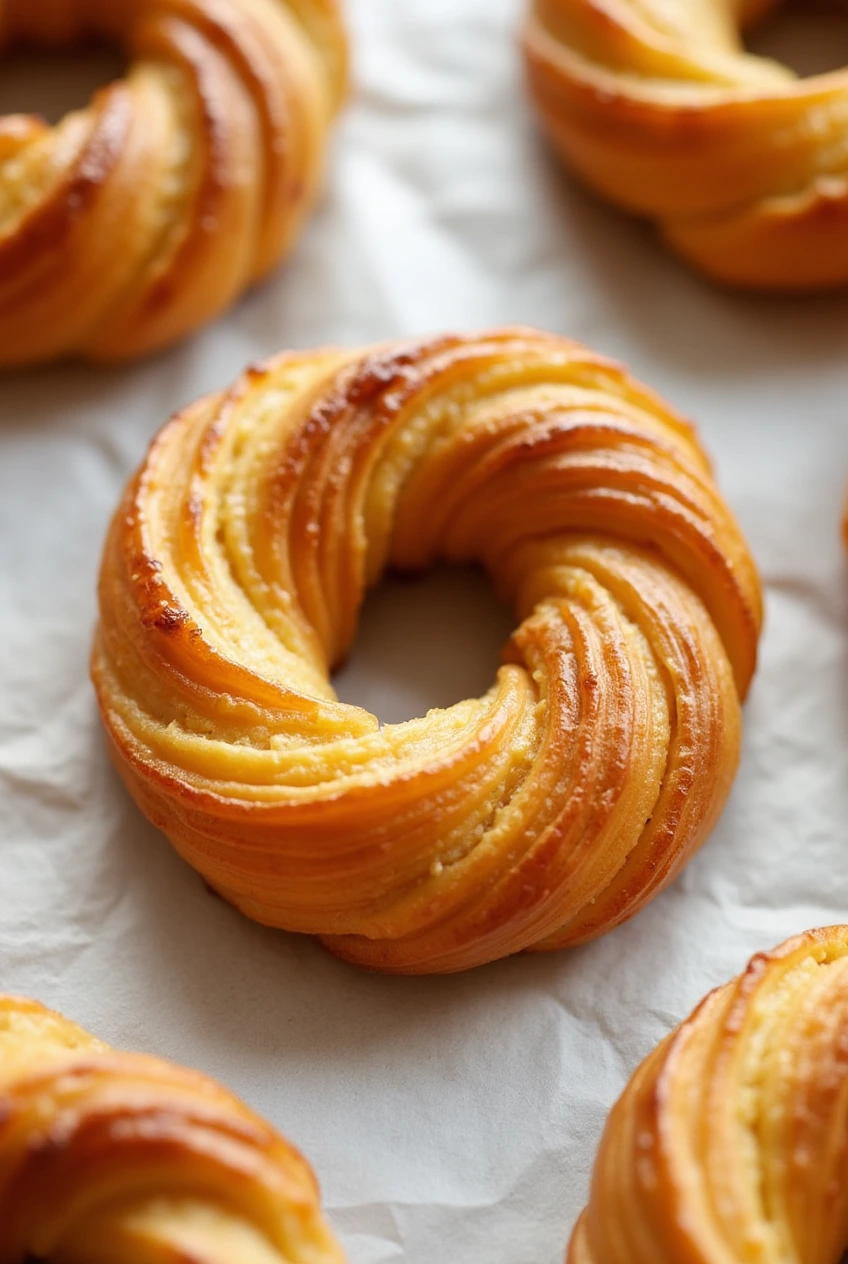
I absolutely love making French Crullers! These light, airy pastries with their distinctive ridged shape and sweet glaze have always held a special place in my heart. When I first started making these delicious French Crullers at home, I was amazed at how something so elegant could come from such a simple choux pastry dough.
The crispy exterior gives way to a tender, almost custard-like interior that practically melts in your mouth. The lemony notes in the dough paired with the sweet vanilla glaze create the perfect balance of flavors that will keep you coming back for more.
Why You’ll Love These French Crullers
You’re going to fall head over heels for these French Crullers for so many reasons! First, they’re incredibly impressive-looking but actually quite manageable to make at home. The ridged pattern created by the star tip gives them that characteristic cruller appearance that will have everyone thinking you bought them from a fancy bakery.
Unlike cake donuts, these French Crullers are light as air thanks to the high moisture content in the choux pastry. They puff up beautifully when fried, creating those delightful airy pockets inside. The hint of lemon zest adds a subtle brightness that elevates them above ordinary donuts.
What I love most about this recipe is how the crullers develop a delicate crispness on the outside while maintaining that dreamy, almost custardy interior. When you bite into one while it’s still slightly warm, with that sweet vanilla glaze creating the perfect finish… trust me, it’s a moment of pure bliss!
Recipe Ingredients
For the French Crullers:
- ½ cup (4 floz/115ml) whole milk
- ½ cup (4 floz/115ml) water
- ½ cup (4oz/115g) butter
- 1 tablespoon granulated sugar
- 1 teaspoon salt
- 1 cup (5oz/142g) all-purpose flour
- 4 large eggs, room temperature
- Zest from 1 lemon
- 6 cups (48 fl oz/1440 ml) vegetable oil (for frying)
For the Vanilla Glaze:
- 2 cups powdered sugar
- 3-4 tablespoons milk
- 1 teaspoon vanilla extract
- Pinch of salt
How To Make French Crullers
- I start by bringing the milk, water, butter, sugar, and salt to a boil in a large, heavy-bottomed saucepan. This creates the base for our choux pastry.
- Once it reaches a boil, I turn off the heat and quickly dump in all the flour at once. Then I immediately begin stirring vigorously. This is where the magic starts to happen!
- I turn the heat back on and continue stirring constantly for 2-3 minutes over medium heat. The dough becomes thick, and I work it by turning and pressing it onto the pan. I know it’s ready when the dough is smooth and a slight film forms on the bottom of the pan.
- After removing it from the heat, I spread the dough out in the bowl of my stand mixer (or a large mixing bowl) to cool quickly. This prevents the eggs from cooking when added.
- After about 15 minutes, when the dough is just slightly warm to the touch, I begin beating in the eggs one at a time, followed by the lemon zest. I make sure each egg is fully incorporated before adding the next. The dough transforms from stiff to smooth and glossy.
- I then transfer the dough to a medium bowl and place cling wrap directly on the surface to prevent a skin from forming. This goes into the refrigerator to chill for at least an hour, though sometimes I prepare it a day ahead and chill for up to 24 hours.
- While the dough is chilling, I cut parchment paper into eighteen 3-inch (7½ cm) squares. These will make handling the delicate French Crullers much easier.
- Once the dough has chilled and firmed up, I place it in a piping bag fitted with a large open star tip. I pipe a 3-inch (7½ cm) circle of dough onto each parchment square, being careful to connect the ends.
- For frying, I pour oil to a depth of 2 inches in a large, heavy-bottomed pot. I clip a thermometer to the side and heat the oil to 350°F (180°C). If I don’t have a thermometer, I heat the oil on medium heat and test with a small piece of dough – it should sizzle and rise to the surface immediately. I set up a wire rack on a baking sheet next to the pot for cooling and a bowl of vanilla glaze nearby.
- When the oil reaches temperature, I carefully lower a cruller (still on its parchment square) into the oil using a slotted spoon. I add one or two more, depending on the size of my pot, making sure not to overcrowd.
- After about a minute, I use metal tongs to gently pull the parchment paper away from each cruller. I fry them for about 2-3 minutes on one side until they’re beautifully golden brown, then flip and fry the other side for another 2-3 minutes.
- When they’re done, I lift them out with the slotted spoon, letting excess oil drip off, then immediately dip them in the vanilla glaze and place on the wire rack to drain and cool. I repeat with the remaining crullers, frying only 2-3 at a time to maintain the oil temperature.
- These French Crullers are absolutely best when served immediately! The contrast between the crisp exterior and tender interior is at its peak when they’re fresh.
Expert Tips and Tricks
Over the years, I’ve picked up some tricks for making perfect French Crullers every time:
The moisture content in choux pastry is crucial. If your dough seems too wet after adding all the eggs, I recommend adding a little more flour, about a tablespoon at a time. Conversely, if it’s too stiff, you can beat in a little extra egg white.
Temperature control is everything with these delicate pastries. I keep a close eye on my oil temperature – if it’s too hot, the crullers will brown too quickly without cooking inside; if it’s too cool, they’ll absorb too much oil and become greasy.
I’ve found that letting the choux dough chill thoroughly makes it much easier to pipe. When I’m in a hurry and try to skip this step, the dough is too soft and the circles don’t hold their shape as well.
The star tip is essential for creating those characteristic ridges that give French Crullers their name and their delightful texture. The grooves allow for more surface area to crisp up during frying and hold onto more of that delicious glaze.
Recipe Variations & Possible Substitutions
My basic French Cruller recipe is wonderful as is, but I love experimenting with variations:
For a chocolate version, I simply add 2 tablespoons of cocoa powder to the flour before incorporating it into the boiling mixture. I also make a chocolate glaze by adding 2 tablespoons of cocoa powder and a little extra milk to the vanilla glaze recipe.
If lemon isn’t your thing, try orange zest instead. Or get fancy with a bit of lavender or rose water for a floral touch – just a quarter teaspoon is enough to add an elegant note without overwhelming.
Can’t have dairy? I’ve successfully made these with plant-based milk and vegan butter with only slight differences in texture.
For a seasonal twist during fall, I sometimes add a quarter teaspoon of ground cinnamon and a pinch of nutmeg to the dough. Paired with a maple glaze, these autumn-inspired French Crullers are absolutely divine!
Serving and Pairing Suggestions
These French Crullers shine as the centerpiece of a special breakfast or brunch. I love serving them with fresh berries on the side to cut through the sweetness.
A perfect cup of coffee is the traditional pairing for French Crullers. The bitterness of the coffee balances the sweetness of the glaze beautifully. For an extra-special touch, try serving them with a coffee flavored with a hint of vanilla or hazelnut.
If you’re feeling indulgent, these make an incredible dessert when served slightly warm with a scoop of vanilla ice cream and a drizzle of caramel sauce.
For a lovely tea-time treat, I pair these with a pot of Earl Grey or a fruity tea that complements the hint of lemon in the pastry.
Storage and Reheating Tips
French Crullers are at their absolute peak of perfection when freshly made. The contrast between the crisp exterior and custardy interior is something special that diminishes with time.
That said, if you do have leftovers, store them in an airtight container in the refrigerator for up to 2 days. They’ll lose some of their crispness, but they’ll still be delicious.
To refresh them, I place them in a preheated 350°F (180°C) oven for about 5 minutes. This helps restore some of the exterior crispness. Just be careful not to leave them in too long or they’ll dry out.
I don’t recommend freezing French Crullers as the delicate texture doesn’t hold up well to freezing and thawing.
Recipe FAQs
Why did my crullers deflate after frying? This usually happens when the oil temperature is too low. I always make sure my oil stays around 350°F (180°C). Another reason could be opening the oven door too early if you’re making baked crullers.
Can I bake these instead of frying? Yes! While traditional French Crullers are fried, you can bake them at 400°F (200°C) for about 20-25 minutes. They won’t be quite as light and crispy, but they’re still delicious and a bit healthier.
Why is my dough too runny? This could happen if you didn’t cook the flour mixture long enough on the stove. Make sure to cook it until it forms a ball that pulls away from the sides of the pan. Also, make sure your eggs aren’t too large.
Can I make the dough ahead of time? Absolutely! The choux dough can be made up to 24 hours in advance and kept in the refrigerator with plastic wrap directly on the surface.
My glaze is too thick/thin. How do I fix it? For too thick glaze, add a teaspoon of milk at a time until you reach the desired consistency. If it’s too thin, add more powdered sugar, a tablespoon at a time.
Troubleshooting Tips
If your French Crullers are coming out dense rather than light and airy, you might be overworking the dough after adding the eggs. Mix just until combined for the best texture.
Crullers turning out too greasy? Your oil is probably too cool. I always let the oil come back up to temperature between batches.
If your piped rings aren’t holding their shape, the dough might be too warm. Pop it back in the refrigerator for 30 minutes to firm up again.
Uneven cooking can happen if your oil isn’t deep enough. I make sure to have at least 2 inches of oil so the crullers can float freely without touching the bottom of the pot.
The perfect French Cruller should have a golden exterior with distinct ridges. If yours are coming out too smooth, check that you’re using a large enough star tip and that your dough is the right consistency.
Conclusion
I hope you enjoy these French Crullers as much as I do. There’s something truly special about biting into a homemade cruller, still slightly warm with that perfect vanilla glaze. It’s one of those simple pleasures that makes any day better!
Print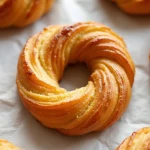
French Crullers
- Total Time: 1 hour and 15 minutes
- Yield: 18 crullers 1x
- Diet: Vegetarian
Ingredients
For the French Crullers:
- ½ cup (4 floz/115ml) whole milk
- ½ cup (4 floz/115ml) water
- ½ cup (4oz/115g) butter
- 1 tablespoon granulated sugar
- 1 teaspoon salt
- 1 cup (5oz/142g) all-purpose flour
- 4 large eggs, room temperature
- Zest from 1 lemon
- 6 cups (48 fl oz/1440 ml) vegetable oil (for frying)
For the Vanilla Glaze:
- 2 cups powdered sugar
- 3–4 tablespoons milk
- 1 teaspoon vanilla extract
- Pinch of salt
Instructions
- I start by bringing the milk, water, butter, sugar, and salt to a boil in a large, heavy-bottomed saucepan. This creates the base for our choux pastry.
- Once it reaches a boil, I turn off the heat and quickly dump in all the flour at once. Then I immediately begin stirring vigorously. This is where the magic starts to happen!
- I turn the heat back on and continue stirring constantly for 2-3 minutes over medium heat. The dough becomes thick, and I work it by turning and pressing it onto the pan. I know it’s ready when the dough is smooth and a slight film forms on the bottom of the pan.
- After removing it from the heat, I spread the dough out in the bowl of my stand mixer (or a large mixing bowl) to cool quickly. This prevents the eggs from cooking when added.
- After about 15 minutes, when the dough is just slightly warm to the touch, I begin beating in the eggs one at a time, followed by the lemon zest. I make sure each egg is fully incorporated before adding the next. The dough transforms from stiff to smooth and glossy.
- I then transfer the dough to a medium bowl and place cling wrap directly on the surface to prevent a skin from forming. This goes into the refrigerator to chill for at least an hour, though sometimes I prepare it a day ahead and chill for up to 24 hours.
- While the dough is chilling, I cut parchment paper into eighteen 3-inch (7½ cm) squares. These will make handling the delicate French Crullers much easier.
- Once the dough has chilled and firmed up, I place it in a piping bag fitted with a large open star tip. I pipe a 3-inch (7½ cm) circle of dough onto each parchment square, being careful to connect the ends.
- For frying, I pour oil to a depth of 2 inches in a large, heavy-bottomed pot. I clip a thermometer to the side and heat the oil to 350°F (180°C). If I don’t have a thermometer, I heat the oil on medium heat and test with a small piece of dough – it should sizzle and rise to the surface immediately. I set up a wire rack on a baking sheet next to the pot for cooling and a bowl of vanilla glaze nearby.
- When the oil reaches temperature, I carefully lower a cruller (still on its parchment square) into the oil using a slotted spoon. I add one or two more, depending on the size of my pot, making sure not to overcrowd.
- After about a minute, I use metal tongs to gently pull the parchment paper away from each cruller. I fry them for about 2-3 minutes on one side until they’re beautifully golden brown, then flip and fry the other side for another 2-3 minutes.
- When they’re done, I lift them out with the slotted spoon, letting excess oil drip off, then immediately dip them in the vanilla glaze and place on the wire rack to drain and cool. I repeat with the remaining crullers, frying only 2-3 at a time to maintain the oil temperature.
- These French Crullers are absolutely best when served immediately! The contrast between the crisp exterior and tender interior is at its peak when they’re fresh.
Notes
Moisture Content in Choux Pastry: If the dough appears too wet after incorporating the eggs, add flour incrementally, one tablespoon at a time. If the dough is too stiff, incorporate additional egg white gradually.
Temperature Control: Monitor oil temperature closely; overheating can cause crullers to brown externally without cooking internally, while underheating can lead to excessive oil absorption and greasiness.
Chilling the Dough: Allowing the choux dough to chill thoroughly facilitates easier piping and helps maintain the crullers’ shape during frying.
Piping with a Star Tip: Utilize a star-shaped piping tip to create the characteristic ridges of French Crullers, enhancing texture and glaze adherence.
- Prep Time: 40 minutes
- Cook Time: 35 minutes
- Category: Dessert
- Method: Deep-frying
- Cuisine: French
Nutrition
- Serving Size: 1 cruller
- Calories: 310 kcal
- Sugar: 7 grams
- Sodium: 260 milligrams
- Fat: 25 grams
- Carbohydrates: 19 grams
- Fiber: 1 gram
- Protein: 4 grams