
Frosted animal cookies have a special place in my heart. As I stand in my kitchen, the sweet aroma of vanilla and butter wafting through the air, I can’t help but smile. I’m making these delightful treats, and suddenly, I’m transported back to my childhood. Remember those little bags of pink and white cookies, covered in sprinkles? They were a staple of my afterschool snacks, and now, I’m recreating that magic in my own home.
When I first decided to make these cookies from scratch, I wasn’t sure if I could capture that nostalgic flavor. But after countless batches (and many happy taste-testers), I’ve perfected a recipe that not only matches but surpasses those store-bought treats. What makes these cookies special? It’s the perfect balance of a buttery, crisp cookie base with a sweet, melt-in-your-mouth frosting. Plus, there’s something undeniably fun about animal-shaped treats!
Ingredients and Equipment
Cookie Ingredients
Let’s gather our ingredients. For the cookies, you’ll need:
– 2 3/4 cups all-purpose flour
– 1 teaspoon baking soda
– 1/2 teaspoon baking powder
– 1 cup softened butter
– 1 1/2 cups white sugar
– 1 egg
– 1 teaspoon vanilla extract
Frosting Ingredients
For the frosting:
– 4 cups powdered sugar
– 1/4 cup milk
– 1 teaspoon vanilla extract
– Food coloring (I use pink and white)
– Sprinkles
I always opt for high-quality butter – it really makes a difference in the flavor. And don’t skimp on the vanilla extract; I use pure vanilla, not imitation. Trust me, your taste buds will thank you!
Equipment Needed
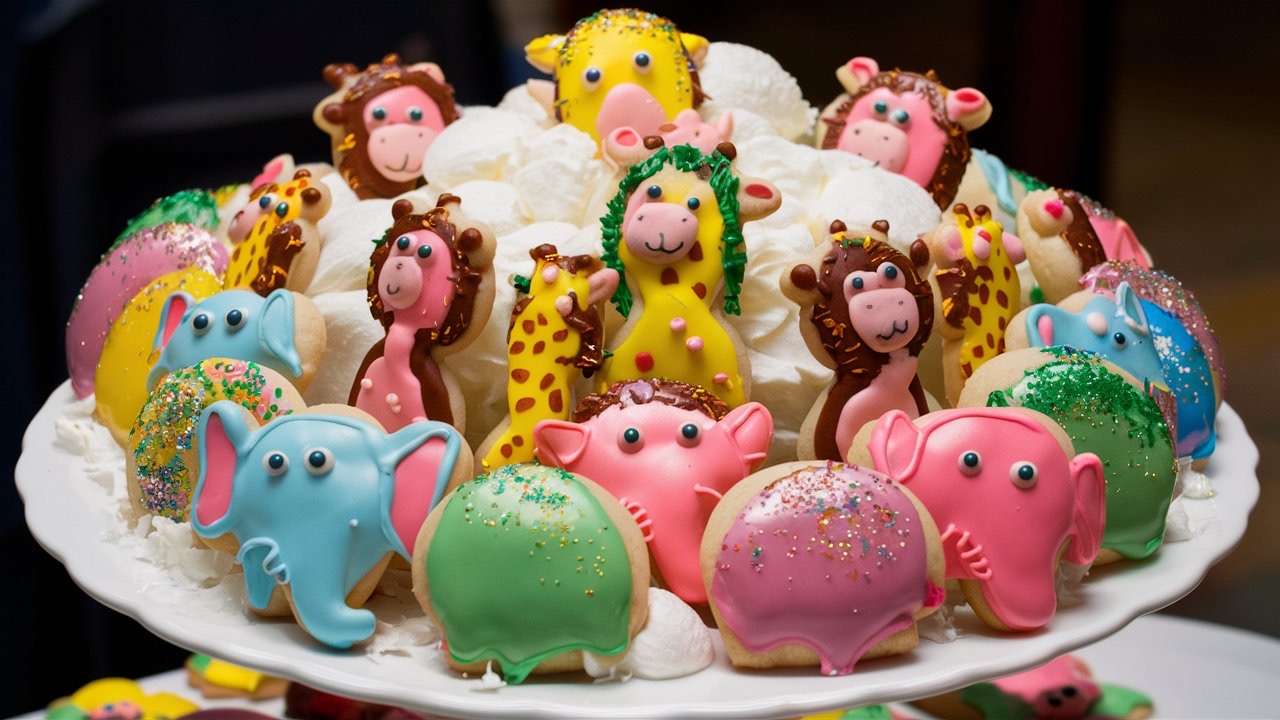
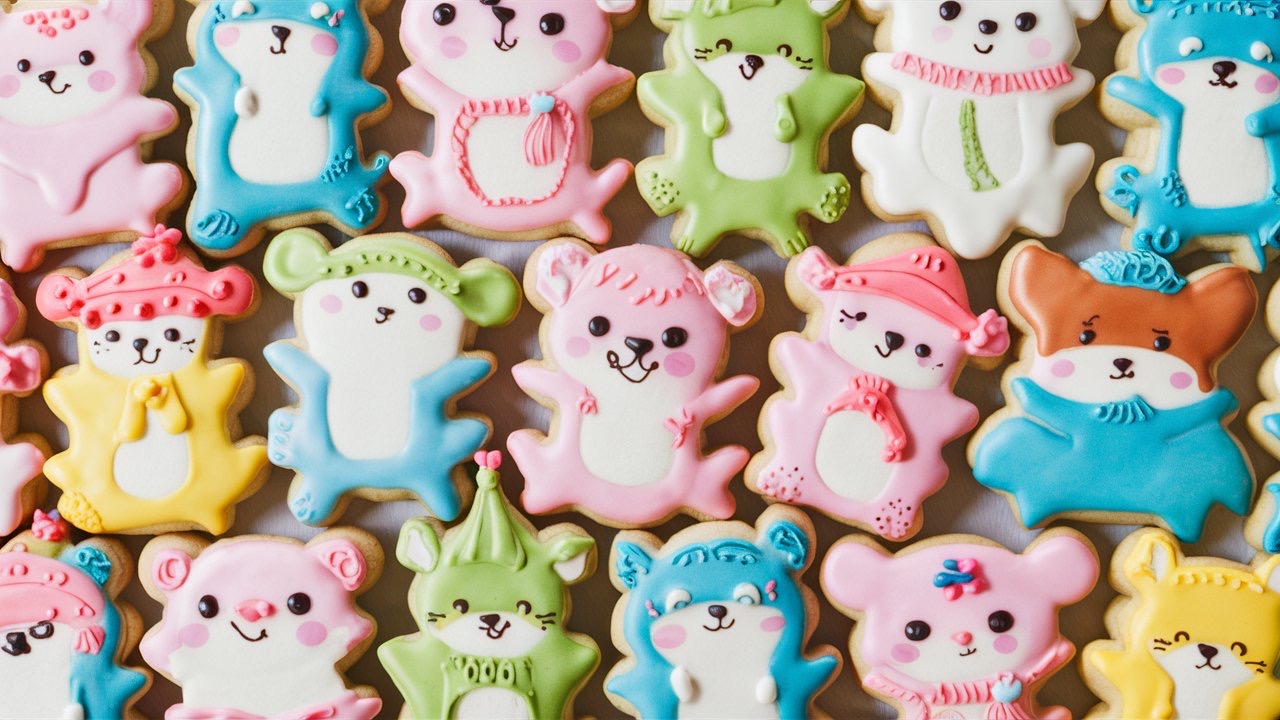
Now, let’s talk equipment. You’ll need the basics: mixing bowls, measuring cups, a hand mixer (or stand mixer if you’re fancy), baking sheets, and parchment paper. But the star of the show? Your animal-shaped cookie cutters! I have a set that’s been passed down through my family, with shapes ranging from elephants to giraffes. Each one tells a story.
Baking Process
Preparing the Dough
Let’s get baking! Cream together the butter and sugar until it’s light and fluffy. This is where I channel my grandmother – she always said, “Cream it until you think you’re done, then cream it for two minutes more.” Add in the egg and vanilla, then gradually mix in the dry ingredients.
Shaping and Baking
Now comes the fun part – rolling out the dough and cutting those adorable animal shapes. I like to roll the dough about 1/4 inch thick. Any thinner, and they’ll be too crisp; any thicker, and they lose that signature crunch. Place them on a parchment-lined baking sheet and pop them in a preheated 375°F oven for 8-10 minutes.
Making the Frosting
While the cookies cool, let’s whip up that luscious frosting. Mix the powdered sugar, milk, and vanilla until smooth. Here’s a pro tip I learned the hard way: add the milk slowly. You can always thin the frosting, but thickening it is trickier. Divide the frosting and tint half of it pink (or whatever color you fancy).
Decorating the Cookies
Decorating is where you can let your creativity shine. I like to frost half the cookies in pink and half in white, then shower them with sprinkles while the frosting is still wet. Last summer, I hosted a cookie decorating party for my niece’s birthday. The kids had a blast, and I’m pretty sure more sprinkles ended up on the floor than on the cookies!
Storage and Gifting
These cookies stay fresh in an airtight container for about a week – if they last that long! In my house, they’re usually gobbled up within days. They make wonderful gifts, too. I’ve packaged them in cute animal-print boxes for baby showers and birthday parties.
Variations and Experiments
Over the years, I’ve experimented with different variations. During the holidays, I’ll switch up the colors to red and green. I’ve also developed a gluten-free version for my nephew with celiac disease. And my kids? They’ve convinced me to try everything from bubblegum flavoring to chocolate chip studded cookies. Some experiments are more successful than others!
Conclusion
As I finish up this batch, carefully placing each frosted cookie on a cooling rack, I’m filled with a sense of satisfaction. These aren’t just cookies; they’re little edible pieces of joy. They’ve become a tradition in my family, a way to create new memories while honoring the past.
I encourage you to try this recipe. Put on some music, gather your loved ones, and have fun with it. Baking should be a joy, not a chore. And when you bite into that first cookie, crisp and sweet with a satisfying crunch of sprinkles, I guarantee you’ll be transported to a place of pure, sugary bliss.
So, are you ready to embark on your own frosted animal cookie adventure? I’d love to hear about your experiences. What shapes will you choose? What colors will you use? The possibilities are as endless as your imagination. Happy baking.
Print
Frosted Animal Cookies: A Sweet Trip Down Memory Lane
Ingredients
For the Cookies:
- 2 3/4 cups all-purpose flour
- 1 teaspoon baking soda
- 1/2 teaspoon baking powder
- 1 cup unsalted butter (softened)
- 1 1/2 cups white sugar
- 1 egg
- 1 teaspoon vanilla extract
For the Frosting:
- 4 cups powdered sugar
- 1/4 cup milk
- 1 teaspoon vanilla extract
- Food coloring (pink, white, or your choice)
- Sprinkles (for decoration)
Instructions
1. Prepare the Dough:
- Preheat the oven to 375°F (190°C) and line baking sheets with parchment paper.
- Cream the softened butter and white sugar together in a large bowl using a mixer until light and fluffy (about 2 minutes). This step is key to achieving the right texture.
- Add the egg and vanilla extract, mixing until fully incorporated.
- Gradually add the dry ingredients (flour, baking soda, and baking powder) to the wet mixture, mixing until just combined.
2. Shape and Bake:
- Roll the dough out on a floured surface to about 1/4 inch thick. This ensures a crisp yet tender cookie.
- Use animal-shaped cookie cutters to cut out the dough into fun shapes (elephants, giraffes, lions, etc.).
- Place the shaped cookies on the prepared baking sheets, spaced about 1 inch apart.
- Bake in the preheated oven for 8-10 minutes, or until the edges of the cookies just start to turn golden. Let the cookies cool on the baking sheets for a few minutes before transferring them to a wire rack to cool completely.
3. Prepare the Frosting:
- While the cookies are cooling, make the frosting. In a large bowl, combine the powdered sugar, milk, and vanilla extract. Mix until smooth and creamy.
- Tip: Add the milk gradually to avoid making the frosting too runny.
- Divide the frosting into separate bowls and add food coloring to each (e.g., pink and white) to create a colorful assortment for decorating.
4. Decorate the Cookies:
- Once the cookies are fully cooled, use a spatula or knife to frost them with your colored frosting.
- Sprinkle with colorful sprinkles while the frosting is still wet to ensure they stick. Let your creativity shine by mixing colors or creating patterns.
Notes
- For the best flavor, use high-quality butter and pure vanilla extract. The richness of these ingredients really makes a difference in the taste.
- The dough is best when rolled out to a consistent thickness. Too thin, and the cookies will be too crisp; too thick, and they may lose their signature crunch.
- The frosting can be a bit tricky to get the right consistency. If it’s too thick, add a little more milk; if it’s too thin, add more powdered sugar.