
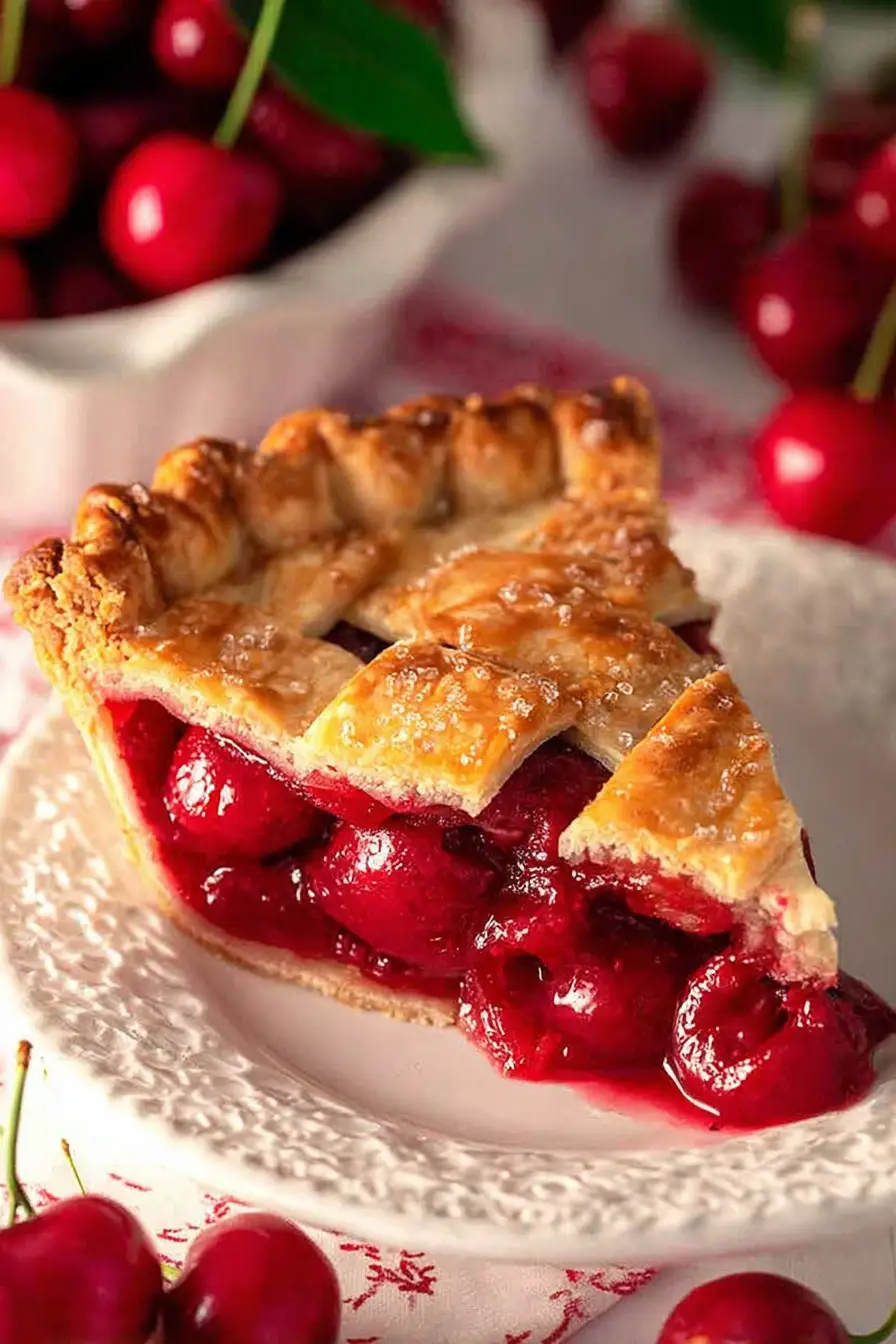
This Homemade Cherry Pie recipe is one of my summer staples; I just love when the fruit is at its peak. You could use some frozen cherries, but fresh ones make all the difference, I think. We love how it has a flaky crust and a sweet-tart filling; its flavor is just right. We find it’s a dessert you make for sharing with these special people in your life.
Table of Contents
Best Cherries to Use for Cherry Pie
For a classic pie, tart cherries like Morello or Montmorency are the way to go. They have that bright, tangy flavor that balances the sugar. If you can only find sweet cherries, like Bing or Rainier, they work wonderfully too! You might just want to pull back a tiny bit on the sugar, depending on how sweet your fruit is. The most important thing is using fresh, firm cherries.
Cherry Pie Ingredients
- A 9-inch double pie crust: You can use a trusted store-bought version or a homemade one.
- Fresh cherries: You’ll need about 2 ½ pounds, which comes out to around 5 cups once they’re pitted.
- Granulated sugar: 2/3 of a cup for the filling, plus a little extra for sprinkling on top.
- Cornstarch: 1/4 cup to help the filling thicken up nicely.
- Lemon juice: 1 tablespoon adds a bit of brightness.
- Vanilla extract: 1 ¼ teaspoons.
- Almond extract: Just 1/4 teaspoon, but it really complements the cherry flavor.
- Salt: 1/8 teaspoon to balance the sweetness.
- Cold unsalted butter: 1 tablespoon, cut into small pieces.
- Egg wash: 1 egg yolk whisked with 1 tablespoon of heavy cream.
How to Make Cherry Pie Filling
First, you’ll need to pit the cherries. It’s a bit of work, but worth it. Once they are pitted, cut them all in half. Then, take about half of those halves and cut them into quarters. Having a mix of sizes gives the filling a great texture.
Put all your prepped cherries into a large bowl. Add the sugar, cornstarch, vanilla extract, almond extract, lemon juice, and salt. Gently stir everything together until the cherries are coated. Let this mixture sit on the counter for a bit while you get the crust ready.
Assembling the Pie
- Take half of your pie dough and roll it out on a floured surface until it’s a couple of inches wider than your 9-inch pie dish. Gently lay it inside the dish, being careful not to stretch it. Trim the edge so it hangs over by about an inch. Put this in the fridge to stay cold.
- Grab your bowl of cherry filling. Spoon the cherries into the chilled pie crust, but try to leave most of the juice behind in the bowl. This is a key step to avoid a soggy bottom.
- Dot the top of the filling with your small pieces of cold butter.
- Roll out the second half of the dough to a 12-inch circle. Place this top crust over the filling.
- Trim the top crust so it’s even with the bottom one. Fold the edge of the top crust under the bottom crust edge, and press them together to seal. You can crimp the edges with your fingers or a fork.
- Whisk together the egg yolk and cream, then brush this egg wash all over the top crust. Sprinkle a little extra sugar on top.
- Cut 3 or 4 slits in the top crust so steam can escape while it bakes. Pop the whole pie in the refrigerator for about 10 minutes.
Baking the Pie
- Place a baking sheet on a lower rack in your oven to catch any drips, and preheat to 400°F (204°C).
- Bake the pie on the hot baking sheet for 20 minutes.
- Then, lower the oven temperature to 350°F (177°C) and bake for another 35-45 minutes. You’ll know it’s done when the crust is a lovely golden brown and you can see the filling bubbling through the slits.
- If the edges of the crust start to get too dark, you can loosely cover them with strips of aluminum foil.
- Let the pie cool on a wire rack for at least 3 to 4 hours before you slice into it. This waiting time is important because it allows the filling to set up properly.
Variations on Cherry Pie
- Lattice Top: Instead of a full top crust, cut the dough into strips and weave them into a lattice pattern. It looks so classic!
- Crumble Topping: Ditch the top crust and instead sprinkle on a simple crumble made from flour, sugar, butter, and oats.
- Spice it Up: Add a pinch of cinnamon or cardamom to the cherry filling for a warmer spice note.
- Mixed Berry: Swap out a cup of cherries for a cup of raspberries or blueberries for a different fruit combination.
Expert Baking Tips
- Keep Dough Cold: Always work with cold pie dough. If it gets too warm and soft while you’re rolling it, just pop it back in the fridge for 15 minutes.
- Don’t Stretch the Dough: When you place the dough in the pie dish, gently ease it in. Stretching it can cause it to shrink back during baking.
- Look for the Bubbles: The most reliable sign that a fruit pie is done is a thick, bubbling filling. The cornstarch needs to boil to activate its thickening power.
- Cool Completely: I know it’s tempting, but cutting into a warm pie will result in a runny filling. Patience is key for clean slices.
Storage and Make-Ahead Instructions
You can store the baked pie, covered, at room temperature for up to 2 days. After that, it should go into the refrigerator for another 2 days.
To make it ahead, you can prepare the pie dough and keep it wrapped in the fridge for up to 3 days. You can also make the filling a day in advance and store it in an airtight container in the fridge.
What to Serve with Cherry Pie
A slice of warm cherry pie is fantastic on its own, but it’s even better with a scoop of vanilla bean ice cream. A simple dollop of fresh whipped cream is also a wonderful choice.
Can You Freeze This Pie?
Yes, you can! To freeze an unbaked pie, assemble it completely but don’t add the egg wash or cut the steam vents. Wrap it tightly in a layer of plastic wrap and then a layer of foil. It will keep in the freezer for up to 3 months. When you’re ready to bake, do not thaw it. Just add the egg wash, cut the vents, and bake from frozen, adding about 15-20 extra minutes to the baking time.
You can also freeze a fully baked and cooled pie. Wrap it well and freeze. To serve, let it thaw at room temperature.
Cherry Pie FAQ’s
Why is my pie filling runny?
This usually happens for one of two reasons: the pie wasn’t cooled long enough before slicing, or it wasn’t baked long enough for the cornstarch to fully thicken the juices. Make sure you see the filling actively bubbling before you take it out of the oven.
Can I use frozen cherries?
You can. Thaw them completely and drain off any excess liquid before mixing them with the other filling ingredients. You may need to add an extra tablespoon of cornstarch to be safe.
How do I prevent a soggy bottom crust?
Baking the pie on a preheated baking sheet helps crisp up the bottom crust right away. Also, remember my tip about not pouring all the loose liquid from the filling bowl into the pie shell.

Homemade Cherry Pie
- Total Time: 1 hour 20 minutes
- Yield: 8 servings 1x
- Diet: Vegetarian
Ingredients
- A 9-inch double pie crust: You can use a trusted store-bought version or a homemade one.
- Fresh cherries: You’ll need about 2 ½ pounds, which comes out to around 5 cups once they’re pitted.
- Granulated sugar: 2/3 of a cup for the filling, plus a little extra for sprinkling on top.
- Cornstarch: 1/4 cup to help the filling thicken up nicely.
- Lemon juice: 1 tablespoon adds a bit of brightness.
- Vanilla extract: 1 ¼ teaspoons.
- Almond extract: Just 1/4 teaspoon, but it really complements the cherry flavor.
- Salt: 1/8 teaspoon to balance the sweetness.
- Cold unsalted butter: 1 tablespoon, cut into small pieces.
- Egg wash: 1 egg yolk whisked with 1 tablespoon of heavy cream.
Instructions
First, you’ll need to pit the cherries. It’s a bit of work, but worth it. Once they are pitted, cut them all in half. Then, take about half of those halves and cut them into quarters. Having a mix of sizes gives the filling a great texture.
Put all your prepped cherries into a large bowl. Add the sugar, cornstarch, vanilla extract, almond extract, lemon juice, and salt. Gently stir everything together until the cherries are coated. Let this mixture sit on the counter for a bit while you get the crust ready.
Assembling the Pie
- Take half of your pie dough and roll it out on a floured surface until it’s a couple of inches wider than your 9-inch pie dish. Gently lay it inside the dish, being careful not to stretch it. Trim the edge so it hangs over by about an inch. Put this in the fridge to stay cold.
- Grab your bowl of cherry filling. Spoon the cherries into the chilled pie crust, but try to leave most of the juice behind in the bowl. This is a key step to avoid a soggy bottom.
- Dot the top of the filling with your small pieces of cold butter.
- Roll out the second half of the dough to a 12-inch circle. Place this top crust over the filling.
- Trim the top crust so it’s even with the bottom one. Fold the edge of the top crust under the bottom crust edge, and press them together to seal. You can crimp the edges with your fingers or a fork.
- Whisk together the egg yolk and cream, then brush this egg wash all over the top crust. Sprinkle a little extra sugar on top.
- Cut 3 or 4 slits in the top crust so steam can escape while it bakes. Pop the whole pie in the refrigerator for about 10 minutes.
Baking the Pie
- Place a baking sheet on a lower rack in your oven to catch any drips, and preheat to 400°F (204°C).
- Bake the pie on the hot baking sheet for 20 minutes.
- Then, lower the oven temperature to 350°F (177°C) and bake for another 35-45 minutes. You’ll know it’s done when the crust is a lovely golden brown and you can see the filling bubbling through the slits.
- If the edges of the crust start to get too dark, you can loosely cover them with strips of aluminum foil.
- Let the pie cool on a wire rack for at least 3 to 4 hours before you slice into it. This waiting time is important because it allows the filling to set up properly.
Notes
- Keep Dough Cold: Always work with cold pie dough. If it gets too warm and soft while you’re rolling it, just pop it back in the fridge for 15 minutes.
- Don’t Stretch the Dough: When you place the dough in the pie dish, gently ease it in. Stretching it can cause it to shrink back during baking.
- Look for the Bubbles: The most reliable sign that a fruit pie is done is a thick, bubbling filling. The cornstarch needs to boil to activate its thickening power.
- Cool Completely: I know it’s tempting, but cutting into a warm pie will result in a runny filling. Patience is key for clean slices.
- Prep Time: 30 minutes
- Cook Time: 50 minutes
- Category: Dessert
- Method: Baking
- Cuisine: American
Nutrition
- Serving Size: 1 slice
- Calories: 420 kcal
- Sugar: 26 g
- Sodium: 290 mg
- Fat: 21 g
- Saturated Fat: 12 g
- Unsaturated Fat: 8 g
- Trans Fat: 0 g
- Carbohydrates: 55 g
- Fiber: 3 g
- Protein: 4 g
- Cholesterol: 50 mg