
What if you could make bakery-quality bread with just 5 minutes of hands-on work? The first time I tried no-knead bread, I was amazed by its crusty exterior and airy crumb all achieved with minimal effort. This recipe works because it uses time instead of kneading to develop gluten.
You don’t need special skills or tools, making it perfect for busy home cooks, beginners, or anyone tired of dense homemade bread. If you’ve ever thought baking bread was too complicated, this recipe will change your mind. Are you ready to try it?
What Is No-Knead Italian Artisan Bread?
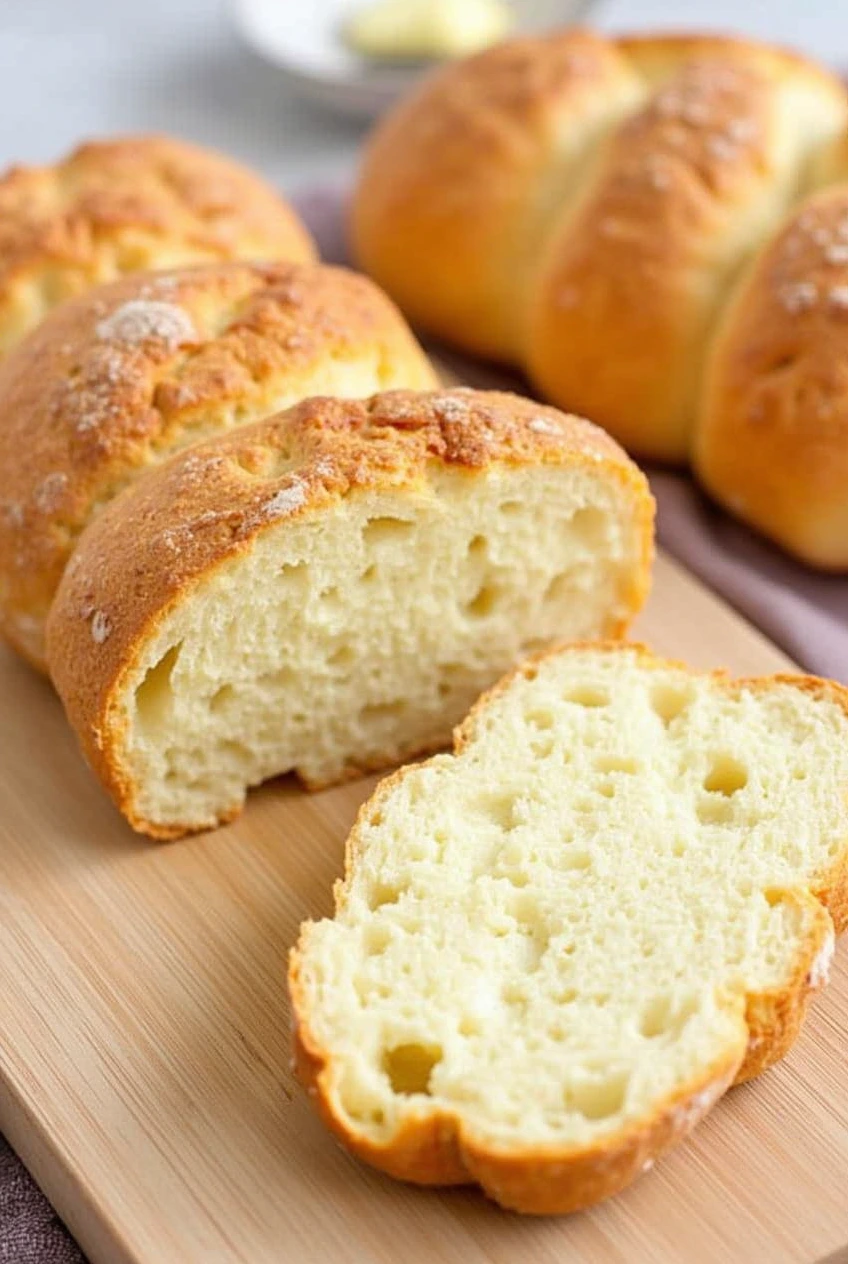
No-Knead Italian Artisan Bread is a crusty, rustic loaf inspired by Italian pane Pugliese. It’s made with a wet dough and relies on long fermentation to create an open crumb structure. Unlike regular bread, this recipe skips the kneading step gluten forms naturally as the dough rests. With a hydration level of 75–80%, the dough is stickier but results in a lighter texture.
The science behind it is simple: yeast and bacteria break down starches during fermentation, creating flavor and gas bubbles that give the bread its airy interior. Think of it like sourdough, but without the hassle of maintaining a starter. Have you ever wondered how professional bakers achieve such complex flavors? This recipe brings that magic into your kitchen.
Key Ingredients
Here’s what you’ll need to make this bread:
- Bread Flour (500g): High protein content (12–14%) provides structure.
- Substitute all-purpose flour if needed, but expect a slightly less chewy texture.
- Water (400ml): Lukewarm water (75°F/24°C) activates the yeast steadily.
- Salt (10g): Enhances flavor and controls fermentation speed.
- Instant Yeast (0.5g): A tiny amount ensures slow, steady rising.
- Optional: Add 1 tablespoon of olive oil for a softer crust.
Each ingredient plays a crucial role, so measure carefully. Precision matters here!
Required Equipment
You don’t need fancy tools, but these basics are essential:
- Dutch Oven: Traps steam for a crackling crust.
- Alternative: Use any oven-safe pot with a lid.
- Mixing Bowl: Large enough to let the dough double in size.
- Kitchen Scale: Measuring by weight ensures accuracy. Grams are recommended.
- Parchment Paper: Prevents sticking when transferring dough to the oven.
- Bench Scraper: Helps handle sticky dough easily.
Do you have everything you need? If not, what can you substitute?
Instructions
Day 1: Mixing & Fermentation
- Combine Ingredients:
- Mix 500g flour + 400ml water until no dry spots remain.
- Add 10g salt + 0.5g yeast. Mix for 30 seconds.
- Rest: Cover the bowl and let it sit for 12–18 hours at 70°F (21°C).
- Tip: Longer fermentation creates a tangier flavor.
Day 2: Shaping & Baking
- Preheat: Place a Dutch oven in a cold oven. Heat to 450°F (230°C) for 45 minutes.
- Shape Dough:
- Scrape dough onto a floured surface. Fold edges into the center 4 times.
- Let it rest uncovered for 30 minutes.
- Bake:
- Transfer dough to parchment paper. Score the top with a knife.
- Bake covered for 30 minutes. Remove the lid and bake for 15 more minutes until deep brown.
- Pro Tip: Drop an ice cube into the Dutch oven for extra steam.
How does your kitchen smell while baking? Does it make you hungry?
Variations
Want to customize your bread? Here are some ideas:
- Herb & Garlic: Fold 2 tablespoons of chopped rosemary + 1 minced garlic clove into the dough.
- Whole Grain: Replace 100g of bread flour with whole wheat or rye for added nutrition.
- Cheese-Stuffed: Add ½ cup shredded Parmesan during folding for a cheesy twist.
- Vegan: Skip olive oil; the crust will be crispier.
- Gluten-Free: Not recommended hydration and structure differ drastically.
What variation would you try first?
Storage Tips
Proper storage keeps your bread fresh longer:
- Room Temperature: Keep in a paper bag for 1 day to preserve the crust.
- Freeze:
- Slice cooled bread. Wrap in foil and freeze for up to 3 months.
- Reheat at 350°F (175°C) for 10 minutes.
- Revive Stale Bread: Sprinkle with water and bake at 400°F (200°C) for 5 minutes.
Do you prefer fresh-baked bread or freezing slices for later?
Recipe Tips
Here are some actionable tips for success:
- Measure by Weight: 500g flour = ~3¾ cups, but scales vary.
- Control Fermentation:
- Too cold? Extend time by 2–4 hours.
- Too warm? Reduce time to avoid overproofing.
- Troubleshooting:
- Dense loaf? Underproofed ferment longer next time.
- Flat loaf? Overproofed reduce fermentation time.
- Use Sticky Dough: Wet hands to handle without frustration.
What’s your favorite tip for working with sticky dough?
FAQs
Here are answers to common questions:
Q: Can I halve the recipe?
Yes. Use 250g flour + 200ml water. Bake in a smaller pot.
Q: Why no kneading?
Time replaces mechanical kneading. Enzymes develop gluten naturally.
Q: My dough didn’t rise. What went wrong?
Old yeast or a cold kitchen might be the issue. Test yeast in warm water with sugar first.
Q: Can I add commercial yeast to speed fermentation?
No. This recipe relies on slow fermentation for flavor and texture.
Which question surprised you the most?
Conclusion
No-Knead Italian Artisan Bread proves that minimal effort can yield maximum reward. Bake this tonight your future self will thank you at breakfast. What will YOU pair with your first slice: olive oil, soup, or fresh butter?
Print
No-Knead Italian Artisan Bread
- Total Time: About 2 days and 3 hours (including resting and rising times)
- Yield: 1 loaf (serves approximately 6)
- Diet: Vegetarian
Ingredients
- Bread Flour (500g): High protein content (12–14%) provides structure.
- Substitute all-purpose flour if needed, but expect a slightly less chewy texture.
- Water (400ml): Lukewarm water (75°F/24°C) activates the yeast steadily.
- Salt (10g): Enhances flavor and controls fermentation speed.
- Instant Yeast (0.5g): A tiny amount ensures slow, steady rising.
- Optional: Add 1 tablespoon of olive oil for a softer crust.
Instructions
Day 1: Mixing & Fermentation
- Combine Ingredients:
- Mix 500g flour + 400ml water until no dry spots remain.
- Add 10g salt + 0.5g yeast. Mix for 30 seconds.
- Rest: Cover the bowl and let it sit for 12–18 hours at 70°F (21°C).
- Tip: Longer fermentation creates a tangier flavor.
Day 2: Shaping & Baking
- Preheat: Place a Dutch oven in a cold oven. Heat to 450°F (230°C) for 45 minutes.
- Shape Dough:
- Scrape dough onto a floured surface. Fold edges into the center 4 times.
- Let it rest uncovered for 30 minutes.
- Bake:
- Transfer dough to parchment paper. Score the top with a knife.
- Bake covered for 30 minutes. Remove the lid and bake for 15 more minutes until deep brown.
- Pro Tip: Drop an ice cube into the Dutch oven for extra steam.
Notes
- Measure by Weight: 500g flour = ~3¾ cups, but scales vary.
- Control Fermentation:
- Too cold? Extend time by 2–4 hours.
- Too warm? Reduce time to avoid overproofing.
- Troubleshooting:
- Dense loaf? Underproofed ferment longer next time.
- Flat loaf? Overproofed reduce fermentation time.
- Use Sticky Dough: Wet hands to handle without frustration.
- Prep Time: 2 hours and 15 minutes
- Cook Time: 45 minutes
- Category: Bread
- Method: Baking
- Cuisine: Italian
Nutrition
- Serving Size: 1 slice (1/6 of the loaf)
- Calories: 230 kcal
- Sugar: 0g
- Sodium: 779mg
- Fat: 1g
- Saturated Fat: 0g
- Carbohydrates: 48g
- Fiber: 2g
- Protein: 7g
- Cholesterol: 0mg