
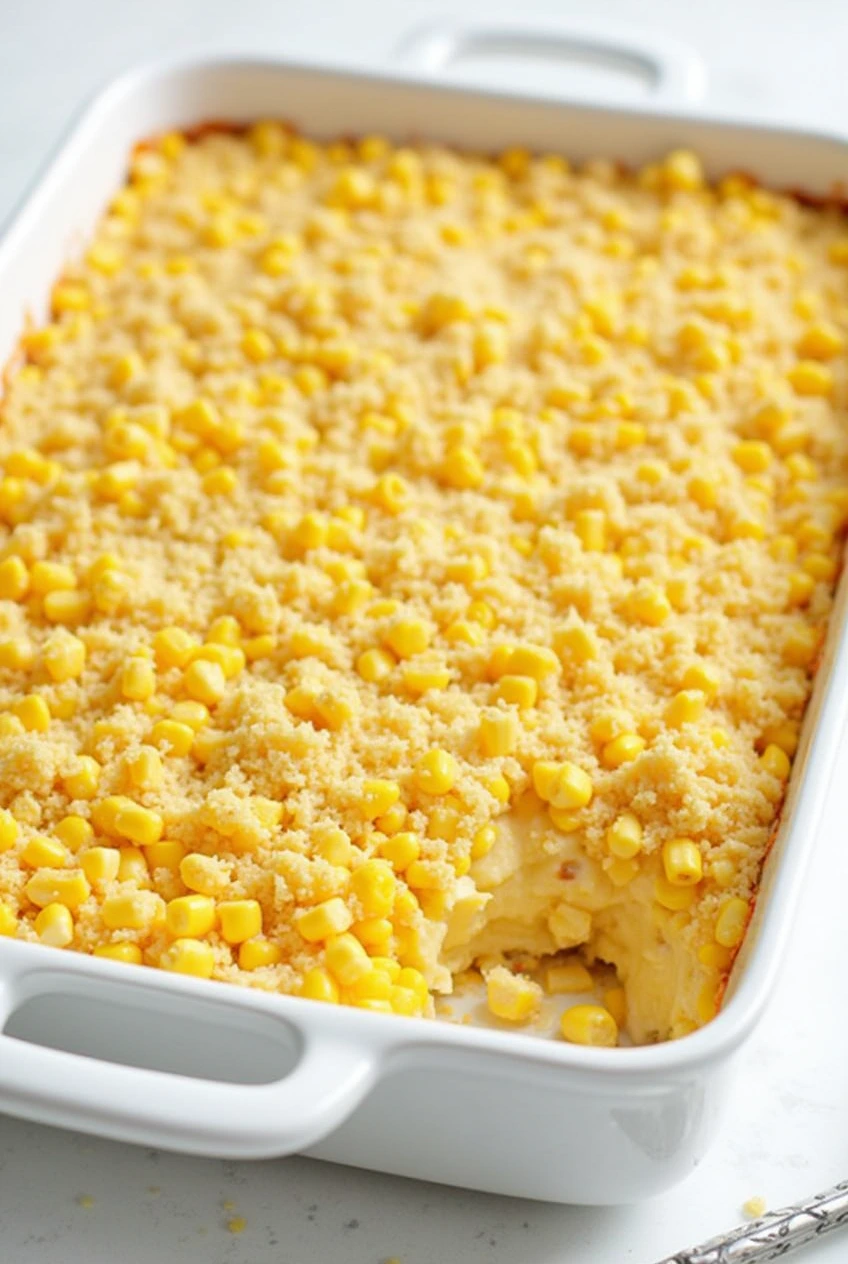
I’ve been making Paula Deen’s corn casserole for years, and let me tell you, it’s become one of my most treasured recipes. This creamy, comforting dish brings back memories of countless family gatherings and potlucks where it’s always been a crowd favorite.
I’m excited to share my take on this classic Southern comfort food that’s both incredibly simple and absolutely delicious.
What is Corn Casserole?
When I first discovered corn casserole, I couldn’t believe how something so simple could taste so heavenly. It’s essentially a cross between cornbread and a soufflé, with a texture that’s wonderfully moist and creamy while still being light and fluffy.
The dish combines sweet corn, cream-style corn, and cornbread mix with other rich ingredients to create what I like to call “corn heaven in a casserole dish.” I’ve found that this recipe perfectly balances sweet and savory flavors, making it an ideal side dish for everything from holiday meals to casual Sunday dinners.
Ingredients
As I gather my ingredients for this beloved casserole, I always feel a sense of satisfaction knowing that it requires such simple components that come together to create something magical:
- 1 (15.25 oz) can whole kernel corn, drained
- 1 (14.75 oz) can cream-style corn
- 1 cup sour cream
- 1 stick (1/2 cup) unsalted butter, melted
- 1 (8.5 oz) package cornbread mix
- 2 large eggs, at room temperature
- 1 cup shredded cheddar cheese
- 1/4 teaspoon salt
- 1/4 teaspoon black pepper
Recommended Equipment
Over the years, I’ve learned that having the right tools makes preparing this casserole even easier. Here’s what I use:
- 9×13 inch baking dish
- Large mixing bowl
- Medium microwave-safe bowl (for melting butter)
- Measuring cups and spoons
- Rubber spatula
- Whisk
- Can opener
Instructions
I’ve made this recipe so many times I could probably do it with my eyes closed, but I’ll share my step-by-step process that ensures perfect results every time:
- First, I preheat my oven to 350°F (175°C). While it’s heating up, I spray my 9×13 inch baking dish with non-stick cooking spray. I’ve learned that this simple step makes serving and cleanup so much easier.
- In my large mixing bowl, I combine both types of corn. The contrast between the whole kernels and creamy style corn creates such an interesting texture that I’ve come to love.
- Next, I add the sour cream and melted butter. I make sure the butter isn’t too hot when I add it I’ve found that room temperature ingredients blend much better together.
- I whisk my eggs in a separate small bowl before adding them to the mixture. This extra step ensures they’re well incorporated throughout the casserole.
- Then, I add the cornbread mix, salt, and pepper. I fold everything together until it’s just combined. Over-mixing can make the casserole heavy, so I’m always gentle with this step.
- I pour the mixture into my prepared baking dish, spreading it evenly with my spatula. Then I sprinkle the shredded cheese on top.
- Into the oven it goes for 45-50 minutes. I know it’s done when the edges are slightly golden brown and the center is set but still slightly jiggly.
- I always let it rest for about 10 minutes before serving. This cooling time helps it set up perfectly and makes it easier to portion.
Variations
Through countless times making this recipe, I’ve experimented with several variations that I’m happy to share:
- Cheese Options: While cheddar is classic, I’ve used Mexican cheese blend, pepper jack for a spicy kick, or even a mixture of cheeses.
- Healthier Version: I’ve successfully used light sour cream and reduced-fat cheese when I want to cut calories.
- Spicy Twist: Sometimes I add a can of diced green chilies or jalapeños for heat.
- Mix-ins: Crispy bacon bits, diced bell peppers, or caramelized onions make wonderful additions.
- Dairy-Free: I’ve used dairy-free sour cream and butter substitutes for guests with dietary restrictions.
How To Storage
I’ve learned the best ways to store this casserole through trial and error:
- Room Temperature: I never leave it out for more than 2 hours.
- Refrigerator: In an airtight container, it stays good for up to 4 days.
- Freezer: I wrap it tightly in foil and freeze for up to 3 months.
- Reheating: I prefer using the oven at 325°F for about 15-20 minutes to maintain the texture.
Tips for Perfect Corn Casserole
Over the years, I’ve discovered several secrets that make this recipe even better:
Bringing cold ingredients to room temperature makes a huge difference in the final texture. I always set out my eggs and sour cream about an hour before starting. When melting the butter, I let it cool slightly so it doesn’t cook the eggs when mixed in.
I’ve found that grating my own cheese, rather than using pre-shredded, creates a creamier melt and better texture. For the best results, I don’t overmix the batter just until the ingredients are combined.
This keeps the casserole light and fluffy. I’ve learned to check the casserole a few minutes before the recommended baking time since all ovens are different. A slight jiggle in the center is perfect it will continue to set as it cools.
Common Questions
Throughout my years of making and sharing this recipe, I’m often asked these questions:
Can I make this ahead of time?
Yes! I often prepare the mixture the night before and refrigerate it unbaked. I just let it come to room temperature for about 30 minutes before baking.
Why is my casserole too wet?
When this happens to me, it’s usually because I forgot to drain the whole kernel corn. Make sure to drain it well, and don’t skip the resting time after baking.
Can I double the recipe?
I’ve successfully doubled this recipe many times for larger gatherings. Just use a larger baking dish and increase the cooking time by about 15-20 minutes.
Is this recipe spicy?
The basic recipe isn’t spicy at all, which is why I sometimes add diced jalapeños or a pinch of cayenne when I want some heat.
I hope you’ll enjoy this corn casserole as much as my family and I do. It’s become such a staple at our gatherings that people actually get disappointed if I don’t bring it! Whether you’re making it for a holiday meal or a casual dinner, I’m confident this recipe will become one of your favorites too.
The best part is how versatile it is you can keep it classic or add your own twist to make it uniquely yours. Every time I make it, I’m reminded of why Paula Deen’s recipes have such staying power they’re simply delicious and bring people together around the table.
Remember, cooking is about making memories as much as it is about making meals, and this corn casserole has certainly helped me create plenty of both.
Print
Paula Deen’s corn casserole
- Total Time: 55 minutes
- Yield: Serves 10 1x
- Diet: Vegetarian
Ingredients
- 1 (15.25 oz) can whole kernel corn, drained
- 1 (14.75 oz) can cream-style corn
- 1 cup sour cream
- 1 stick (1/2 cup) unsalted butter, melted
- 1 (8.5 oz) package cornbread mix
- 2 large eggs, at room temperature
- 1 cup shredded cheddar cheese
- 1/4 teaspoon salt
- 1/4 teaspoon black pepper
Instructions
- First, I preheat my oven to 350°F (175°C). While it’s heating up, I spray my 9×13 inch baking dish with non-stick cooking spray. I’ve learned that this simple step makes serving and cleanup so much easier.
- In my large mixing bowl, I combine both types of corn. The contrast between the whole kernels and creamy style corn creates such an interesting texture that I’ve come to love.
- Next, I add the sour cream and melted butter. I make sure the butter isn’t too hot when I add it I’ve found that room temperature ingredients blend much better together.
- I whisk my eggs in a separate small bowl before adding them to the mixture. This extra step ensures they’re well incorporated throughout the casserole.
- Then, I add the cornbread mix, salt, and pepper. I fold everything together until it’s just combined. Over-mixing can make the casserole heavy, so I’m always gentle with this step.
- I pour the mixture into my prepared baking dish, spreading it evenly with my spatula. Then I sprinkle the shredded cheese on top.
- Into the oven it goes for 45-50 minutes. I know it’s done when the edges are slightly golden brown and the center is set but still slightly jiggly.
- I always let it rest for about 10 minutes before serving. This cooling time helps it set up perfectly and makes it easier to portion.
Notes
Bringing cold ingredients to room temperature makes a huge difference in the final texture. I always set out my eggs and sour cream about an hour before starting. When melting the butter, I let it cool slightly so it doesn’t cook the eggs when mixed in.
I’ve found that grating my own cheese, rather than using pre-shredded, creates a creamier melt and better texture. For the best results, I don’t overmix the batter just until the ingredients are combined.
This keeps the casserole light and fluffy. I’ve learned to check the casserole a few minutes before the recommended baking time since all ovens are different. A slight jiggle in the center is perfect it will continue to set as it cools.
- Prep Time: 10 minutes
- Cook Time: 45 minute
- Category: Side Dish
- Method: Baking
- Cuisine: American
Nutrition
- Serving Size: Approximately 1/10th of the casserole
- Calories: 410 kcal
- Sugar: 11 g
- Sodium: 772 mg
- Fat: 19 g
- Saturated Fat: 9 g
- Carbohydrates: 49 g
- Fiber: 3 g
- Protein: 10 g
- Cholesterol: 40 mg