
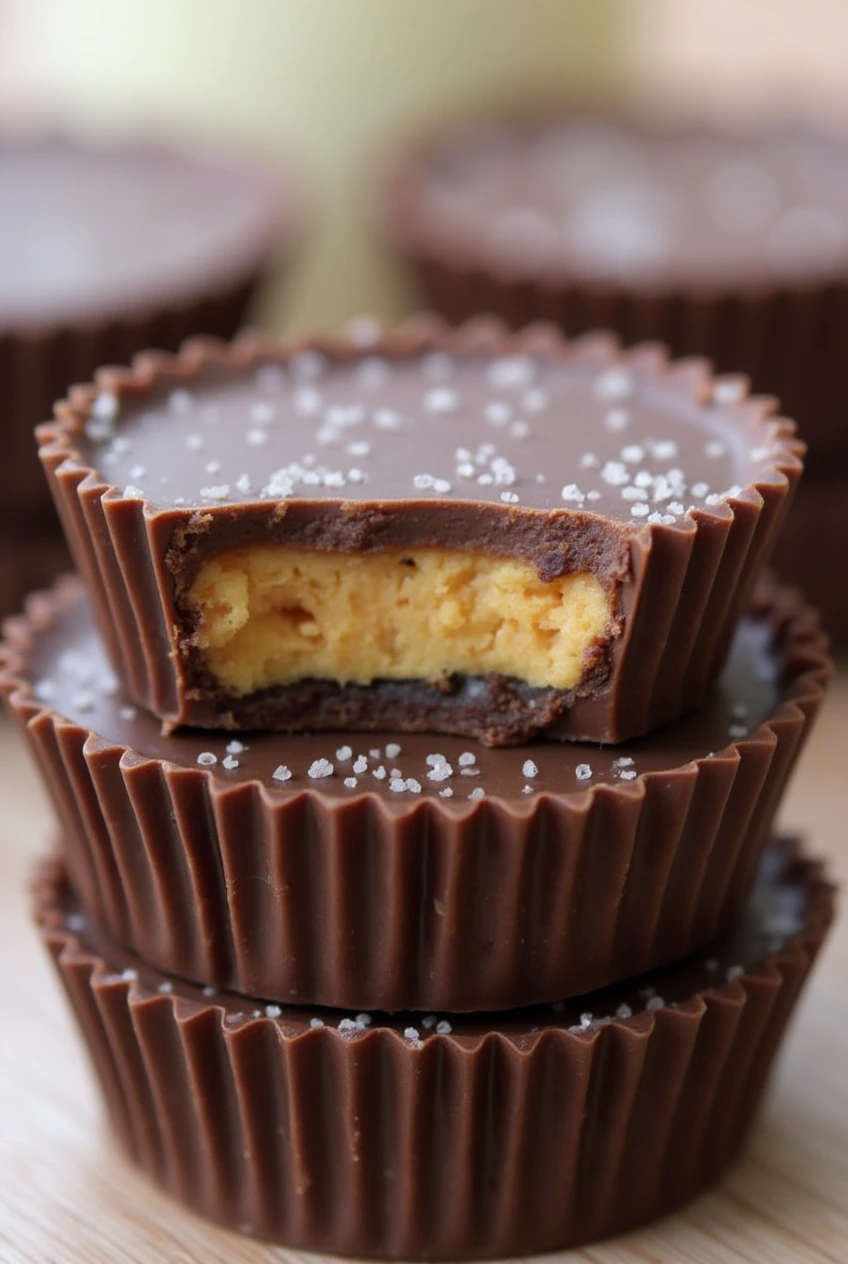
This Reese’s Peanut Butter Cups recipe brings the classic chocolate and peanut butter combination into your kitchen with ease. Making them at home not only satisfies cravings but also offers a fun and rewarding experience.
Tools You Need
Before diving into the recipe, it’s helpful to gather all necessary tools. A food processor or blender is essential for grinding the graham crackers into a fine powder. You’ll also need a large mixing bowl for combining ingredients, a microwave-safe bowl for melting chocolate, and a baking sheet to hold the cupcake liners. Measuring cups and spoons ensure accuracy, and a spoon or small ladle aids in layering the chocolate and peanut butter mixtures. Having these tools ready streamlines the process and makes the experience enjoyable.
Ingredients
The beauty of this recipe lies in its simplicity, requiring just four ingredients:
- 10 graham crackers
- 1¼ cups powdered sugar
- 1½ cups melted peanut butter
- 2 cups milk chocolate chips
These components come together to create a treat that’s both rich and satisfying.
How To Make Reese’s Peanut Butter Cups
- Prepare the Graham Cracker Crumbs: Place the graham crackers in a food processor or blender, pulsing until they become a fine powder. This forms the base of the peanut butter mixture, adding texture and flavor.
- Combine Dry Ingredients: Transfer the graham cracker crumbs to a large mixing bowl. Add the powdered sugar, mixing thoroughly to ensure an even distribution.
- Incorporate Peanut Butter: Pour the melted peanut butter into the dry mixture. Stir until fully combined, resulting in a cohesive and pliable filling.
- Prepare the Chocolate Layer: In a microwave-safe bowl, melt the milk chocolate chips, stirring every 30 seconds until smooth. This gentle heating method prevents scorching and ensures a glossy finish.
- Assemble the Cups:
- Place 15 cupcake liners on a baking sheet.
- Spoon a heaping tablespoon of melted chocolate into each liner, spreading it to cover the bottom evenly.
- Add a heaping tablespoon of the peanut butter mixture on top of the chocolate layer.
- Finish with another heaping tablespoon of melted chocolate, ensuring it completely covers the peanut butter layer.
- Set the Cups: Refrigerate the assembled cups for about an hour, allowing them to firm up and the flavors to meld together.
Expert Tips
Achieving the perfect homemade Reese’s Peanut Butter Cups involves a few nuances:
- Chocolate Melting: Melting chocolate requires attention to prevent burning. Stirring every 30 seconds during microwaving helps maintain a smooth consistency.
- Layering Technique: Ensuring each layer is evenly spread contributes to the classic appearance and balanced taste.
- Chilling Time: Allowing adequate refrigeration time ensures the cups set properly, making them easier to handle and enhancing their texture.
FAQ
Can I use a different type of chocolate?
Absolutely! While milk chocolate provides a classic taste, dark or semi-sweet chocolate offers a richer flavor. Some enthusiasts even mix different chocolates to create a unique profile.
Is there a substitute for graham crackers?
If graham crackers aren’t available, digestive biscuits or similar cookies can serve as a substitute, maintaining the desired texture and taste.
How long do these peanut butter cups last?
Stored in an airtight container in the refrigerator, they remain fresh for up to a week. For extended storage, freezing is an option, though it’s best to consume them within a month for optimal flavor.
Ways to Serve
These homemade treats are versatile:
- Gifting: Packaged in decorative boxes, they make heartfelt gifts for friends and family.
- Dessert Platters: Their appealing look and delectable taste make them a hit at gatherings.
- Personal Enjoyment: Pairing them with a cup of coffee or tea provides a delightful indulgence.
Storage Tips
To maintain their freshness:
- Refrigeration: Store in an airtight container to keep them firm and extend shelf life.
- Freezing: Place in a freezer-safe container, separating layers with parchment paper to prevent sticking. Thawing should be done in the refrigerator to retain texture.
Conclusion
Crafting homemade Reese’s Peanut Butter Cups is a rewarding endeavor that combines simplicity with indulgence. The process is straightforward, and the result is a treat that rivals its store-bought counterpart. Whether shared with loved ones or enjoyed solo, these cups are sure to satisfy any sweet tooth.
Print
Reese’s Peanut Butter Cups recipe
- Total Time: 20 minutes
- Yield: 12 peanut butter cups 1x
- Diet: Vegetarian
Ingredients
- 10 graham crackers
- 1¼ cups powdered sugar
- 1½ cups melted peanut butter
- 2 cups milk chocolate chips
Instructions
- Prepare the Graham Cracker Crumbs: Place the graham crackers in a food processor or blender, pulsing until they become a fine powder. This forms the base of the peanut butter mixture, adding texture and flavor.
- Combine Dry Ingredients: Transfer the graham cracker crumbs to a large mixing bowl. Add the powdered sugar, mixing thoroughly to ensure an even distribution.
- Incorporate Peanut Butter: Pour the melted peanut butter into the dry mixture. Stir until fully combined, resulting in a cohesive and pliable filling.
- Prepare the Chocolate Layer: In a microwave-safe bowl, melt the milk chocolate chips, stirring every 30 seconds until smooth. This gentle heating method prevents scorching and ensures a glossy finish.
- Assemble the Cups:
- Place 15 cupcake liners on a baking sheet.
- Spoon a heaping tablespoon of melted chocolate into each liner, spreading it to cover the bottom evenly.
- Add a heaping tablespoon of the peanut butter mixture on top of the chocolate layer.
- Finish with another heaping tablespoon of melted chocolate, ensuring it completely covers the peanut butter layer.
- Set the Cups: Refrigerate the assembled cups for about an hour, allowing them to firm up and the flavors to meld together.
Notes
Chocolate Melting: Melting chocolate requires attention to prevent burning. Stirring every 30 seconds during microwaving helps maintain a smooth consistency.
Layering Technique: Ensuring each layer is evenly spread contributes to the classic appearance and balanced taste.
Chilling Time: Allowing adequate refrigeration time ensures the cups set properly, making them easier to handle and enhancing their texture.
- Prep Time: 15 minutes
- Cook Time: 5 minutes
- Category: Dessert
- Method: No-bake
- Cuisine: American
Nutrition
- Serving Size: 1 peanut butter cup
- Calories: 210 kcal
- Sugar: 16g
- Sodium: 80mg
- Fat: 14g
- Saturated Fat: 6g
- Unsaturated Fat: 7g
- Trans Fat: 0g
- Carbohydrates: 20g
- Fiber: 2g
- Protein: 4g
- Cholesterol: 5mg