
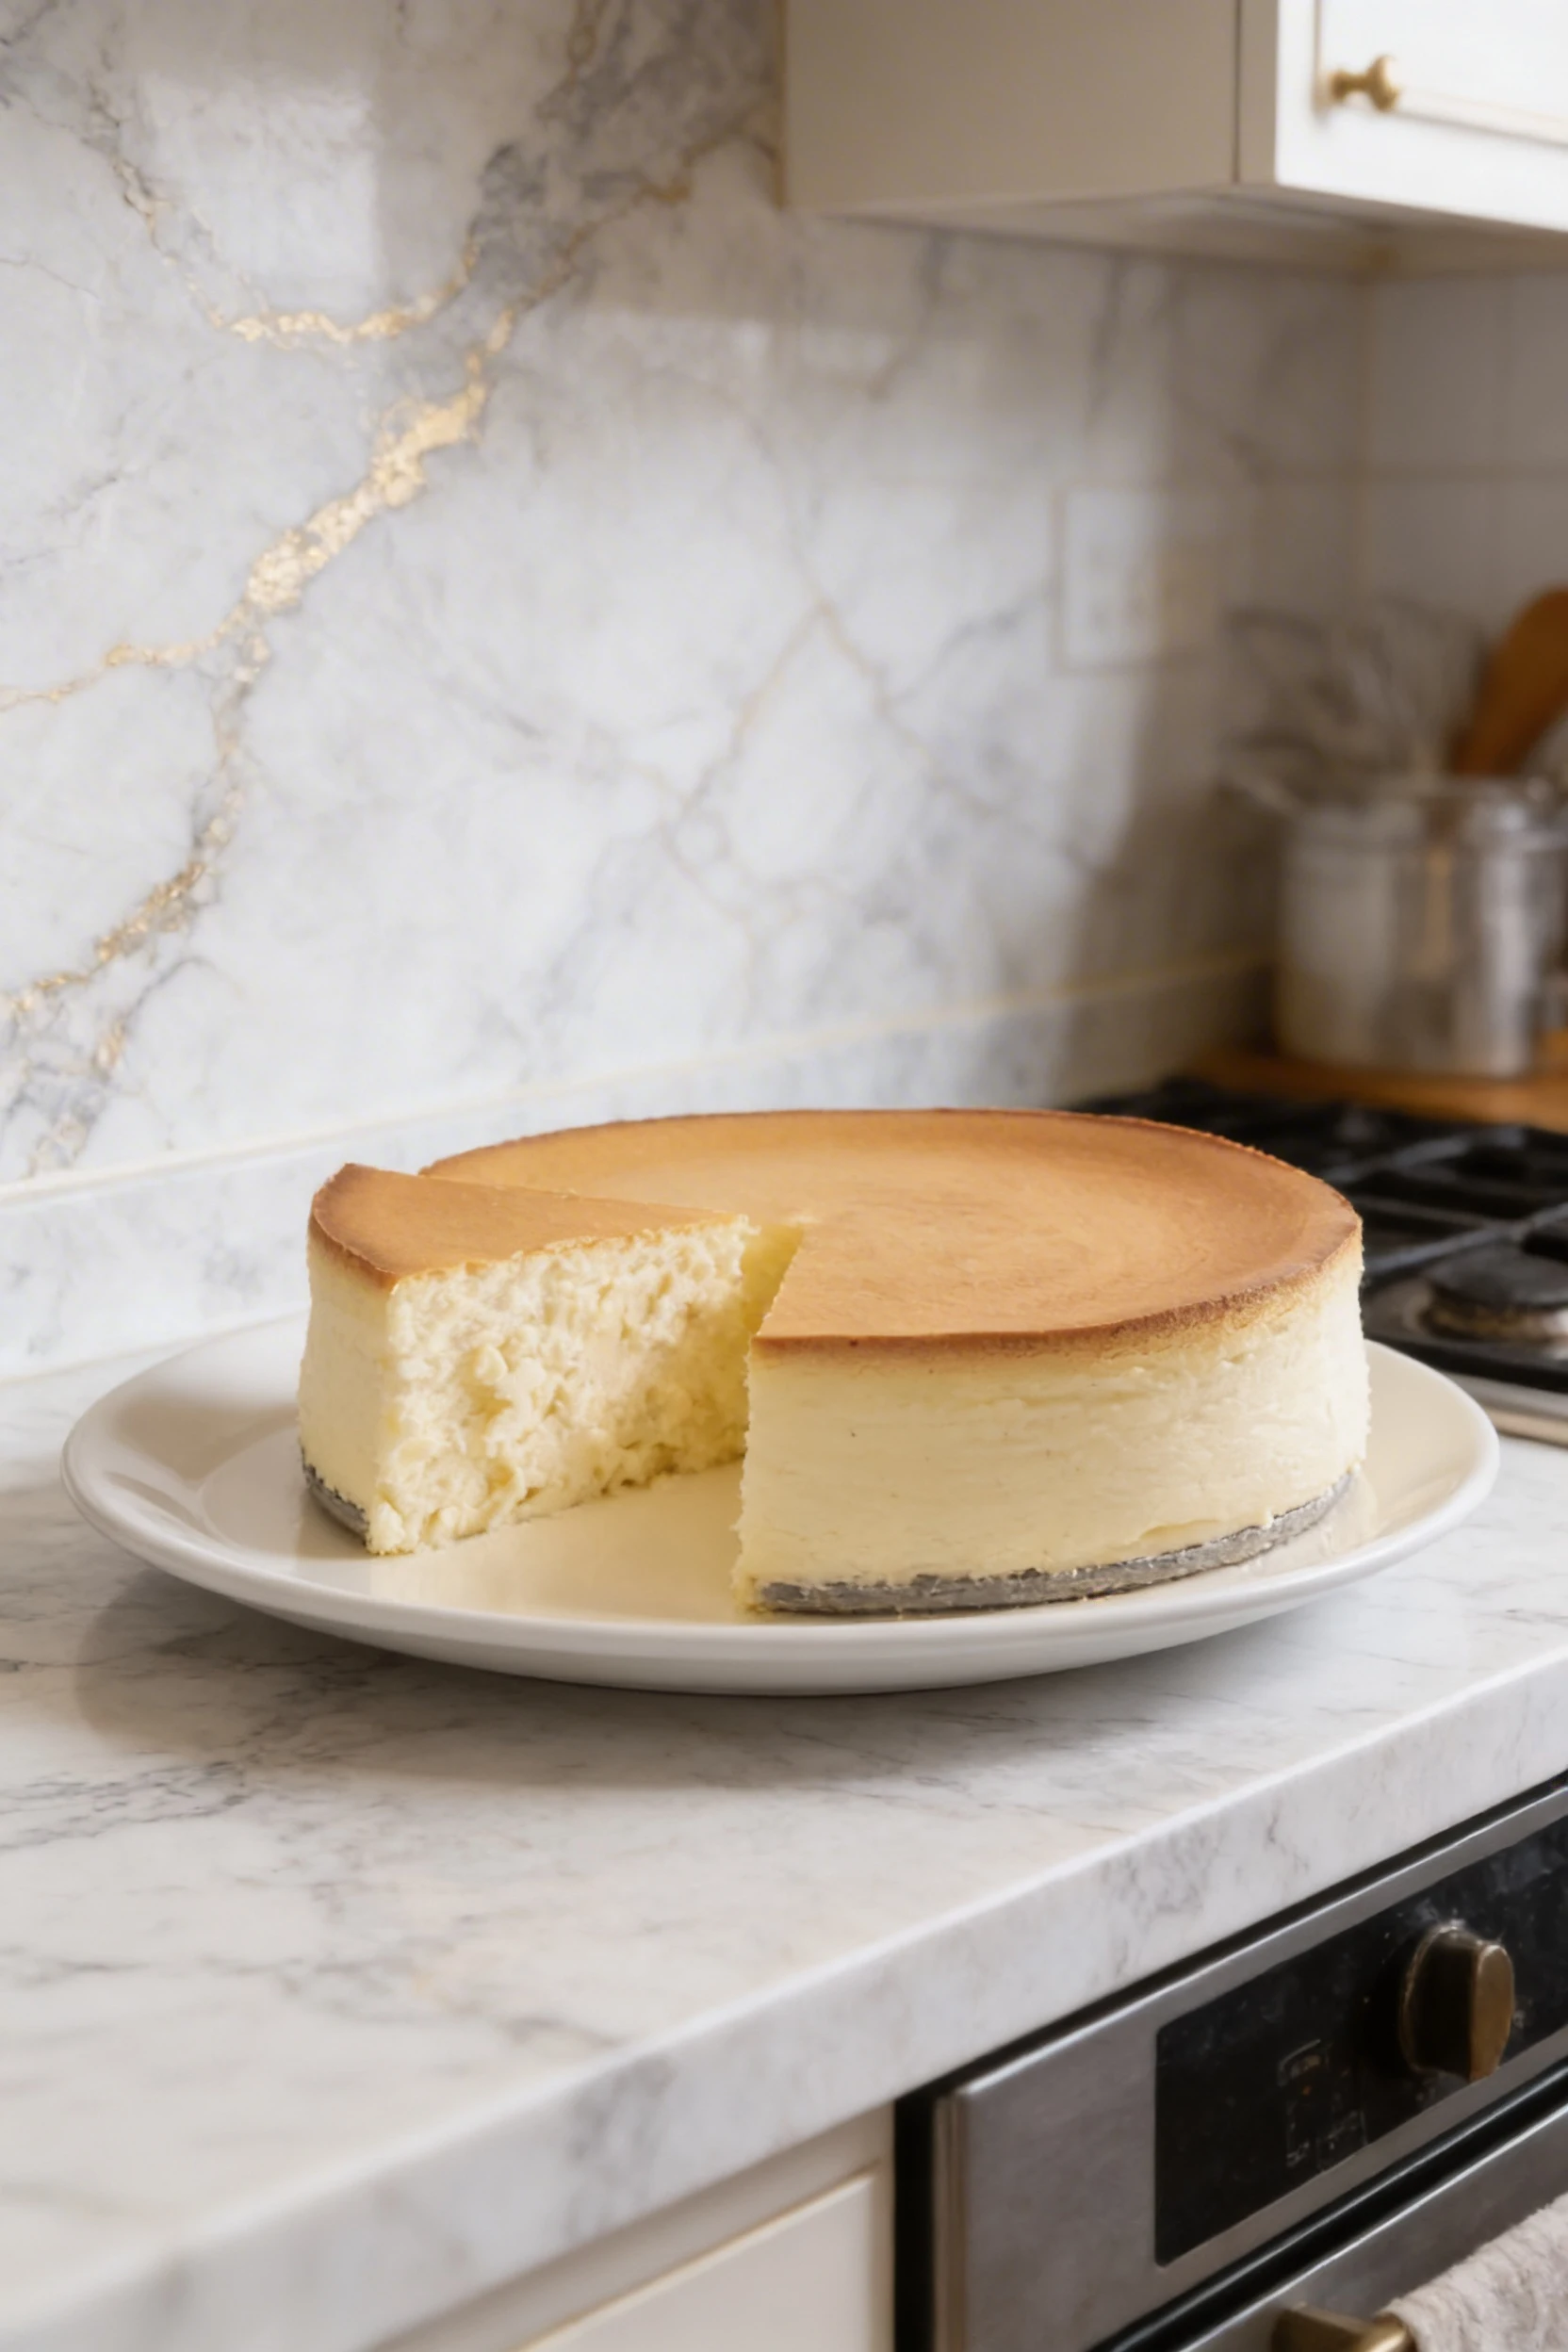
This tall and creamy New York cheesecake is one of those desserts I keep coming back to every time I need something that actually impresses without any gimmicks. I’ve made it for birthdays, holidays, and honestly, just a random Tuesday when I needed a project.
What makes this version stand out is the sheer height and that dense, velvety texture you only get from a generous amount of full-fat cream cheese and sour cream together. It slices cleanly, it’s rich without being heavy, and once you try it, every other cheesecake feels like a shortcut.
Ingredients
For the Crust
- 1 ½ cups graham cracker crumbs
- 3 tablespoons granulated sugar
- 8 tablespoons unsalted butter, melted
For the Cheesecake Filling
- 32 ounces full-fat cream cheese (4 packages, 8 oz each), softened to room temperature
- 1 ½ cups granulated sugar
- 2 tablespoon cornstarch
- 2 vanilla beans, split and scraped (or 1 ½ teaspoon pure vanilla extract)
- 1 teaspoon fresh lemon juice
- 5 large eggs, room temperature
- 2 cups full-fat sour cream, room temperature
- 8 tablespoon unsalted butter, melted and slightly cooled
How To Make New York Cheesecake
- Preheat your oven to 325°F (163°C). Wrap the outside of a 9-inch springform pan tightly with two layers of heavy-duty aluminum foil to prevent water from seeping in during the water bath.
- Combine the graham cracker crumbs, 3 tablespoons sugar, and melted butter in a bowl. Stir until the mixture resembles wet sand.
- Press the crust mixture firmly and evenly into the bottom of the prepared springform pan. Use the flat bottom of a measuring cup to pack it tightly. Bake for 10 minutes, then set aside to cool.
- Beat the room-temperature cream cheese in a stand mixer fitted with the paddle attachment on medium speed for about 3 minutes, until completely smooth and no lumps remain.
- Add the sugar and cornstarch to the cream cheese. Mix on medium-low for 2 minutes, scraping down the sides of the bowl halfway through.
- Add the scraped vanilla bean seeds (or vanilla extract) and fresh lemon juice. Mix briefly to combine.
- Add the eggs one at a time on low speed, mixing just until each egg disappears into the batter. Don’t overmix at this stage or you’ll incorporate too much air.
- Pour in the melted butter and sour cream. Fold on the lowest speed setting for about 30 seconds, just until the batter is smooth and uniform.
- Pour the filling over the cooled crust. Gently tap the pan on the counter a few times to release any air bubbles.
- Place the foil-wrapped springform pan into a large roasting pan. Pour hot water into the roasting pan until it reaches about 1 inch up the sides of the springform pan.
- Bake at 325°F for 75 to 85 minutes. The cheesecake is done when the edges are set and the center still has a slight wobble, about a 2-inch jiggle in the middle.
- Turn the oven off, crack the door open slightly, and let the cheesecake sit inside for 1 hour. This gradual cooling is what prevents cracks.
- Remove from the water bath, run a thin knife around the edges of the pan, and let the cheesecake cool completely on a wire rack.
- Refrigerate for at least 6 hours, but overnight is best before slicing and serving.
Why This New York Cheesecake Is Different
Most cheesecake recipes call for 2 or 3 packages of cream cheese. This one uses 4, and that’s not an accident. That extra block is what gives you the tall, dense, almost brick-like texture that New York cheesecake is actually known for. The sour cream works alongside the cream cheese to keep the texture smooth rather than grainy, and the melted butter adds a richness that rounds everything out beautifully.
Using vanilla beans instead of extract is a small upgrade that makes a real difference in flavor. You get those tiny flecks throughout the filling and a more layered vanilla note that extract just can’t replicate. If fresh beans aren’t easy to find, the pure extract works fine, but it’s worth tracking them down at least once.
Getting the Texture Right
The two things that ruin most homemade tall and creamy New York cheesecakes are overmixing and skipping the water bath. Overmixing whips too much air into the batter, which causes the cheesecake to puff up in the oven and then sink and crack as it cools. Mix everything on low once the eggs go in, and stop as soon as the batter looks smooth.
The water bath sounds like extra work, but it’s what keeps the texture silky instead of rubbery. The steam creates a gentle, even heat around the pan so the edges don’t overbake while the center catches up. It’s non-negotiable for this style.
Cornstarch is also doing quiet, important work here. It stabilizes the proteins in the eggs and helps the cheesecake hold its structure once it’s sliced, so you get those clean, tall pieces instead of something that sags.
Serving and Topping Ideas
This New York cheesecake is genuinely great on its own with nothing on top. The flavor is rich enough that it doesn’t need anything extra. That said, a simple topping can take it in a different direction depending on what you’re in the mood for.
Fresh strawberries or a quick berry compote are the classic move and work for a reason. You can also go the caramel route for something more indulgent, similar to what I do with my Caramel Apple Cheesecake. Lemon curd is another option that cuts through the richness nicely.
For a lighter dessert situation, try a dollop of barely sweetened whipped cream and some fresh citrus zest. It’s simple and it actually lets the cheesecake itself be the main event, which is how it should be.
Make-Ahead and Storage
This is one of the best desserts you can make a day or two ahead. The flavor actually improves after a night in the fridge once everything has had time to settle and firm up. I almost always make mine the day before I need it, and it’s always better for it.
Once fully chilled, cover the top loosely with plastic wrap and keep it in the fridge for up to 5 days. It holds its texture well and doesn’t dry out if it’s covered properly.
You can also freeze individual slices for up to 2 months. Wrap each slice tightly in plastic wrap, then in foil, and thaw overnight in the fridge when you’re ready to eat them. It comes back to nearly the same texture, which makes this a great recipe to batch bake when you have a big occasion coming up.
Quick Tips
- Don’t skip bringing your cream cheese, eggs, and sour cream to room temperature. Cold ingredients create lumps that are nearly impossible to fully smooth out.
- Always scrape down the sides and bottom of the bowl between each addition.
- If your crust browns too quickly, tent a piece of foil loosely over the top for the last 20 minutes of baking.
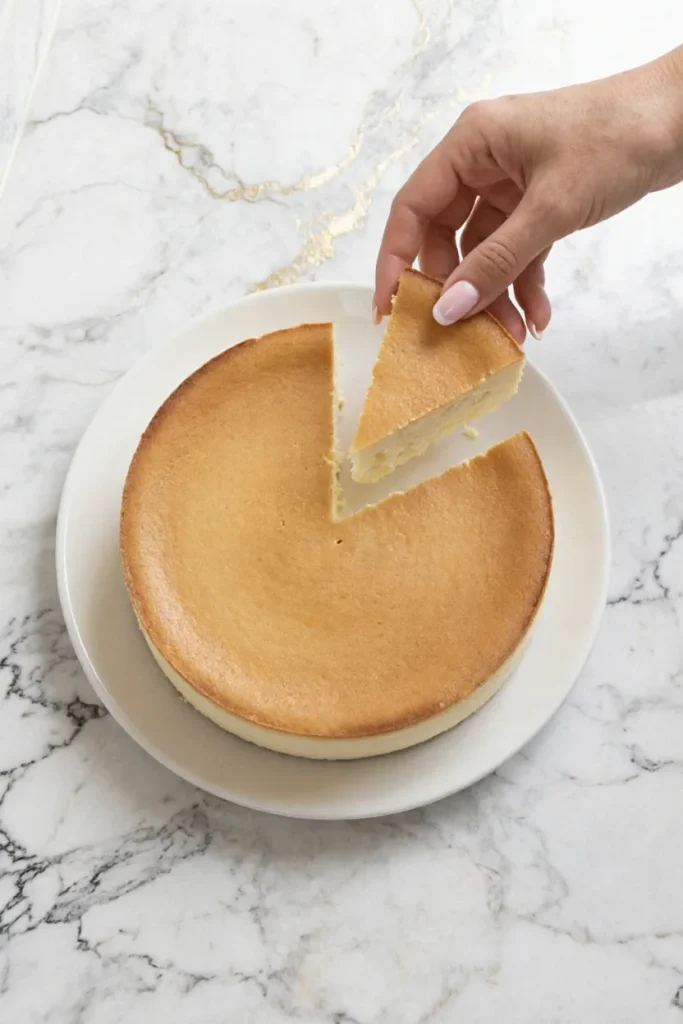
- For very clean slices, dip a sharp knife in hot water and wipe it dry between each cut.
- The slight jiggle in the center is correct. Don’t bake until the center looks fully set or it’ll be overbaked by the time it cools.
- A springform pan with sides at least 3 inches tall is worth using here to accommodate the full volume of filling.
- If you notice small cracks forming, don’t panic. A topping of sour cream thinned with a little sugar can cover them completely.
Recipe FAQs
Can I make this cheesecake without a water bath?
You can, but you’re more likely to end up with cracks and a slightly rubbery texture around the edges. If you really want to skip it, place a pan of hot water on the rack below the cheesecake instead. It won’t have the same effect as a proper water bath, but it does help maintain some moisture in the oven.
Why did my cheesecake crack on top?
The most common reasons are overmixing, baking at too high a temperature, or cooling it too quickly. This recipe addresses all three, but if it still happens, it’s usually a sign the oven ran hot. Oven thermometers are a genuinely useful tool for baking if yours tends to run warm.
Can I substitute the sour cream?
Full-fat Greek yogurt works as a 1-to-1 substitute if that’s what you have. The flavor will be slightly tangier and the texture just a little less dense, but it’s a solid swap. Don’t use low-fat dairy in any form here since the fat content is what gives the filling its structure and richness.
How do I know when the tall and creamy New York cheesecake is done baking?
The edges should look set and slightly puffed, and the center should still wobble like Jell-O when you gently shake the pan. An instant-read thermometer inserted in the center reading around 150°F is another reliable indicator.
Can I freeze the whole cheesecake?
Yes, the whole cheesecake freezes beautifully. Once it’s fully chilled, remove the springform ring, wrap the whole thing tightly in a double layer of plastic wrap followed by foil, and freeze for up to 2 months. Thaw it overnight in the fridge still wrapped, then unwrap and serve.
Print
Tall and Creamy New York Cheesecake
- Total Time: 1 hour 40 minutes (plus chilling time 6–8 hours)
- Yield: 12 servings 1x
- Diet: Vegetarian
Ingredients
For the Crust
- 1 ½ cups graham cracker crumbs
- 3 tablespoons granulated sugar
- 8 tablespoons unsalted butter, melted
For the Cheesecake Filling
- 32 ounces full-fat cream cheese (4 packages, 8 oz each), softened to room temperature
- 1 ½ cups granulated sugar
- 2 tablespoon cornstarch
- 2 vanilla beans, split and scraped (or 1 ½ teaspoon pure vanilla extract)
- 1 teaspoon fresh lemon juice
- 5 large eggs, room temperature
- 2 cups full-fat sour cream, room temperature
- 8 tablespoon unsalted butter, melted and slightly cooled
Instructions
- Preheat your oven to 325°F (163°C). Wrap the outside of a 9-inch springform pan tightly with two layers of heavy-duty aluminum foil to prevent water from seeping in during the water bath.
- Combine the graham cracker crumbs, 3 tablespoons sugar, and melted butter in a bowl. Stir until the mixture resembles wet sand.
- Press the crust mixture firmly and evenly into the bottom of the prepared springform pan. Use the flat bottom of a measuring cup to pack it tightly. Bake for 10 minutes, then set aside to cool.
- Beat the room-temperature cream cheese in a stand mixer fitted with the paddle attachment on medium speed for about 3 minutes, until completely smooth and no lumps remain.
- Add the sugar and cornstarch to the cream cheese. Mix on medium-low for 2 minutes, scraping down the sides of the bowl halfway through.
- Add the scraped vanilla bean seeds (or vanilla extract) and fresh lemon juice. Mix briefly to combine.
- Add the eggs one at a time on low speed, mixing just until each egg disappears into the batter. Don’t overmix at this stage or you’ll incorporate too much air.
- Pour in the melted butter and sour cream. Fold on the lowest speed setting for about 30 seconds, just until the batter is smooth and uniform.
- Pour the filling over the cooled crust. Gently tap the pan on the counter a few times to release any air bubbles.
- Place the foil-wrapped springform pan into a large roasting pan. Pour hot water into the roasting pan until it reaches about 1 inch up the sides of the springform pan.
- Bake at 325°F for 75 to 85 minutes. The cheesecake is done when the edges are set and the center still has a slight wobble, about a 2-inch jiggle in the middle.
- Turn the oven off, crack the door open slightly, and let the cheesecake sit inside for 1 hour. This gradual cooling is what prevents cracks.
- Remove from the water bath, run a thin knife around the edges of the pan, and let the cheesecake cool completely on a wire rack.
- Refrigerate for at least 6 hours, but overnight is best before slicing and serving.
Notes
- Don’t skip bringing your cream cheese, eggs, and sour cream to room temperature. Cold ingredients create lumps that are nearly impossible to fully smooth out.
- Always scrape down the sides and bottom of the bowl between each addition.
- If your crust browns too quickly, tent a piece of foil loosely over the top for the last 20 minutes of baking.
- For very clean slices, dip a sharp knife in hot water and wipe it dry between each cut.
- The slight jiggle in the center is correct. Don’t bake until the center looks fully set or it’ll be overbaked by the time it cools.
- A springform pan with sides at least 3 inches tall is worth using here to accommodate the full volume of filling.
- If you notice small cracks forming, don’t panic. A topping of sour cream thinned with a little sugar can cover them completely.
- Prep Time: 25 minutes
- Cook Time: 1 hour 15 minutes
- Category: Dessert
- Method: Baking (water bath)
- Cuisine: American
Nutrition
- Serving Size: 1 slice
- Calories: 450 kcal
- Sugar: 28 g
- Sodium: 320 mg
- Fat: 32 g
- Saturated Fat: 32 g
- Unsaturated Fat: 11 g
- Trans Fat: 0.5 g
- Carbohydrates: 35 g
- Fiber: 1 g
- Protein: 7 g
- Cholesterol: 140 mg