
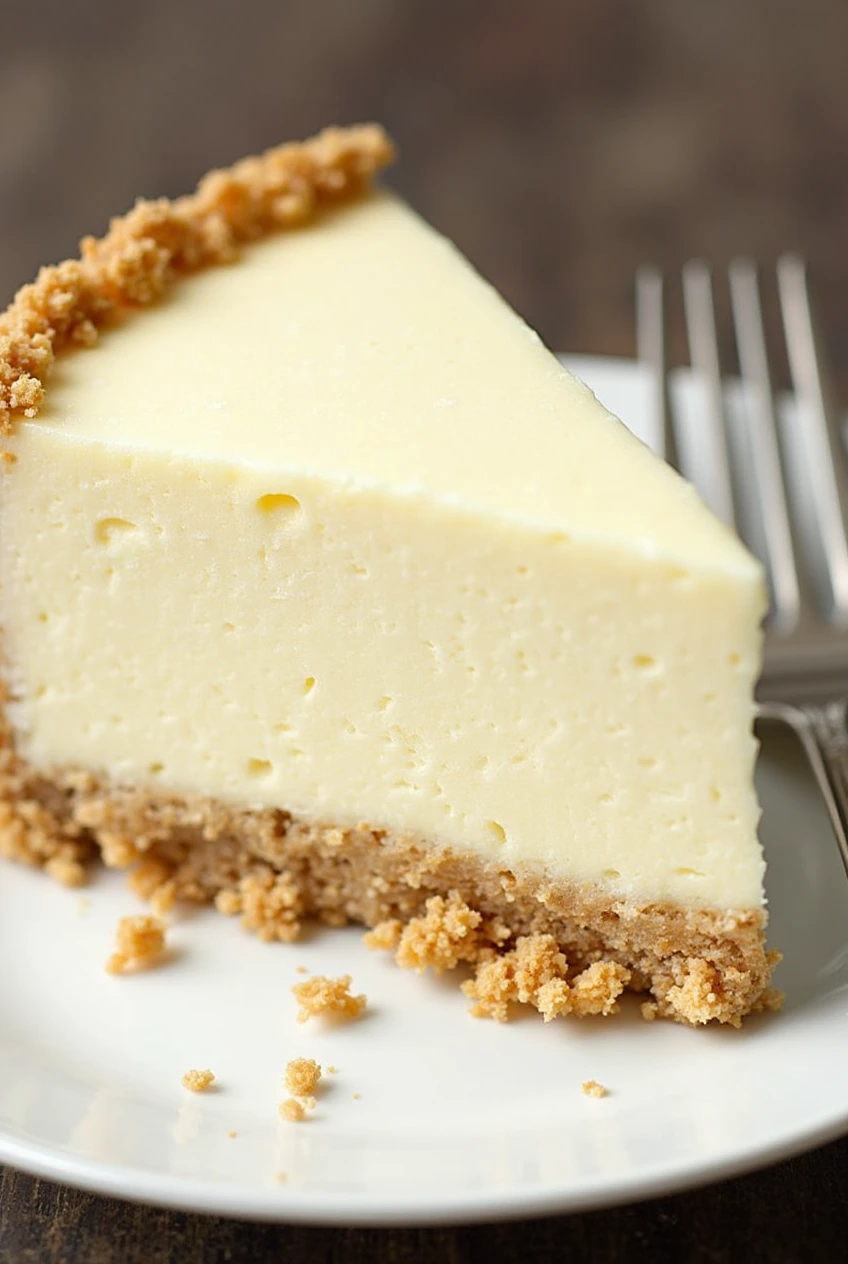
My Vanilla Bean Cheesecake recipe is the ultimate indulgence for any dessert lover. I’ve perfected this recipe over years of testing, balancing the delicate flavor of real vanilla beans with a silky-smooth cream cheese filling and a buttery graham cracker crust. The Vanilla Bean Cheesecake has become my signature dessert for special occasions, and I’m excited to share my secrets with you.
Why You’ll Love This Vanilla Bean Cheesecake
This isn’t just any cheesecake. The combination of real vanilla beans and white chocolate creates a depth of flavor that’s impossible to achieve with extract alone. I love how the tiny black specks of vanilla bean add visual appeal while infusing the entire dessert with authentic vanilla flavor. The texture is perfectly creamy without being too dense, and the graham cracker crust provides just the right contrast. When I serve this Vanilla Bean Cheesecake at gatherings, it never fails to impress.
Recipe Ingredients
Crust
- 1 1/4 cups graham cracker crumbs
- 3 tablespoons granulated sugar
- 6 tablespoons unsalted butter, melted
- 1/8 teaspoon salt
Filling
- 4 ounces white chocolate, finely chopped
- 3/4 cup heavy cream
- 4 8-ounce packages full fat cream cheese, at room temperature
- 2/3 cup granulated sugar
- 3 large eggs
- 2 vanilla beans, sliced and scraped
- 2 teaspoons vanilla extract
- 1/2 teaspoon salt
Topping
- 3/4 cup heavy cream
- 1/4 cup powdered sugar
- 1/2 teaspoon vanilla extract
How To Make Vanilla Bean Cheesecake
- Preheat the oven to 350 degrees.
- Wrap a 9-inch springform pan with three layers of aluminum foil. Spray the pan with cooking spray and set aside.
- Combine the graham cracker crumbs, sugar, butter, and salt in a mixing bowl and stir until the crumbs are evenly moistened. Press the mixture into the bottom and 1 inch up the sides of the prepared pan.
- Set pan aside while preparing the filling.
- Combine the white chocolate and heavy cream in a small microwave-safe bowl. Heat the mixture in 15-second intervals with microwave set to 50% power. Stir after each interval until chocolate is melted and mixture is smooth.
- Set aside to cool slightly while proceeding with the filling.
- Place the cream cheese in a large mixing bowl and beat with an electric mixer on medium speed for 5 minutes, scraping down the sides of the bowl as needed. Add the sugar and beat well.
- Add the eggs one at a time, beating well after each addition, then beat in the scraped vanilla beans, vanilla extract, and salt.
- Slowly beat in the white chocolate-cream mixture until fully combined. Use a rubber spatula to stir up from the bottom of the bowl several times, ensuring everything is properly mixed.
- Pour the filling into the crust and smooth the top.
- Pour a half-inch of water into a roasting pan (or any large rimmed baking pan) and carefully place the pan in the oven.
- Set the cheesecake in the middle of the pan. Bake 1 hour and 45 minutes to 2 hours, until just the center of the cheesecake jiggles when you tap the pan.
- Remove cheesecake from the oven and cool to room temperature. Cover loosely with plastic wrap and refrigerate overnight.
- When ready to serve, make the topping by beating the heavy cream until it begins to thicken. Add the powdered sugar and beat to stiff peaks, then mix in the vanilla.
- Spread or pipe the topping over the cheesecake. Slice and serve.
Tips & Notes
I’ve learned that patience is key when making this Vanilla Bean Cheesecake. Don’t rush the process of bringing the cream cheese to room temperature – cold cream cheese will leave lumps in your filling. I always make sure to scrape down the sides of the bowl frequently while mixing to ensure a perfectly smooth texture.
The water bath is non-negotiable in my kitchen. It prevents cracking by providing gentle, even heat. I’ve found that triple-wrapping the springform pan with foil prevents any water from seeping in and creating a soggy crust.
Recipe Variations & Possible Substitutions
When I’m feeling adventurous, I sometimes add a tablespoon of bourbon to the filling for a more complex flavor profile. If vanilla beans are hard to find or too expensive, you can substitute with an additional tablespoon of high-quality vanilla extract, though you’ll miss the beautiful flecks of vanilla bean throughout the Vanilla Bean Cheesecake.
For the crust, I occasionally use gingersnap cookies instead of graham crackers when I want a spicier contrast to the creamy filling. Chocolate lovers in my family enjoy when I drizzle the finished cheesecake with melted dark chocolate.
Serving and Pairing Suggestions
I love serving this Vanilla Bean Cheesecake with fresh raspberries, as their tartness perfectly balances the richness of the dessert. A small drizzle of warm raspberry sauce can elevate this cheesecake to restaurant-quality status. For dinner parties, I pair slices with dessert wine like Moscato d’Asti or a good quality Port.
Storage and Reheating Tips
My Vanilla Bean Cheesecake keeps beautifully in the refrigerator for up to 5 days when stored in an airtight container. I recommend adding the whipped cream topping only when you’re ready to serve. For longer storage, I freeze individual slices wrapped tightly in plastic wrap and then aluminum foil for up to 2 months. I thaw frozen slices overnight in the refrigerator for the best texture.
Recipe FAQs
Can I make this Vanilla Bean Cheesecake without a water bath? While you can, I don’t recommend it. In my experience, the water bath ensures even cooking and prevents the dreaded crack across the top of your cheesecake.
How do I know when my cheesecake is done? I’ve found the perfect doneness is when the edges are set but the center still has a slight jiggle – about a 2-3 inch circle in the middle should wobble slightly when you gently shake the pan.
Can I use vanilla bean paste instead of whole vanilla beans? Yes! I sometimes substitute 1 tablespoon of vanilla bean paste for the 2 whole vanilla beans when I’m in a hurry.
Troubleshooting Tips
If your cheesecake develops cracks despite the water bath, don’t worry! I’ve been there. The whipped cream topping will cover any imperfections. If your cheesecake seems too soft after cooling, it likely needs more time in the refrigerator – I always ensure mine chills for at least 8 hours, but preferably overnight for that perfect Vanilla Bean Cheesecake texture.
Print
Vanilla Bean Cheesecake
- Total Time: 1 hour and 50 minutes
- Yield: 12 servings 1x
- Diet: Vegetarian
Ingredients
Crust
- 1 1/4 cups graham cracker crumbs
- 3 tablespoons granulated sugar
- 6 tablespoons unsalted butter, melted
- 1/8 teaspoon salt
Filling
- 4 ounces white chocolate, finely chopped
- 3/4 cup heavy cream
- 4 8-ounce packages full fat cream cheese, at room temperature
- 2/3 cup granulated sugar
- 3 large eggs
- 2 vanilla beans, sliced and scraped
- 2 teaspoons vanilla extract
- 1/2 teaspoon salt
Topping
- 3/4 cup heavy cream
- 1/4 cup powdered sugar
- 1/2 teaspoon vanilla extract
Instructions
- Preheat the oven to 350 degrees.
- Wrap a 9-inch springform pan with three layers of aluminum foil. Spray the pan with cooking spray and set aside.
- Combine the graham cracker crumbs, sugar, butter, and salt in a mixing bowl and stir until the crumbs are evenly moistened. Press the mixture into the bottom and 1 inch up the sides of the prepared pan.
- Set pan aside while preparing the filling.
- Combine the white chocolate and heavy cream in a small microwave-safe bowl. Heat the mixture in 15-second intervals with microwave set to 50% power. Stir after each interval until chocolate is melted and mixture is smooth.
- Set aside to cool slightly while proceeding with the filling.
- Place the cream cheese in a large mixing bowl and beat with an electric mixer on medium speed for 5 minutes, scraping down the sides of the bowl as needed. Add the sugar and beat well.
- Add the eggs one at a time, beating well after each addition, then beat in the scraped vanilla beans, vanilla extract, and salt.
- Slowly beat in the white chocolate-cream mixture until fully combined. Use a rubber spatula to stir up from the bottom of the bowl several times, ensuring everything is properly mixed.
- Pour the filling into the crust and smooth the top.
- Pour a half-inch of water into a roasting pan (or any large rimmed baking pan) and carefully place the pan in the oven.
- Set the cheesecake in the middle of the pan. Bake 1 hour and 45 minutes to 2 hours, until just the center of the cheesecake jiggles when you tap the pan.
- Remove cheesecake from the oven and cool to room temperature. Cover loosely with plastic wrap and refrigerate overnight.
- When ready to serve, make the topping by beating the heavy cream until it begins to thicken. Add the powdered sugar and beat to stiff peaks, then mix in the vanilla.
- Spread or pipe the topping over the cheesecake. Slice and serve.
Notes
- I’ve learned that patience is key when making this Vanilla Bean Cheesecake. Don’t rush the process of bringing the cream cheese to room temperature – cold cream cheese will leave lumps in your filling. I always make sure to scrape down the sides of the bowl frequently while mixing to ensure a perfectly smooth texture.
- The water bath is non-negotiable in my kitchen. It prevents cracking by providing gentle, even heat. I’ve found that triple-wrapping the springform pan with foil prevents any water from seeping in and creating a soggy crust.
- Prep Time: 30 minutes
- Cook Time: 1 hour and 20 minutes
- Category: Dessert
- Method: Baking
- Cuisine: American
Nutrition
- Serving Size: 1 slice
- Calories: 296 kcal
- Sugar: 26g
- Sodium: 189mg
- Fat: 16g
- Saturated Fat: 9g
- Carbohydrates: 33g
- Fiber: 0g
- Protein: 7g
- Cholesterol: 90mg